Mazda 3 Service Manual: Vacuum Pump Removal/Installation [Skyactiv G 2.0]
1. Remove the plug hole plate..
2. Remove the battery and battery tray..
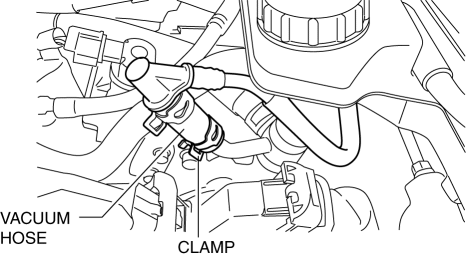
3. Pinch open the clamp using pliers and disconnect the vacuum hose from the vacuum pump.
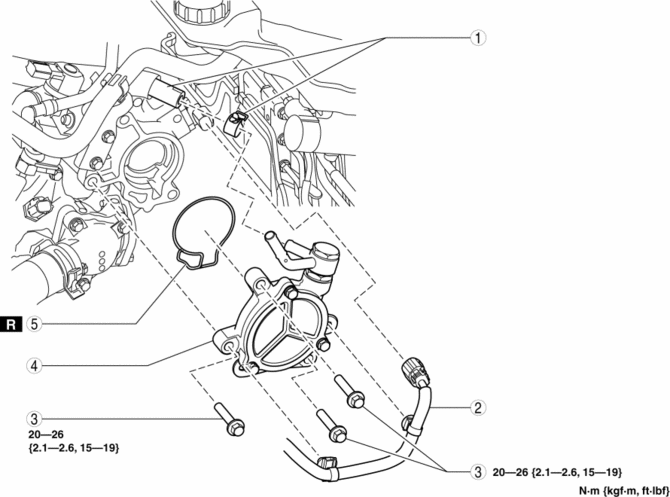
4. Remove in the order shown in the table.
5. Install in the reverse order of removal.
|
1 |
Vacuum hose, clamp |
|
2 |
Exhaust CMP sensor connector, wiring harness |
|
3 |
Bolt |
|
4 |
Vacuum pump (See Vacuum Pump Removal Note.) (See Vacuum Pump and O-ring Installation Note.) |
|
5 |
O-ring (See Vacuum Pump and O-ring Installation Note.) |
Vacuum Pump Removal Note
1. When removing the vacuum pump, place a rag under the installation surface of the vacuum pump so that engine oil does not get on other parts.
2. Remove the vacuum pump.
Vacuum Pump and O-ring Installation Note
1. Rotate the vacuum pump by hand to drain the remainder of the engine oil in the vacuum pump.
2. Degrease the O-ring installation groove and installation surface.
3. Install the new O-ring to the vacuum pump.
4. Install the vacuum pump.
 Vacuum Pump Inspection [Skyactiv G 2.0]
1. Pinch open the clamp using pliers and disconnect the vacuum hose from the
vacuum pump.
2. Install the vacuum gauge as shown in the figure, then check the vacuum.
3. Warn up the engin ...

Other materials:
Liftgate Removal/Installation
WARNING:
When removing the stay damper, serious injury may occur if the stay damper
is removed without supporting the liftgate. Always perform the procedure with
at least another person.
1. Disconnect the negative battery cable..
2. Remove the following parts:
a. Rear scuff p ...
Transaxle Oil Replacement [A26 M R]
1. Park the vehicle on level ground.
2. Remove the aerodynamic under cover No.2..
3. Remove the drain plug and gasket.
4. Drain the oil into a suitable container.
5. Install a new gasket and the drain plug.
Tightening torque
28—51 N·m {2.9—5.2 kgf·m, 21—37 ft·lbf}
6. Remo ...
Operating Tips for CD Player
Condensation phenomenon
Immediately after turning on the heater
when the vehicle is cold, the CD or
optical components (prism and lens) in
the CD player may become clouded with
condensation. At this time, the CD will
eject immediately when placed in the unit.
A clouded CD can be corrected s ...
