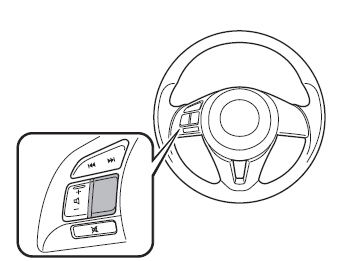
Mazda 3 Owners Manual: Audio Control Switch Operation
Without Bluetooth ® Hands-Free
With Bluetooth ® Hands-Free
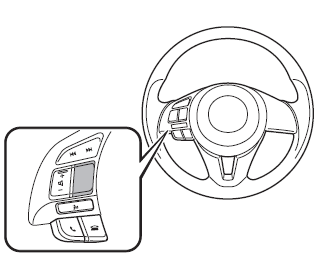
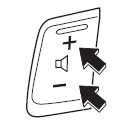
Adjusting the Volume
To increase the volume, press up the volume switch ( +).
To decrease the volume, press down the volume switch ( -).
Seek Switch
AM/FM radio
Press the seek switch (  ,
,
). The radio
switches to the next/previous stored station
in the order that it was stored.
Press and hold the seek switch ( ,
,
 ) to
) to
seek all usable stations at a higher or lower
frequency whether programmed or not.
Radio stations which have been previously
stored in the auto memory tuning (Type
A)/favorite radio (Type B) can be called
up by pressing the seek switch (  ,
,
)
while any radio station stored in the auto
memory tuning (Type A)/favorite radio
(Type B) is being received. Radio stations
can be called up in the order they were
stored with each press of the switch
( , ).
, ).
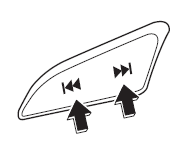
USB Audio/Bluetooth ® Audio /CD
Press the seek switch ( ) to
) to
skip forward
to the beginning of the next track.
Press the seek switch ( ) within a
few
seconds after playback begins to track
down to the beginning of the previous
track.
Press the seek switch ( ) after a
few
seconds have elapsed to start playback
from the beginning of the current track.
Press and hold the seek switch ( ,
,
 ) to
) to
continuously switch the tracks up or down.
Pandora ® /Aha™/Stitcher™ Radio (Type B)
Press the seek switch ( ) to
) to
skip forward
to the beginning of the next track.
Press and hold the seek switch ( )
)
to
evaluate the playback of the current song
as “Like”.
Press and hold the seek switch ( )
)
to
evaluate the playback of the current song
as “Dislike”.
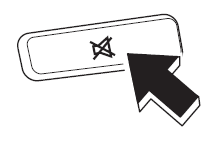
Mute Switch *
Press the mute switch ( ) once
to mute
audio, press it again to resume audio
output.
NOTE If the ignition is switched off with the audio muted, the mute will be canceled.
Therefore, when the engine is restarted,
the audio is not muted. To mute the audio
again, press the mute switch ( ).
).
 Applications
NOTE
Depending on the grade and specification,
the screen display may differ.
Select the icon on the home screen to
display the Applications screen. The
following information can be verified.
...
 AUX/USB/iPod mode
Audio can be heard from the vehicle's
speakers by connecting a commerciallyavailable
portable audio unit to the
auxiliary jack.
A commercially-available, non-impedance
(3.5 ) stereo mini plug c ...
Other materials:
Joint Shaft Assembly [Skyactiv G 2.0]
1. Assemble in the order indicated in the table.
1
Dust cover
.
2
Bearing
.
3
Snap ring
4
Dust seal
.
5
Joint shaft
Dust Cover Assembly N ...
Rear Door Hinge Removal/Installation
1. Disconnect the negative battery cable..
2. Remove the following parts:
a. Rear door.
b. Front scuff plate.
c. Rear scuff plate.
d. B-pillar lower trim.
3. Remove in the order indicated in the table.
1
Bolt
2
Nut
...
Front Door Latch And Lock Actuator Inspection
1. The following actuators and switches are integrated with the front door latch
and lock actuator. Inspect the front door latch and lock actuator according to each
inspection procedure for the following items.
Front door lock actuator.
Door lock-link switch.
Door latch s ...
