Mazda 3 Service Manual: Center Roof Antenna Removal/Installation
4SD
1. Disconnect the negative battery cable..
2. Remove the rain sensor cover. (Vehicles with auto light/wiper system).
3. Disconnect the rain sensor connector. (Vehicles with auto light/wiper system)
4. Partially peel back the seaming welts.
5. Remove the following parts:
a. Sunroof seaming welt (vehicles with sunroof)
b. A-pillar trim.
c. Front scuff plate.
d. Rear scuff plate.
e. B-pillar lower trim.
f. Upper anchor of the front seat belt.
g. B-pillar upper trim.
h. Rear seat cushion.
i. Tire house trim.
j. C-pillar trim.
k. Map light.
l. Sunvisor.
m. Assist handle.
n. Headliner.
6. Disconnect the connector.
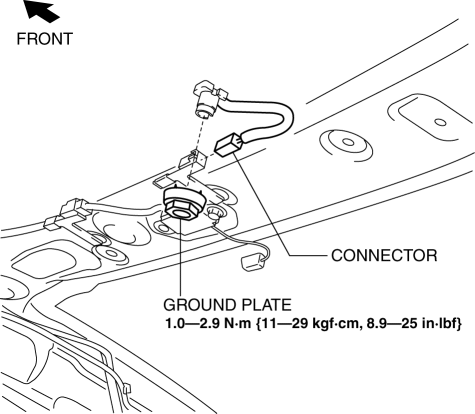
7. Remove the ground plate.
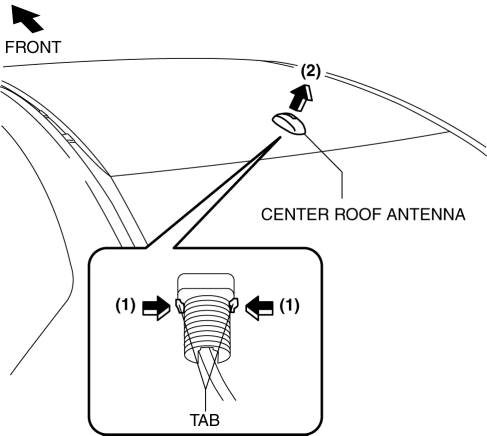
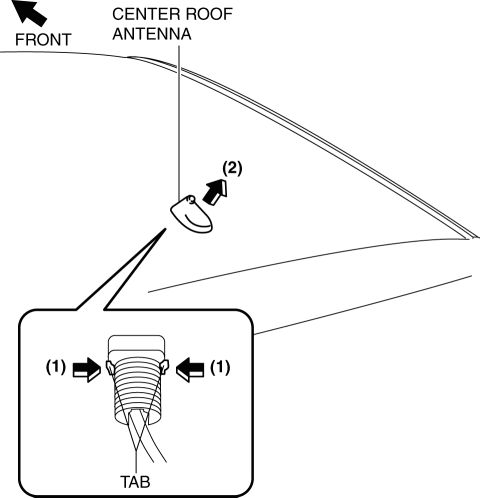
8. Remove the center roof antenna in the direction of the arrow (2) shown in the figure while pressing the center roof antenna tabs in the direction of the arrow (1).
9. Install in the reverse order of removal.
10. After installation, verify that the rubber of the center roof antenna is installed to the roof panel with no space between them.
5HB
1. Disconnect the negative battery cable..
2. Remove the rain sensor cover. (Vehicles with auto light/wiper system).
3. Disconnect the rain sensor connector. (Vehicles with auto light/wiper system)
4. Partially peel back the seaming welts.
5. Remove the following parts:
a. Sunroof seaming welt (vehicles with sunroof)
b. A-pillar trim.
c. Front scuff plate.
d. Rear scuff plate.
e. B-pillar lower trim.
f. Upper anchor of the front seat belt.
g. B-pillar upper trim.
h. Rear seat cushion.
i. Tire house trim.
j. Trunk side upper trim.
k. C-pillar trim.
l. Map light.
m. Sunvisor.
n. Assist handle.
o. Headliner.
6. Disconnect the connector.
AM/FM type
AM/FM/SIRIUS type
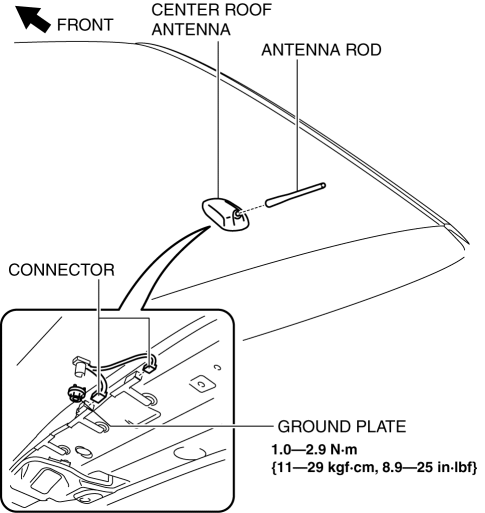
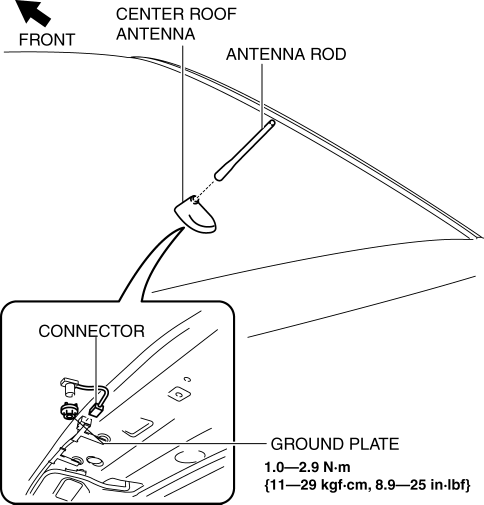
7. Remove the ground plate.
8. Remove the antenna rod.
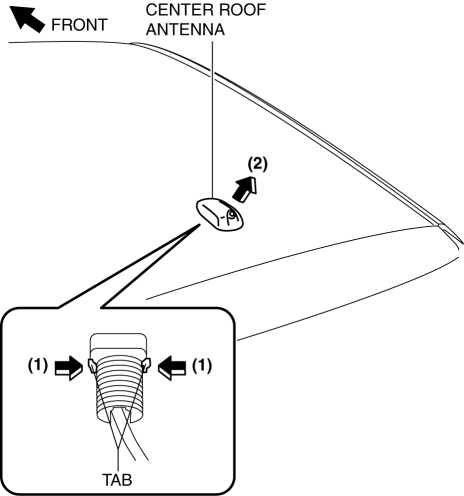
9. Remove the center roof antenna in the direction of the arrow (2) shown in the figure while pressing the center roof antenna tabs in the direction of the arrow (1).
AM/FM type
AM/FM/SIRIUS type
10. Install in the reverse order of removal.
11. After installation, verify that the rubber of the center roof antenna is installed to the roof panel with no space between them.
 Center Roof Antenna Inspection
4SD
1. Disconnect the negative battery cable..
2. Remove the rain sensor cover. (Vehicles with auto light/wiper system).
3. Disconnect the rain sensor connector. (Vehicles with auto light/wiper s ...
 Coil Antenna Removal/Installation
1. Disconnect the negative battery cable..
2. Remove the column cover..
3. Remove the key cylinder..
4. Disconnect the coil antenna connector.
5. Remove the screw.
6. Detach the coil ante ...
Other materials:
Outside the United States/
Canada
Government regulations in the United States/Canada require that automobiles
meet specific
emission regulations and safety standards. Therefore, vehicles built for use in
the United
States/Canada may differ from those sold in other countries.
The differences may make it difficult or even imp ...
Rear Window Glass Installation
WARNING:
Using a utility knife with bare hands can cause injury. Always wear gloves
when using a utility knife.
CAUTION:
Proper installation of the glass may be difficult if sealant is cracked or
the glass is pushed out by air pressure when a door is opened/closed with al ...
Rear Speaker Removal/Installation
4SD
1. Disconnect the negative battery cable..
2. Remove the following parts:
a. Rear seat cushion.
b. Rear scuff plate.
c. Tire house trim.
d. C-pillar trim.
e. Rear package trim.
3. Remove the screw.
4. Disconnect the connector.
5. Remove the rear speaker.
6. Install in th ...
