Mazda 3 Service Manual: Front Bumper Removal/Installation
1. Disconnect the negative battery cable..
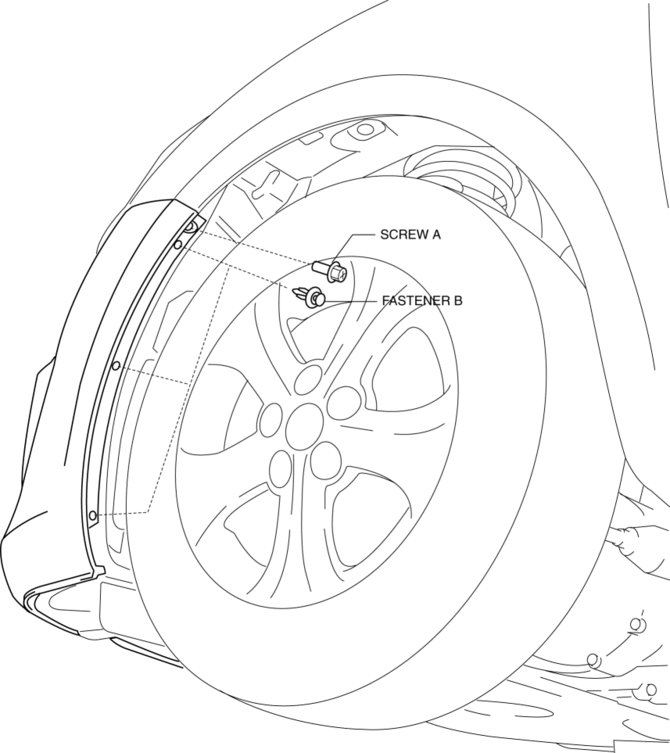
2. Remove the screw A and fasteners B.
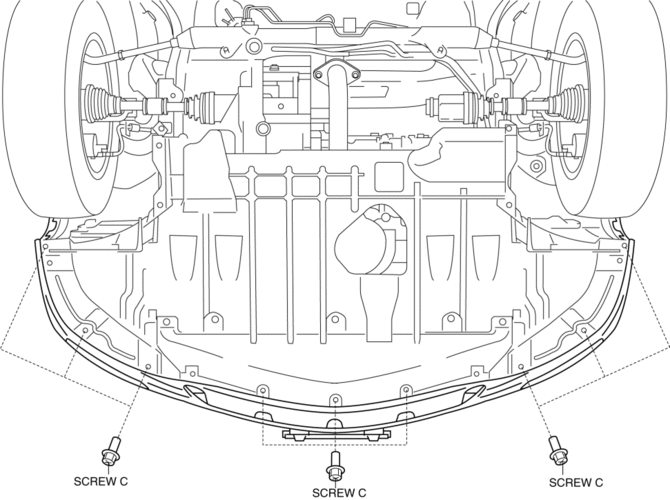
3. Remove the screws C.
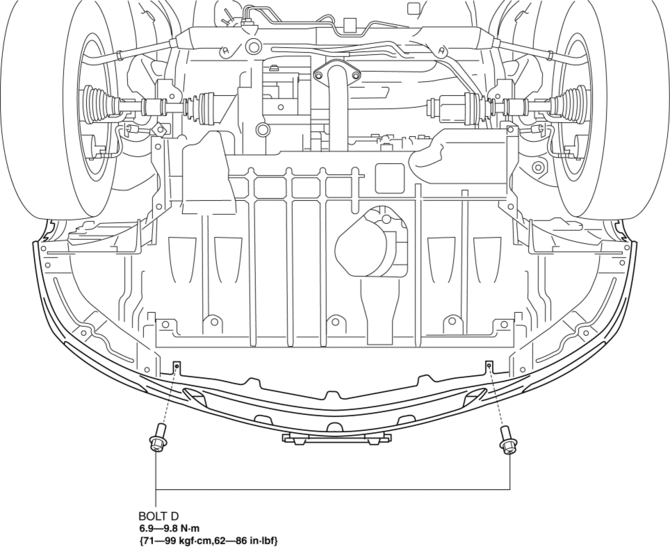
4. Remove the bolts D.
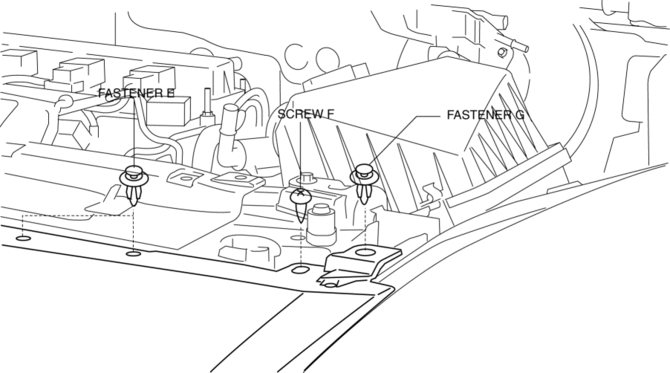
5. Remove the fasteners E, screw F and fastener G.
6. Pull the front bumper in the direction of the arrow in the order of (1), (2) and (3), then remove the front bumper..
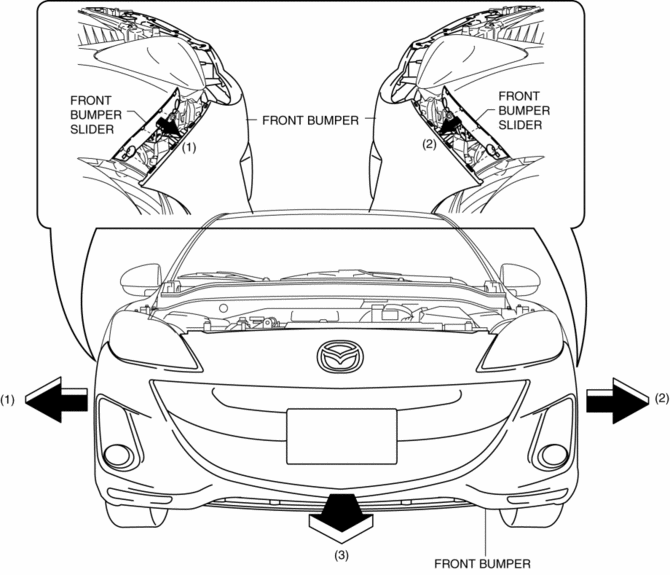
CAUTION:
-
The front bumper and front bumper slider are engaged firmly. If they are disengaged forcibly the bumper could fall and be damaged. Perform the servicing carefully when disengaging the front bumper from the front bumper slider.
-
When disengaging the front bumper from the front bumper slider, the front bumper could fall and be damaged. Support the front bumper so that it does not fall.
7. Disconnect the front fog light connector. (Vehicles with front fog lights)
8. Install in the reverse order of removal.
9. Adjust the front fog light aiming for vehicles with front fog lights..
Front Bumper Installation Note
1. Spread the front bumper ends apart.
CAUTION:
-
The front bumper and front bumper slider are engaged firmly. If they are disengaged forcibly the bumper could fall and be damaged. Perform the servicing carefully when disengaging the front bumper from the front bumper slider.
-
When disengaging the front bumper from the front bumper slider, the front bumper could fall and be damaged. Support the front bumper so that it does not fall.
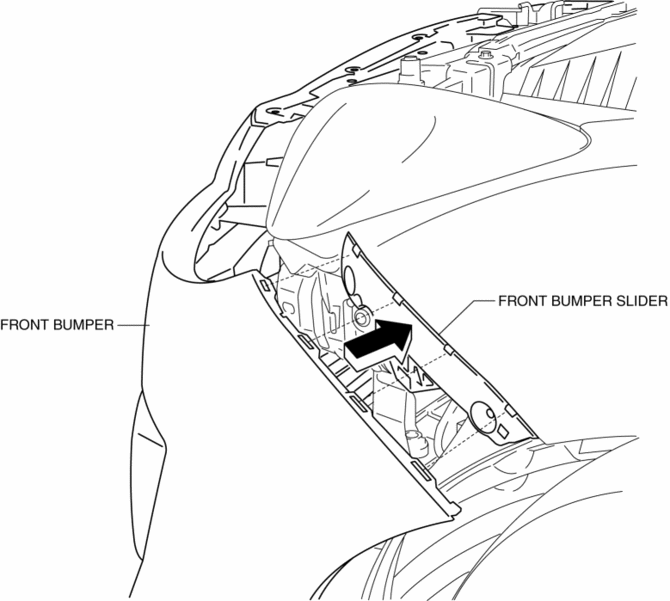
2. Attach the front bumper to the body.
3. Press the front bumper connecting area in the direction of the arrow shown in the figure to engage with the front bumper slider.
Front Bumper of New Parts Installation Note
1. Paint the front bumper face.
2. Cut the rib position of A, B, and C from the base with using a nipper.
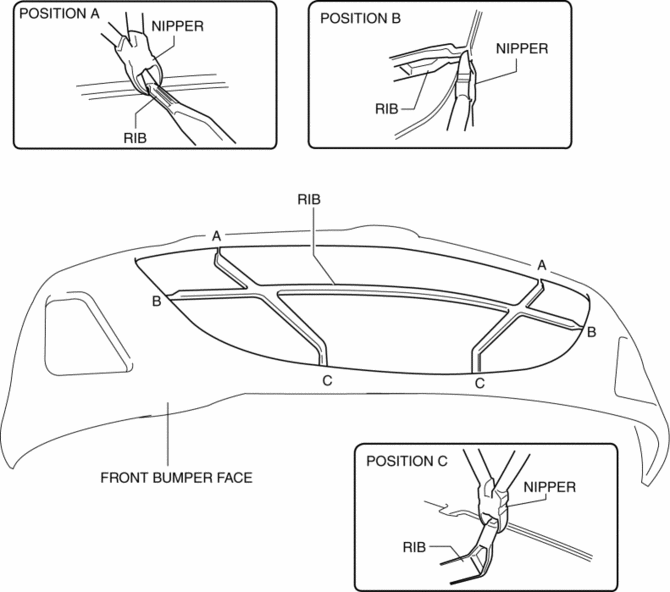
 Front Bumper Reinforcement Removal/Installation
1. Disconnect the negative battery cable..
2. Remove the following parts:
a. Front bumper.
b. Seal plate.
3. Remove the bolts A.
4. Remove the bolts B.
5. Remove the front bumper r ...
 Front Fender Panel Removal/Installation
1. Disconnect the negative battery cable..
2. Remove the following parts:
a. Front bumper.
b. Front combination light.
c. Front fender molding.
d. Side step molding.
3. Remove fasteners an ...
Other materials:
Electric Variable Valve Timing Actuator Inspection [Skyactiv G 2.0]
WARNING:
A hot engine can cause severe burns. Turn off the engine and wait until it
is cool before servicing.
CAUTION:
Do not disassemble the electric variable valve timing actuator because it
is a precision unit.
1. Remove the battery cover..
2. Disconnect the ne ...
Door Sash Film Installation
1. Remove any grease or dirt from the affixing surface of the door.
2. Cut away the unused portion along the dotted lines.
3. Peel off the backing paper and attach the door sash film onto the door as
shown in the figure.
Standard clearance
a: 3.0—5.0 mm {0.12—0.19 in}
...
No.28 Fuel Filling Shut Off Concerns [Mzr 2.0, Mzr 2.5]
28
FUEL FILLING SHUT OFF CONCERNS
DESCRIPTION
Fuel does not shut off properly.
POSSIBLE CAUSE
PCM DTC is stored
Nonreturn valve malfunction
Fuel nozzle ...
