Mazda 3 Service Manual: Front Door Key Cylinder Removal/Installation
1. To access the glass installation bolt, position the front door glass so that the distance from the top of the front door glass to the upper part of the front beltline molding is approx. 80 mm {3.1 in}
.
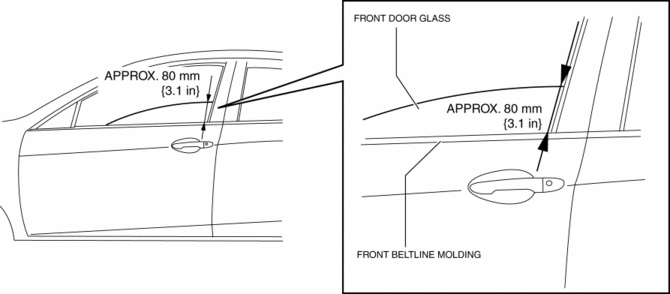
2. Disconnect the negative battery cable..
3. Remove the following parts:
a. Inner garnish.
b. Front door trim.
c. Front door speaker.
d. Front door glass.
e. Front door module panel.
4. Remove the service hole cover.
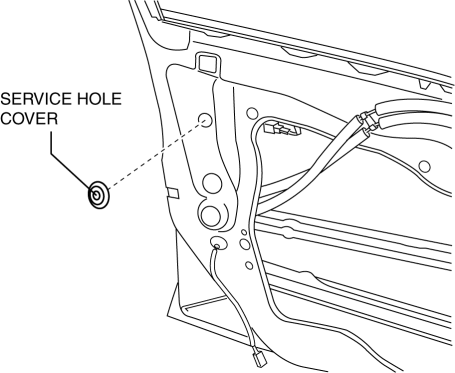
5. Remove the tab, then remove the door lock-link bracket.
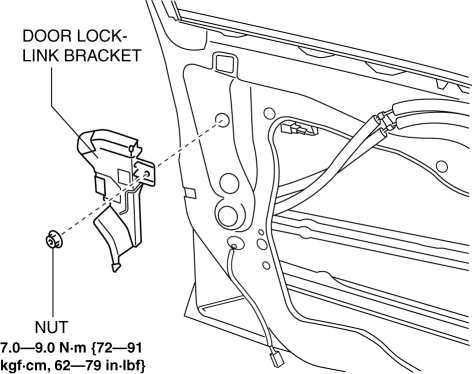
6. Remove the service hole cover.
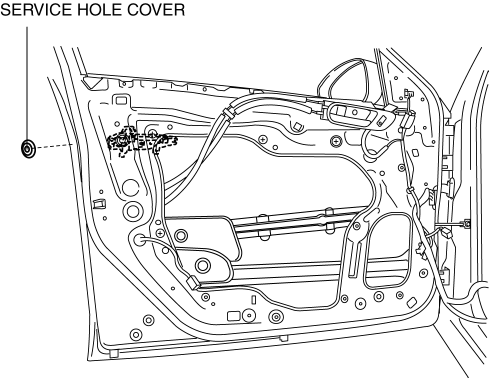
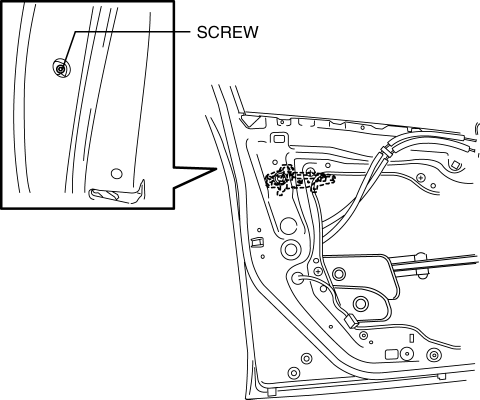
7. Remove the screw from the service hole.
NOTE:
-
The screw cannot be removed because of the stopper.
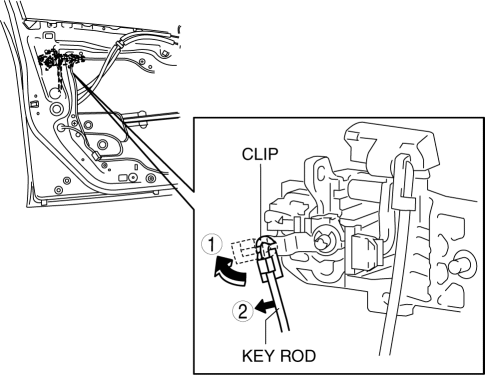
8. Lift the clip in the direction of the arrow (1), and pull out the key rod in the direction of the arrow (2).
9. Press the tab on the front outer handle bracket in the direction of the arrow.
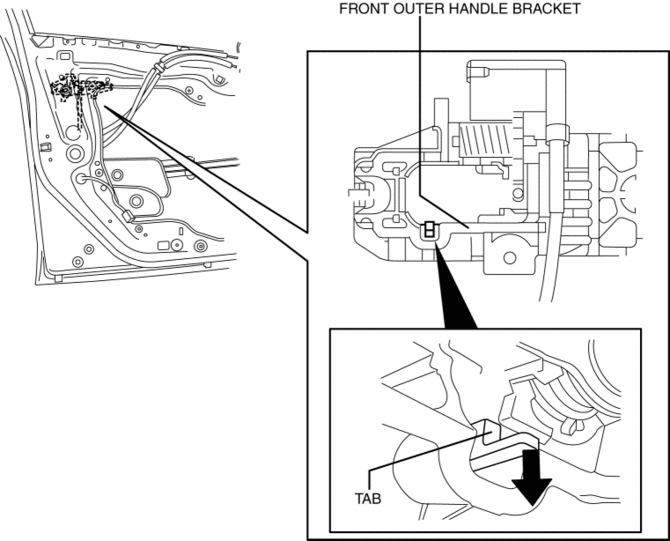
10. Maintaining the condition in Step 9, remove the front key cylinder.
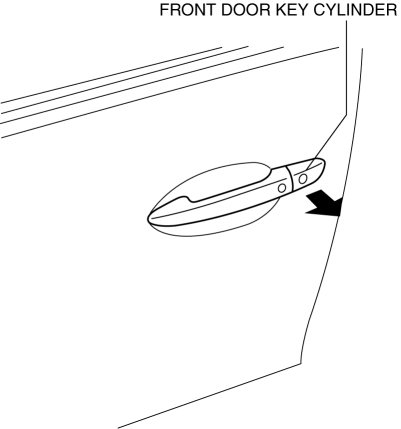
11. Using a tape-wrapped fastener remover, press up the collar cap in the direction of the arrow shown in the arrow, press aside the front door key cylinder tabs (1), and remove the collar cover from the front door key cylinder.
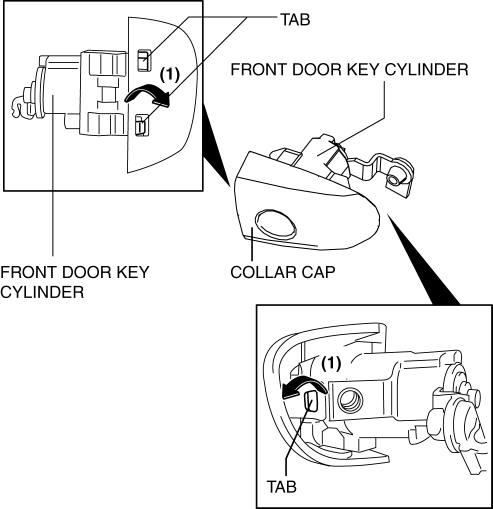
12. Install in the reverse order of removal.
 Keyless Control Module Removal/Installation
1. If the keyless control module is replaced, always perform the following procedure.
Vehicles with immobilizer system
Keyless Control Module Configuration.
Immobilize ...
 Front Door Key Cylinder Switch Inspection
1. To access the glass installation bolt, position the front door glass so that
the distance from the top of the front door glass to the upper part of the front
beltline molding is approx. 80 mm { ...
Other materials:
Power Brake Unit Removal/Installation [Mzr 2.0, Skyactiv G 2.0, Mzr 2.5]
CAUTION:
Once the brake switch clearance has automatically been adjusted, it cannot
be adjusted again. Therefore, replace the switch with a new one when replacing
the power brake unit or performing any procedure that changes the pedal stroke.
Secure the steering wheel using tap ...
Drive Belt Auto Tensioner Inspection [Mzr 2.3 Disi Turbo]
1. Remove the aerodynamic under cover No.2 and splash shield as a single unit..
2. Remove the drive belt..
3. Verify that the drive belt auto tensioner moves smoothly in the operational
direction.
Replace the drive belt auto tensioner if necessary..
4. Rotate the drive belt ...
Antenna Feeder No.2 Removal/Installation
1. Disconnect the negative battery cable..
2. Remove the rain sensor cover. (Vehicles with auto light/wiper system).
3. Disconnect the rain sensor connector. (Vehicles with auto light/wiper system)
4. Partially peel back the seaming welts.
5. Remove the following parts:
a. Sunroof seaming ...
