Mazda 3 Service Manual: Fuel Filler Lid Opener And Lever Removal/Installation
Fuel-filler Lid Opener
4SD
1. Open the fuel-filler lid.
2. Remove the following parts:
a. Trunk end trim.
b. Trunk side trim (RH).
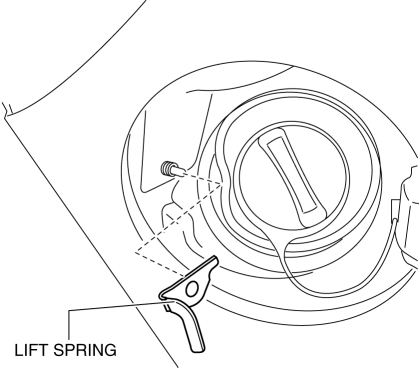
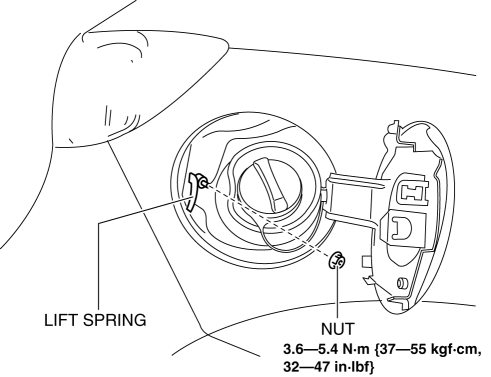
3. Remove the nut.

4. Remove the lift spring.
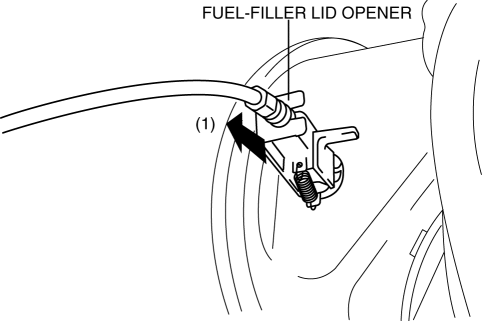
5. Pull out the fuel-filler lid opener in the direction of the arrow (1).
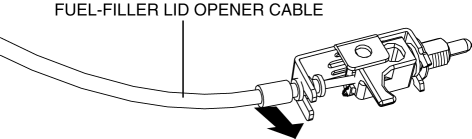
6. Disconnect the fuel-filler lid opener from the fuel-filler lid opener cable.
7. Install in the reverse order of removal.
5HB
1. Open the fuel-filler lid.
2. Remove the following parts:
a. Rear scuff plate (RH).
b. Rear seat cushion.
c. Rear seat back.
d. Tire house trim (RH).
e. Trunk side upper trim (RH).
f. Trunk end trim.
g. Trunk side trim (RH).
3. Remove the nut.
4. Remove the lift spring.
5. Pull out the fuel-filler lid opener in the direction of the arrow (1).
6. Disconnect the fuel-filler lid opener from the fuel-filler lid opener cable.
7. Install in the reverse order of removal.
Fuel-filler Lid Opener Lever
1. Remove the front scuff plate (LH)..
2. Remove the front side trim (LH)..
3. Remove the fuel-filler lid opener bezel..
4. Partially peel back the floor covering.
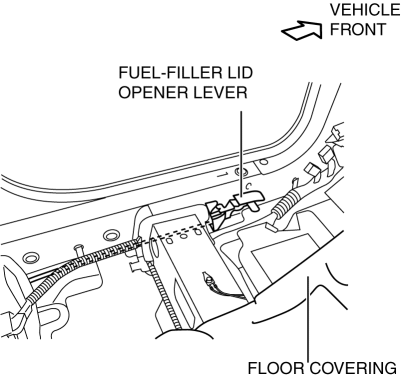
5. Remove the bolts.
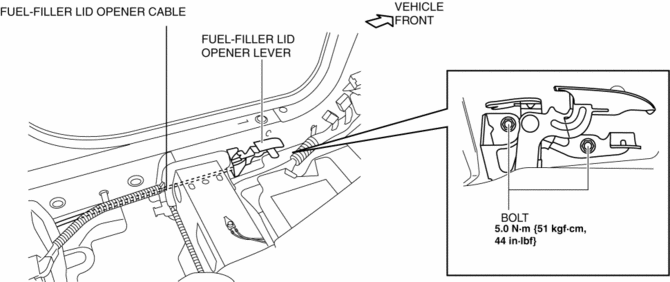
6. Disconnect the cable and fuel-filler lid opener lever.
7. Install in the reverse order of removal.
 Fuel Filler Lid Adjustment
1. Measure the gap and height difference between the fuel-filler lid and the
body.
2. Loosen the fuel-filler lid installation bolts, and adjust the fuel-filler
lid.
Standard clearance
...
 Fuel Filler Lid Opener Bezel Removal/Installation
1. Remove the screw.
2. Pull the fuel-filler lid opener bezel in the direction of the arrow (1) then
remove the tab.
3. Move the fuel-filler lid opener bezel in the direction of the arrow (2 ...
Other materials:
Neutral Switch Removal/Installation [A26 M R]
1. Disconnect the negative battery cable.
2. Disconnect the neutral switch connector.
3. Remove the aerodynamic under cover No.2..
4. Remove the neutral switch with the gasket.
5. Install a new gasket and the neutral switch to the transaxle case.
Tightening torque
29—39 N·m {3. ...
Antenna Feeder No.2 Inspection
1. Disconnect the negative battery cable..
2. Remove the following parts:
a. A-pillar trim (RH).
b. Rear seat cushion (4SD).
c. Rear scuff plate (RH).
d. Tire house trim (RH).
e. Trunk side upper trim (5HB, RH).
f. Trunk side trim (5HB, RH).
g. C–pillar trim (RH).
3. Disconnect the ...
Boost Air Temperature Sensor Inspection [Mzr 2.3 Disi Turbo]
Resistance Inspection
NOTE:
Because the boost air temperature sensor is integrated in the MAP sensor,
replacing the boost air temperature sensor includes replacement of the MAP sensor/boost
air temperature sensor.
1. Remove the battery cover..
2. Disconnect the negative batter ...
