Mazda 3 Service Manual: Headliner Removal/Installation
1. Shift to the D (ATX) or 4th gear (MTX) position. (4SD)
2. Disconnect the negative battery cable..
3. Remove the rain sensor cover. (Vehicles with auto light/wiper system).
4. Disconnect the rain sensor connector. (Vehicles with auto light/wiper system)
5. Partially peel back the seaming welts.
6. Remove the following parts:
a. Sunroof seaming welt (vehicles with sunroof)
b. A-pillar trim.
c. Front scuff plate.
d. Rear scuff plate.
e. B-pillar lower trim.
f. Upper anchor of the front seat belt.
g. B-pillar upper trim.
h. Rear seat cushion.
i. Tire house trim.
j. Trunk side upper trim (5HB).
k. C-pillar trim.
l. Map light.
m. Sunvisor.
n. Assist handle.
7. Disconnect the microphone connecter. (Vehicles with headliner installation type)
8. Disconnect the roof wiring harness connector and remove the roof wiring harness connector clip from the body.
9. Disconnect the rear washer hose. (5HB)
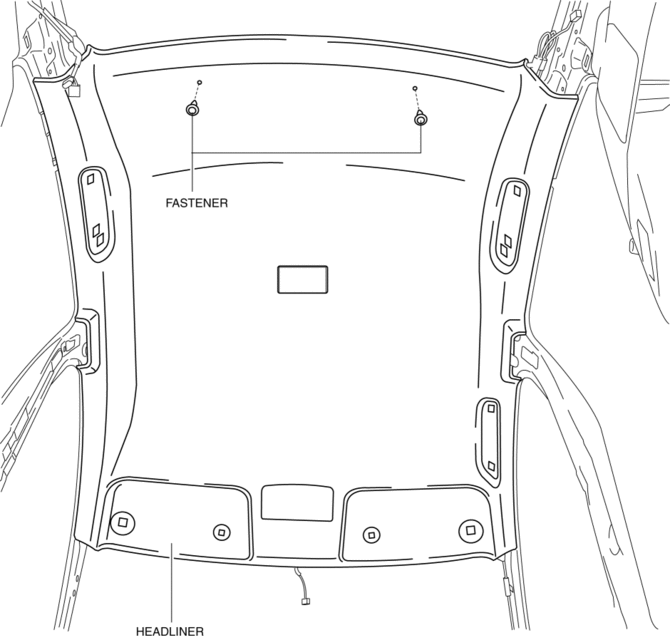
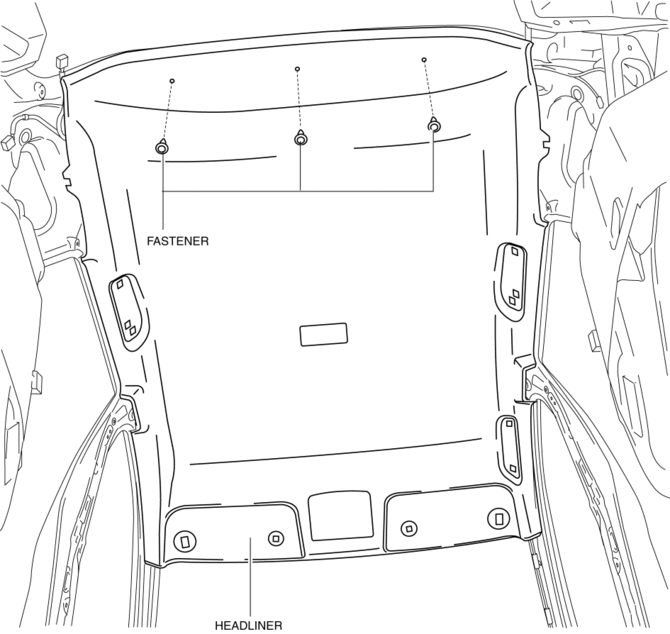
10. Remove the fasteners.
4SD
5HB
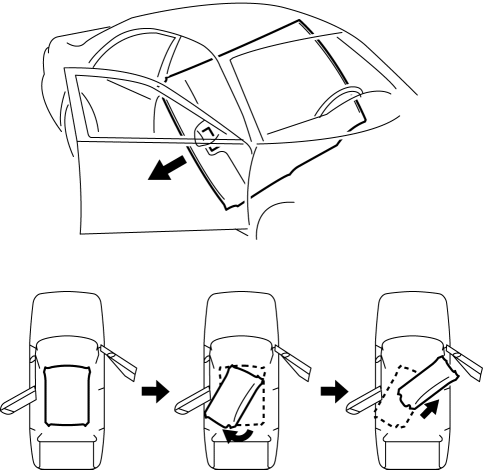
11. Take the headliner out from the opened front passenger-side door. (4SD)
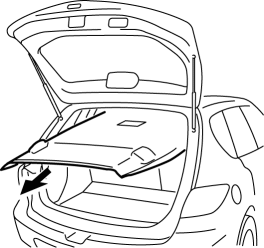
12. Take the headliner out from the opened liftgate. (5HB)
13. Install in the reverse order of removal.
 Front Side Trim Removal/Installation
1. Remove the front scuff plate..
2. Partially peel back the seaming welt.
3. Remove the fastener.
4. Pull the front side trim in the direction of the arrow and detach the clip.
5. Instal ...
 Hole Cover Removal/Installation
With Car-navigation system
1. Disconnect the negative battery cable..
2. Remove the following parts:
a. Upper column cover.
b. Instrument cluster.
c. Center panel.
d. Center cover.
e. Das ...
Other materials:
Hazard Warning Switch Removal/Installation
1. Disconnect the negative battery cable..
2. Remove the center panel..
3. Remove in the order indicated in the table.
1
Screw
2
Hazard warning switch
4. Install in the reverse order of removal. ...
Blower Motor Removal [Manual Air Conditioner]
NOTE:
The blower motor is located on the A/C unit as shown in the figure.
Perform the work from the front passenger side in the posture shown in the
figure.
1. Set the air intake mode to FRESH.
2. Disconnect the negative battery cable.
3. Remove the following ...
Control Switches
Temperature control dial
This dial controls temperature. Turn it
clockwise for hot and counterclockwise
for cold.
Fan control dial
The fan has seven speeds.
AUTO position
The amount of airflow will be
automatically controlled in accordance
with the set temperature.
Except AUTO position
Th ...
