Mazda 3 Service Manual: Inboard Light Removal/Installation
4SD
1. Disconnect the negative battery cable..
2. Remove the trunk lid trim..
3. Disconnect the connector.
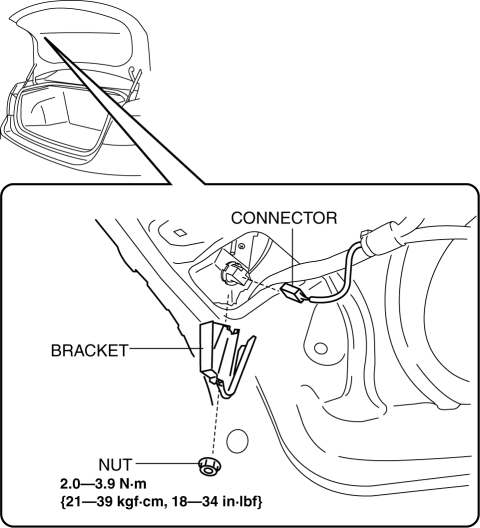
4. Remove the nut.
5. Remove the bracket.
6. Remove the inboard light as shown in the figure.
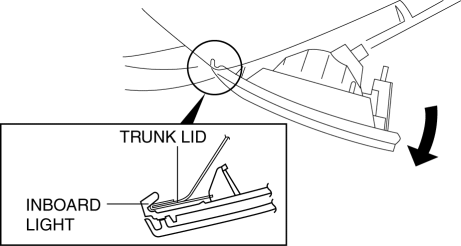
7. Install in the reverse order of removal..
5HB
1. Disconnect the negative battery cable..
2. Remove the service hole cover.
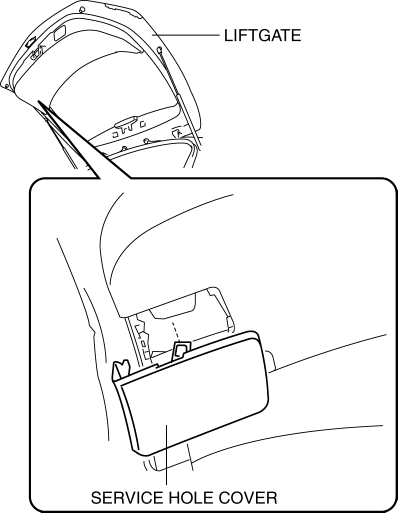
3. Disconnect the connector.
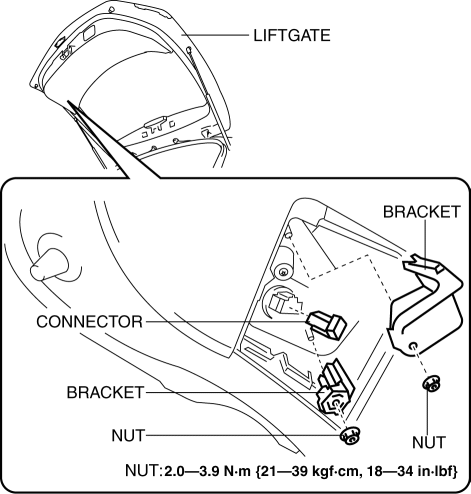
4. Remove the nut.
5. Remove the bracket.
6. Remove the inboard light as shown in the figure.
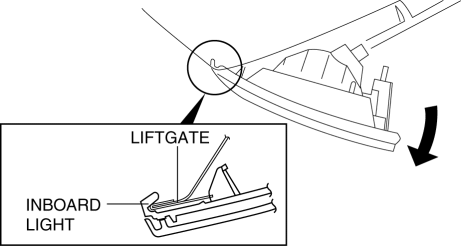
7. Remove the request switch. (With Advanced keyless entry and push button start system).
8. Install in the reverse order of removal..
Inboard Light Installation Note
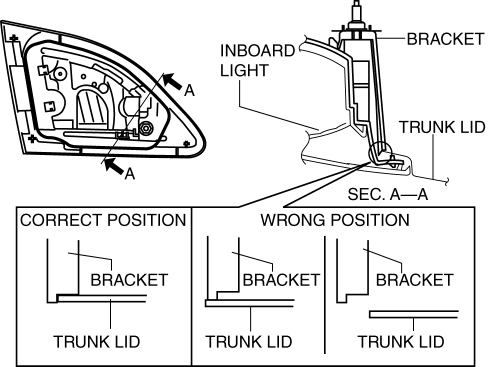
4SD
1. Push the bracket onto the trunk lid as shown in the figure and install.
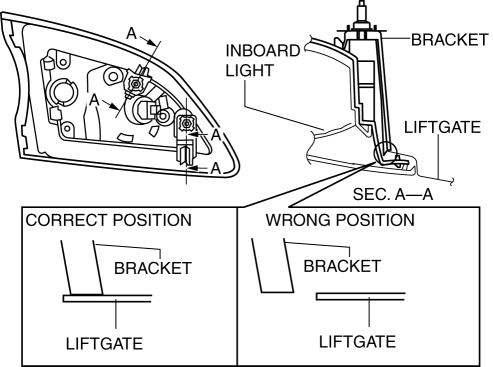
5HB
1. Push the bracket into the liftgate as shown in the figure and install.
 Ignition Key Illumination Removal/Installation
1. Disconnect the negative battery cable..
2. Remove the column cover upper..
3. Remove the ignition key illumination bulb.
4. Install in the reverse order of removal. ...
 Indirect Illumination Removal/Installation
Power Window Switch (With power window switch indirect illumination)
1. Disconnect the negative battery cable..
2. Remove the assist handle cover..
3. Remove in the order indicated in the table. ...
Other materials:
Engine Coolant Protection Inspection [Mzr 2.0, Mzr 2.5]
1. Measure the engine coolant temperature and specific gravity using a thermometer
and a hydrometer.
CAUTION:
Use engine coolant at a concentration that meets the environmental conditions
in which the vehicle is driven, otherwise engine damage could occur.
The engine has alumi ...
Power Outer Mirror Switch Inspection
1. Disconnect the negative battery cable..
2. Remove the following parts:
a. Inner garnish.
b. Front door trim.
c. Switch panel.
3. Verify that the continuity between the power outer mirror switch terminals
is as indicated in the table.
If not as indicated in the table, replace t ...
Roof Carrier Bracket Removal/Installation
4SD
1. Disconnect the negative battery cable..
2. Remove the following parts:
a. Sunroof seaming welt (vehicles with sunroof)
b. Front scuff plate.
c. Rear scuff plate.
d. A-pillar trim.
e. B-pillar lower trim.
f. Upper anchor of the front seat belt installation bolt.
g. B-pillar up ...
