Mazda 3 Service Manual: Keyless Antenna Removal/Installation
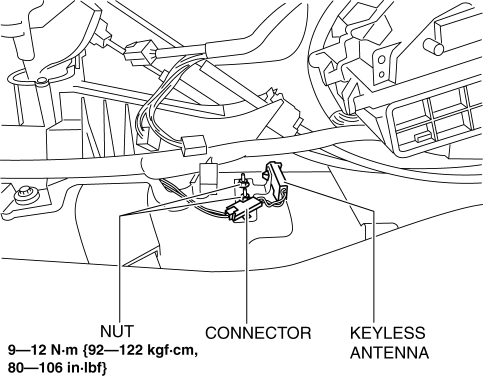
Interior, Front
1. Disconnect the negative battery cable..
2. Remove the following parts:
a. Upper panel.
b. Shift knob (MTX).
c. Selector lever knob (ATX).
d. Shift panel.
e. Side wall.
f. Center panel.
g. Audio unit.
h. Rear heat duct (1).
3. Disconnect the connector.

4. Remove the nuts.
5. Remove the keyless antenna.
6. Install in the reverse order of removal.
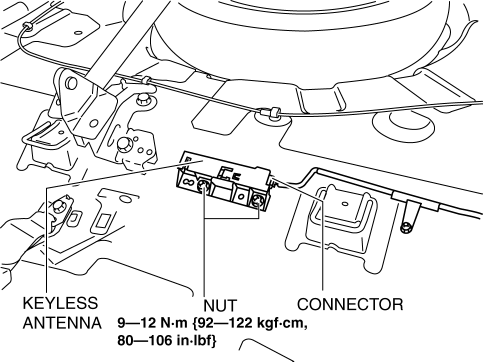
Interior, Rear
1. Disconnect the negative battery cable..
2. Remove the rear seat cushion..
3. Disconnect the connector.

4. Remove the nuts.
5. Remove the keyless antenna.
6. Install in the reverse order of removal.
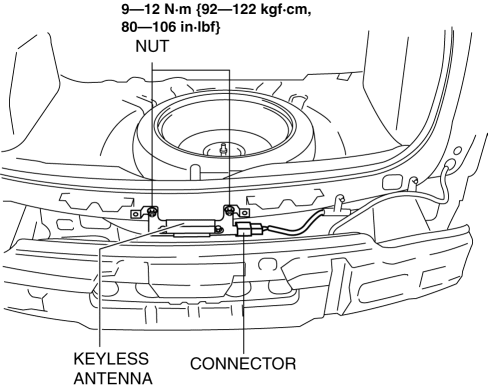
Exterior, Rear
1. Disconnect the negative battery cable..
2. Remove the rear combination light..
3. Remove the rear bumper..
4. Remove the nuts.

5. Disconnect the connector.
6. Remove the keyless antenna.
7. Install in the reverse order of removal.
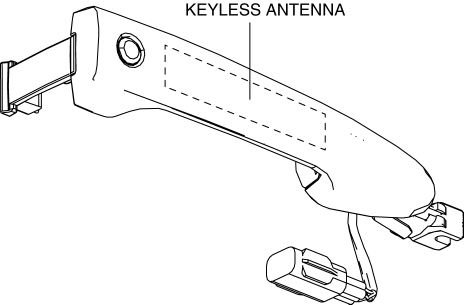
Exterior, LF/RF
NOTE:
-
The keyless antenna (vehicle exterior, LF/RF) is built into the front outer handle..

 Door Lock Switch Removal/Installation
1. Disconnect the negative battery cable..
2. Remove the inner garnish..
3. Remove the front door trim..
4. Remove the front inner handle..
5. Remove the screws, then remove the door lock swit ...
 Keyless Beeper Inspection
1. Disconnect the negative battery cable..
2. Remove the front mudguard..
3. Remove the keyless beeper..
4. When applying battery positive voltage to the keyless beeper, verify that
an electro ...
Other materials:
Outer Mirror Glass Inspection
Vehicles With Heated Outer Mirror
1. Disconnect the negative battery cable..
2. Remove the outer mirror glass..
3. Verify that the resistance is as indicated in the table.
If not as indicated in the table, or if the resistance is not within the
specification, replace the outer mi ...
Trunk Lid Removal/Installation
WARNING:
Removing the trunk lid stay damper without supporting the trunk lid can be
dangerous. The trunk lid may fall and injure you. Be sure to open the trunk
lid completely and support it securely before removing the trunk lid stay damper.
1. Disconnect the negative battery cab ...
Shroud Panel Removal/Installation
CAUTION:
Because the shroud panel is installed to the bumper reinforcement, support
the shroud panel using a jack before removing the bumper reinforcement so as
not to apply excessive force to the shroud panel.
Since the servicing is performed with the hood open, secure the hoo ...
