Mazda 3 Service Manual: Lower Panel Removal/Installation
Driver-side
1. Disconnect the negative battery cable..
2. Remove the following parts:
a. Driver-side front scuff plate.
b. Driver-side front side trim.
c. Hood release lever.
d. Upper panel.
e. Shift knob (MTX).
f. Selector lever knob (ATX).
g. Shift panel.
h. Side wall.
i. Console.
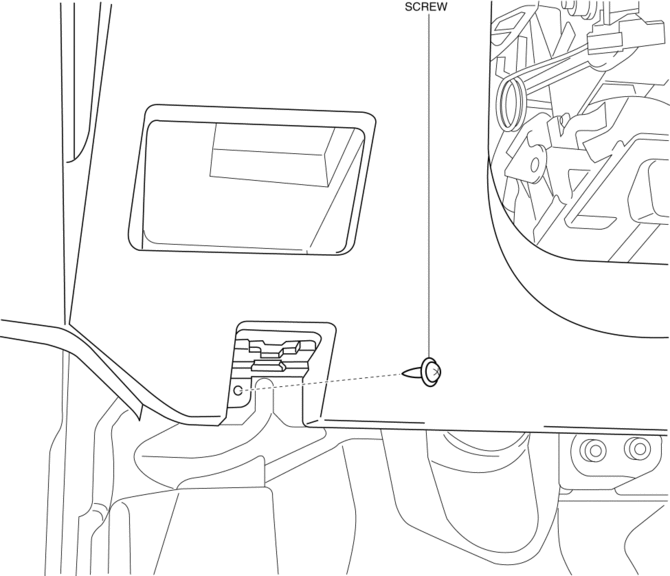
3. Partially peel back the seaming welt.
4. Remove the screw.
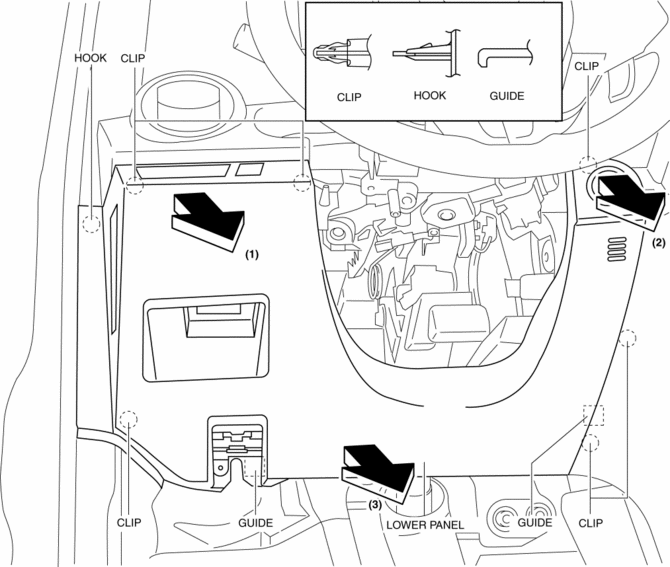
5. Pull the lower panel in the direction of the arrow in the order of (1) (2), (3) and remove the lower panel while detaching the hooks, clips and guides.
6. Disconnect the switch connector.
7. Disconnect the push button start connector.
8. Install in the reverse order of removal.
Passenger-side
1. Remove the following parts:
a. Passenger-side front scuff plate.
b. Passenger-side front side trim.
c. Dashboard under cover.
d. Glove compartment.
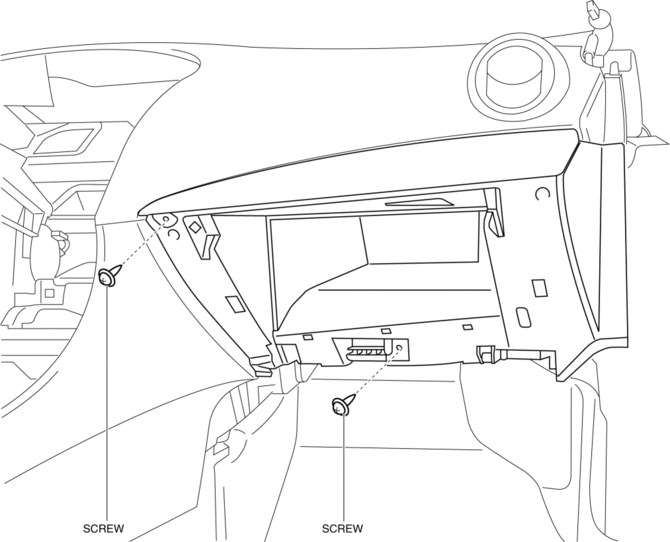
2. Partially peel back the seaming welt.
3. Remove the screws.
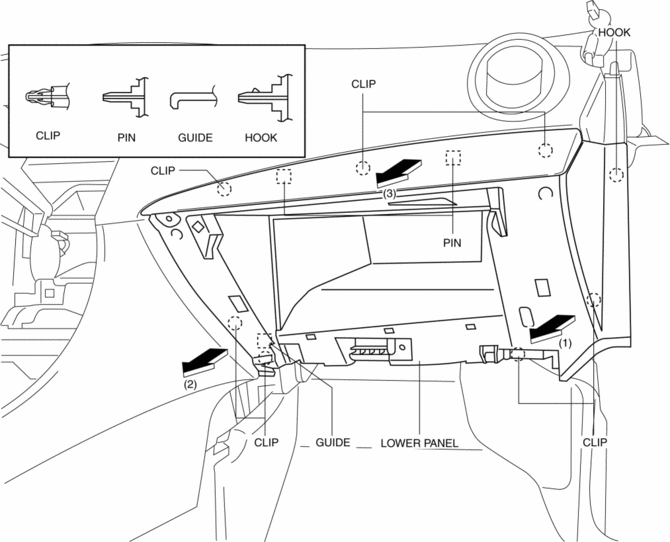
4. Pull the lower panel in the direction of the arrow in the order of (1) (2), (3) and remove the lower panel while detaching the hook, clips, guide and pins.
5. Install in the reverse order of removal.
 Inner Garnish Removal/Installation
1. Disconnect the negative battery cable..
2. Pull the inner garnish in the direction of the arrow shown in the figure and
remove it while detaching clips and tab.
CAUTION:
When pull ...
 Rear Package Trim Removal/Installation
1. Remove the following parts:
a. Rear seat cushion.
b. Rear scuff plate.
c. Tire house trim.
d. C-pillar trim.
2. Fold the rear seat back.
3. Remove the fasteners.
4. Pull up the re ...
Other materials:
Lighting System Personalization Features Setting Procedure
Auto Light System
1. Connect the M-MDS (IDS) to the DLC-2.
2. After the vehicle is identified, select the following items from the initial
screen of the IDS.
Select the “Module Programming”
Select the “Programmable Parameters”.
Select menu in the Exterior Lighting.
...
Rear View Monitor Operation
The operation of the rear view monitor when reversing the vehicle varies
depending on
the traffic, road, and vehicle conditions. The amount of steering and the
timing also varies
depending on conditions, so confirm the surrounding conditions directly with
your eyes and
steer the vehicle in ...
Clock Spring Inspection [Standard Deployment Control System]
1. Disconnect the negative battery cable..
2. Remove the driver–side air bag module..
3. Remove the steering wheel..
4. Remove the column cover.
5. Remove the clock spring..
6. Verify that the continuity is as indicated in the table.
If not as indicated in the table, replace the cl ...
