Mazda 3 Service Manual: On Board Diagnostic System Simulation Inspection [Fw6 A EL]
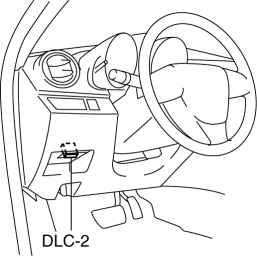
1. Connect the M-MDS (IDS) to the DLC-2.
2. After the vehicle is identified, select the following items from the initialization screen of the IDS.
a. Select “DataLogger”.
b. Select “Modules”.
c. Select “TCM”.
3. Select the simulation items from the PID table.
4. Perform the active command modes function, inspect the operations for each parts.
-
If the operation of output parts cannot be verified after the active command mode inspection is performed, this could indicate the possibility of an open or short circuit, sticking, or operation malfunction in the output parts.
|
Item |
Description |
Unit/Condition |
Operation condition |
|
SS_ON-OFF |
On/off solenoid condition |
Off/On |
Under the following conditions:
|
|
SS1_C |
Shift solenoid No.1 target current |
A |
Under the following conditions:
|
|
SS2_C |
Shift solenoid No.2 target current |
A |
Under the following conditions:
|
|
SS3_C |
Shift solenoid No.3 target current |
A |
Under the following conditions:
|
|
SS4_C |
Shift solenoid No.4 target current |
A |
Under the following conditions:
|
|
SSLU_C |
TCC control solenoid target current |
A |
Under the following conditions:
|
|
SSP_C |
Pressure control solenoid target current |
A |
Idling at P or N position |
 On Board Diagnostic System Simulation Inspection [FS5 A EL]
1. Connect the M-MDS(IDS) to the DLC-2.
2. After the vehicle is identified, select the following items from the initialization
screen of the IDS.
a. Select "DataLogger".
b. Selec ...
 PID/Data Monitor Inspection [Bcm]
1. Connect the M-MDS (IDS) to the DLC-2.
2. After the vehicle is identified, select the following items from the initialization
screen of the IDS.
a. Select “DataLogger”.
b. Select “Module ...
Other materials:
Rearview Mirror Removal
1. Insert a tape-wrapped flathead screwdriver to the position shown in the figure
and press the center part of the spring in the direction of arrows (1), and then
pull out the rearview mirror in the direction of arrows (2) shown in the figure.
CAUTION:
When removing the rearview m ...
Cooling System Cap Inspection [Mzr 2.0, Mzr 2.5]
WARNING:
Never remove the cooling system cap or loosen the radiator drain plug while
the engine is running, or when the engine and radiator are hot. Scalding engine
coolant and steam may shoot out and cause serious injury. It may also damage
the engine and cooling system.
Tu ...
Rear Heat Duct Removal/Installation
1. Disconnect the negative battery cable..
2. Remove the following parts:
a. Upper panel.
b. Shift lever knob (MTX).
c. Selector lever knob (ATX).
d. Shift panel.
e. Side wall.
f. Console.
g. Front scuff plate.
h. Front side trim.
i. Fuel-filler lid opener lever cover.
3. Turn ...
