Mazda 3 Service Manual: Rear Bumper Removal/Installation
4SD
1. Disconnect the negative battery cable..
2. Remove the rear combination light..
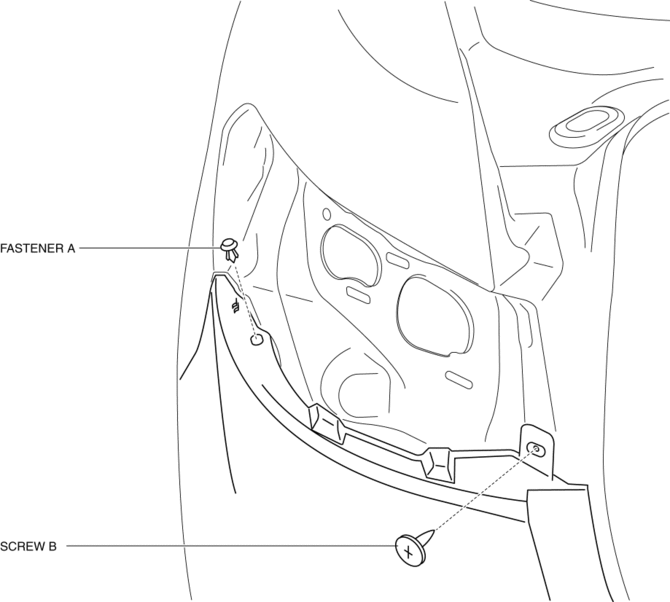
3. Remove the fastener A and screw B.
4. Remove the rear splash shield..
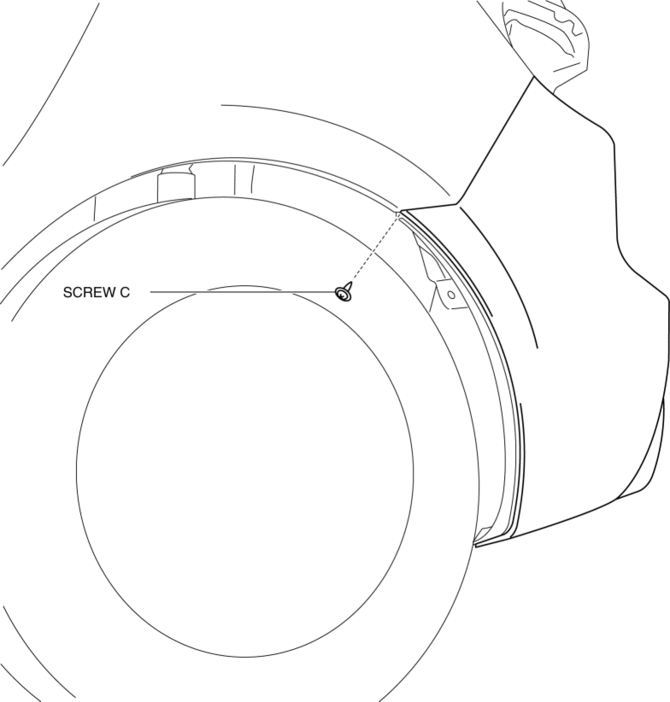
5. Remove the screws C.
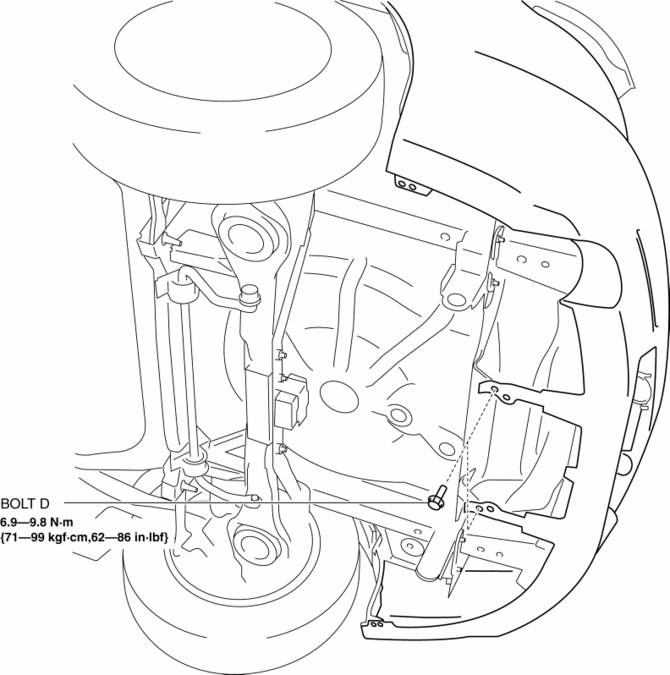
6. Remove the bolts D.
7. Affix the protective tape to the position shown in the figure.

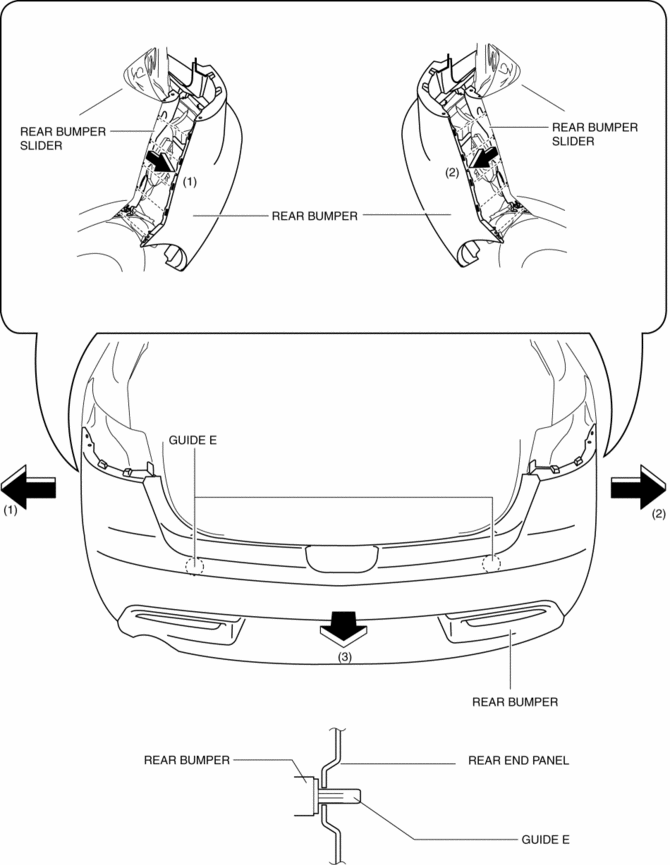
8. Pull the rear bumper in the direction of arrow (1), (2) shown in the figure to disengage the rear bumper from the rear bumper slider.
9. Pull the rear bumper in the direction of arrow (3), then remove the guide E.

CAUTION:
-
When disengaging the rear bumper from the rear bumper slider, the rear bumper could fall and be damaged. Support the rear bumper so that it does not fall.
10. Disconnect the license plate light connector.
11. Install in the reverse order of removal.
5HB
1. Disconnect the negative battery cable..
2. Remove the rear combination light..
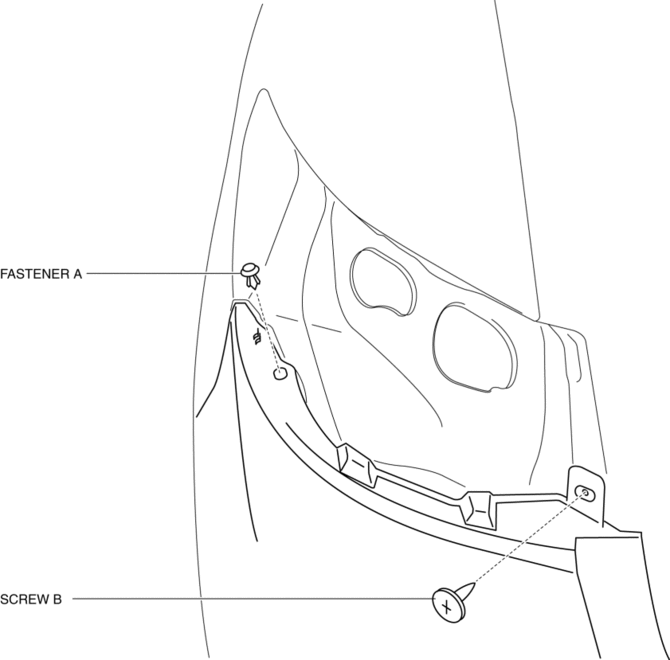
3. Remove the fastener A and screw B.
4. Remove the rear splash shield..
5. Remove the screws C.
6. Remove the bolts D.

7. Affix the protective tape to the position shown in the figure.
8. Pull the rear bumper in the direction of arrow (1), (2) shown in the figure to disengage the rear bumper from the rear bumper slider.
9. Pull the rear bumper in the direction of arrow (3), then remove the guide E.
CAUTION:
-
When disengaging the rear bumper from the rear bumper slider, the rear bumper could fall and be damaged. Support the rear bumper so that it does not fall.
10. Disconnect the license plate light connector.
11. Install in the reverse order of removal.
 Rear Bumper Reinforcement Removal/Installation
1. Disconnect the negative battery cable..
2. Remove the rear combination light..
3. Remove the rear bumper..
4. Remove the nuts and remove the rear bumper reinforcement.
5. Install in the ...
 Rear Spoiler Removal/Installation
4SD
1. Remove the trunk lid trim..
2. Remove the nuts.
3. While cutting the double-sided adhesive tape using a flathead screwdriver
or a razor, separate the rear spoiler from the trunk lid. ...
Other materials:
Rear Door Trim Removal/Installation
1. Disconnect the negative battery cable..
2. Move the hook in the direction of arrow shown in the figure using a tape-lapped
flathead screwdriver and detach it from the rear door trim.
CAUTION:
Affix protective tape to the rear door trim and assist handle cover to prevent
damag ...
Compression Inspection [Skyactiv G 2.0]
WARNING:
Hot engines and oil can cause severe burns. Be careful not to burn yourself
during removal/installation of each component.
Fuel vapor is hazardous. It can very easily ignite, causing serious injury
and damage. Always keep sparks and flames away from fuel.
Fuel ...
Rear Beltline Molding Removal/Installation
1. Fully open the rear door glass.
2. Remove the rear door trim..
3. Remove clip A using a fastener remover and pull up the rear beltline molding
in the direction of the arrow (1) shown in the figure.
4. Remove clip B using a fastener remover and pull up the rear beltline molding
in the di ...
