Mazda 3 Service Manual: Rear Seat Back Removal/Installation
1. Remove the rear seat cushion..
2. Remove the rear buckle installation bolt..
3. Fold the rear seat back.
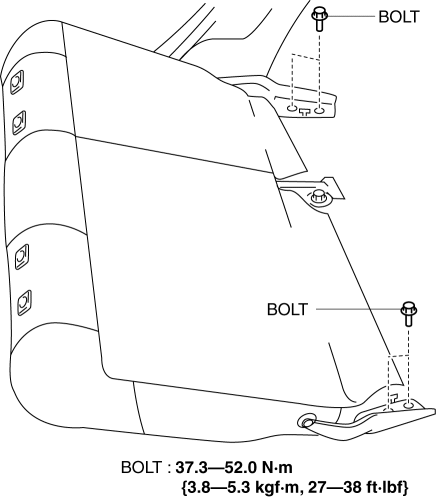
4. Remove the bolts.


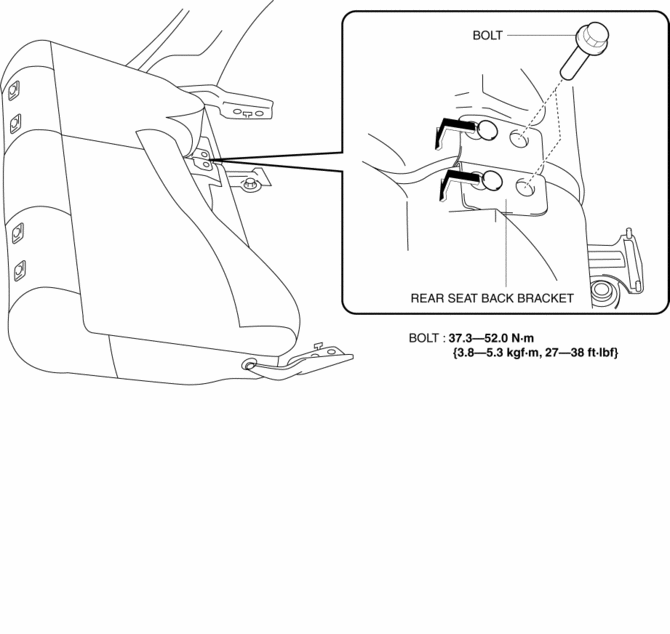
5. Remove the rear seat back from the rear seat back bracket by pulling the rear seat back in the direction of the arrow shown in the figure.
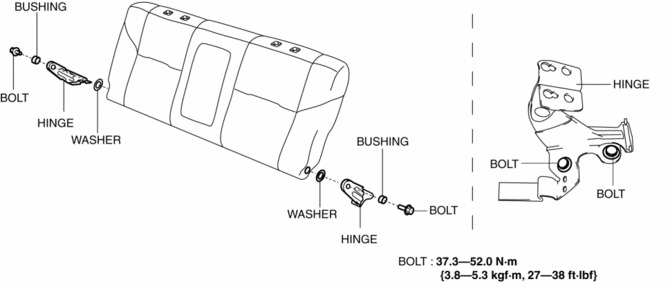
6. Remove the bolts, remove the hinge.

7. Install in the reverse order of removal.
 Rear Seat Back Frame Removal/Installation
1. Remove the rear seat cushion..
2. Remove the rear buckle installation bolt..
3. Remove the rear seat back..
4. Remove the headrest.
5. Open the fasteners.
6. Detach the hooks.
7. ...
 Rear Seat Back Trim Removal/Installation
1. Remove the rear seat back frame..
2. Remove rings C, then remove the seat back trim from the seat back pad.
3. Install in the reverse order of removal. ...
Other materials:
Shroud Panel Removal/Installation
CAUTION:
Because the shroud panel is installed to the bumper reinforcement, support
the shroud panel using a jack before removing the bumper reinforcement so as
not to apply excessive force to the shroud panel.
Since the servicing is performed with the hood open, secure the hoo ...
Rear Door Latch And Lock Actuator Inspection
1. The following actuator and switch are integrated with the rear door latch
and lock actuator. Inspect the rear door latch and lock actuator according to each
inspection procedure for the following items.
Rear door lock actuator.
Rear door latch switch.
Rear door lock-li ...
Front Brake (Disc) Inspection
Brake Judder Repair Hints
Description
1. Brake judder concern has the following 3 characteristics:
Steering wheel vibration
1. The steering wheel vibrates in the rotation direction. This characteristic
is most noticeable when applying brakes at a vehicle speed of 100—140 km/h {62.2—86.9
mph ...
