Mazda 3 Service Manual: Rear Window Glass Installation
WARNING:
-
Using a utility knife with bare hands can cause injury. Always wear gloves when using a utility knife.
CAUTION:
-
Proper installation of the glass may be difficult if sealant is cracked or the glass is pushed out by air pressure when a door is opened/closed with all the window glass closed. Keep the door glass open until the rear window glass installation is completed.
4SD
1. Remove sealant along the perimeter of the glass using a utility knife or scraper. (When reusing the glass)
2. Clean and degrease an approx. 50 mm {2.0 in}
wide strip along the perimeter of the glass.
3. Inspect the glass for cracks. If it is cracked, chamfer it using sandpaper.
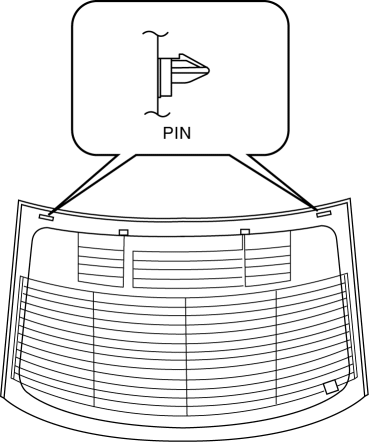
4. Install the spacer and pins to the glass as shown in the figure.
NOTE:
-
When reusing the glass, align it with the alignment mark placed before the glass was removed.
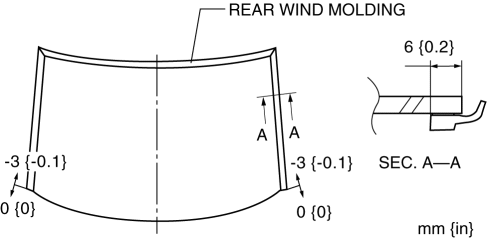
5. Install the rear window glass molding.
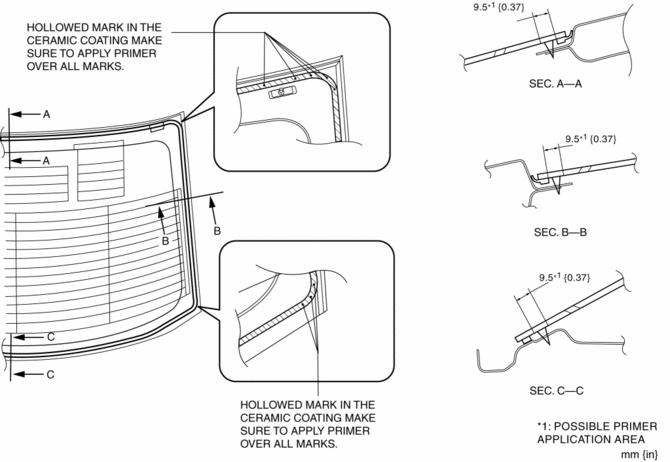
6. Apply glass primer on the glass as shown in the figure then allow it to dry for approx. 30 min
.
CAUTION:
-
To prevent weakening of the primer adhesion, keep the bonding surface free of dirt, moisture, and grease. Do not touch the surface with your hand.
NOTE:
-
Apply primer to the hollowed marks in the ceramic coating.
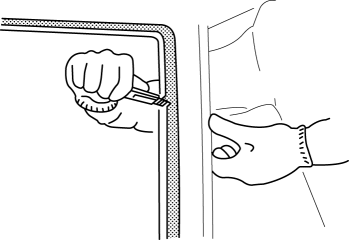
7. Cut away the old sealant using a utility knife or scraper so that 1—2 mm {0.04—0.07 in}
thickness of sealant remains along the perimeter of the frame.
8. Clean and degrease along the perimeter of the bonding area on the body.
9. If the sealant has come off completely in any one place, apply some primer, and allow it to dry for approx. 30 min
.
CAUTION:
-
To prevent weakening of the primer adhesion, keep the bonding surface free of dirt, moisture, and grease. Do not touch the surface with your hand.
10. Apply body primer on the body as shown in the figure, then allow it to dry for approx. 30 min
.
CAUTION:
-
To prevent weakening of the primer adhesion, keep the bonding surface free of dirt, moisture, and grease. Do not touch the surface with your hand.
NOTE:
-
Apply primer to the hollowed marks in the ceramic coating.
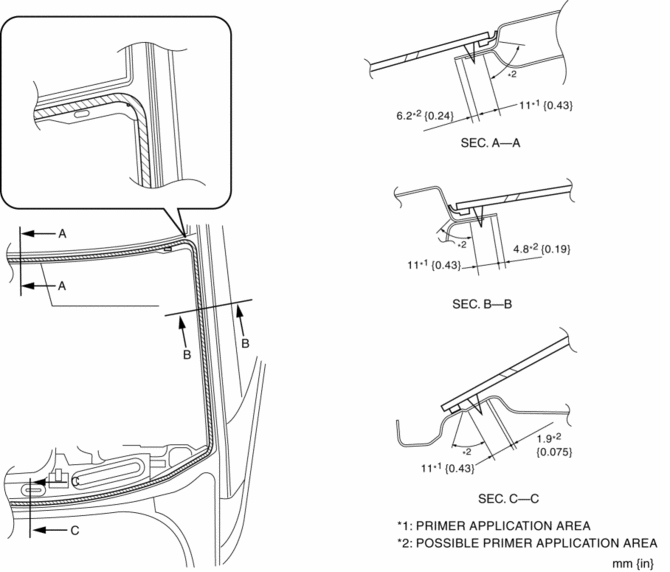
11. Apply sealant to the area of the glass surface as shown in the figure.
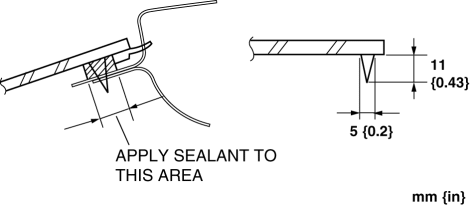
12. Install the rear window glass.
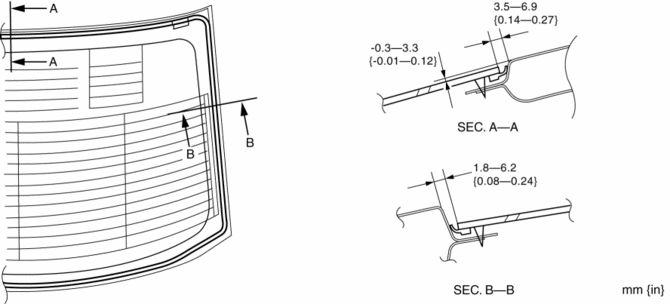
13. Verify that the gap at the upper and lower parts of the glass is within the specification shown in the figure, then press along the perimeter of the glass.
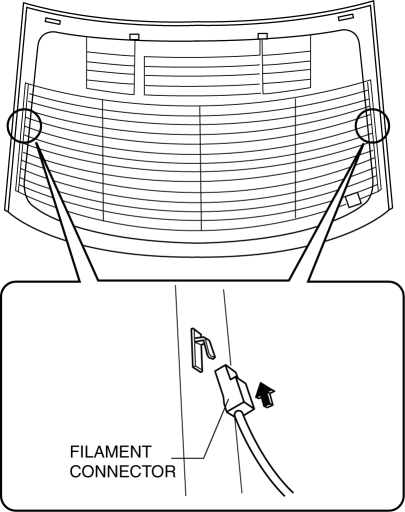
14. Connect the filament connector.
15. Install the fasteners.
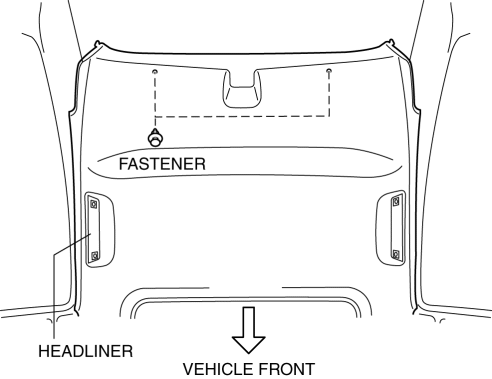
16. Install the following parts:
a. Tire house trims.
b. Rear package trim.
c. C–pillar trims.
d. Rear side seat back.
e. Rear scuff plate.
f. Rear seat cushion.
17. Connect the negative battery cable..
18. Allow the sealant to harden completely. Sealant hardening time: 24 h
5HB
1. Remove sealant along the perimeter of the glass using a utility knife or scraper. (When reusing the glass)
2. Clean and degrease an approx. 50 mm {2.0 in}
wide strip along the perimeter of the glass.
3. Inspect the glass for cracks. If it is cracked, chamfer it using sandpaper.
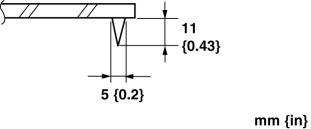
4. Install the spacers, and pins to the glass as shown in the figure.
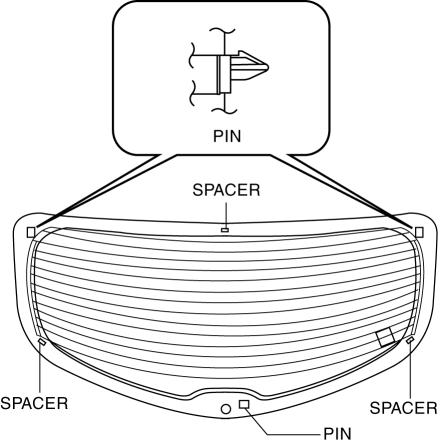
NOTE:
-
When reusing the glass, align it with the alignment mark placed before the glass was removed.
5. Apply glass primer on the glass as shown in the figure then allow it to dry for approx. 30 min
.
CAUTION:
-
To prevent weakening of the primer adhesion, keep the bonding surface free of dirt, moisture, and grease. Do not touch the surface with your hand.
NOTE:
-
Apply primer to the hollowed marks in the ceramic coating.
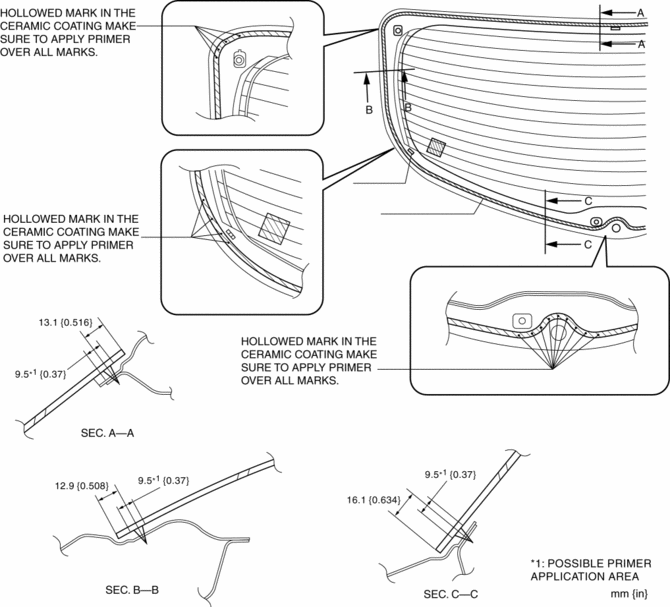
6. Cut away the old sealant using a utility knife or scraper so that 1—2 mm {0.04—0.07 in}
thickness of sealant remains along the perimeter of the frame.

7. Clean and degrease along the perimeter of the bonding area on the body.
8. If the sealant has come off completely in any one place, apply some primer, and allow it to dry for approx. 30 min
.
CAUTION:
-
To prevent weakening of the primer adhesion, keep the bonding surface free of dirt, moisture, and grease. Do not touch the surface with your hand.
9. Apply body primer on the body as shown in the figure, then allow it to dry for approx. 30 min
.
CAUTION:
-
To prevent weakening of the primer adhesion, keep the bonding surface free of dirt, moisture, and grease. Do not touch the surface with your hand.
NOTE:
-
Apply primer to the hollowed marks in the ceramic coating.
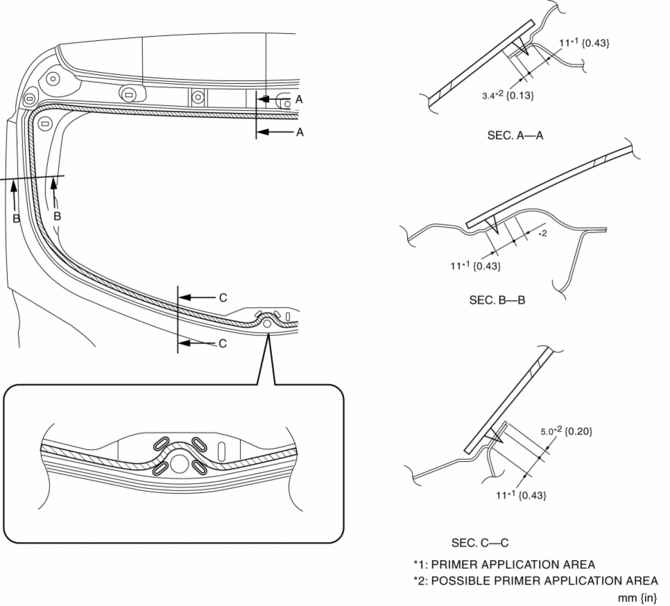
10. Apply sealant to the area of the glass surface as shown in the figure.
11. Install the rear window glass.
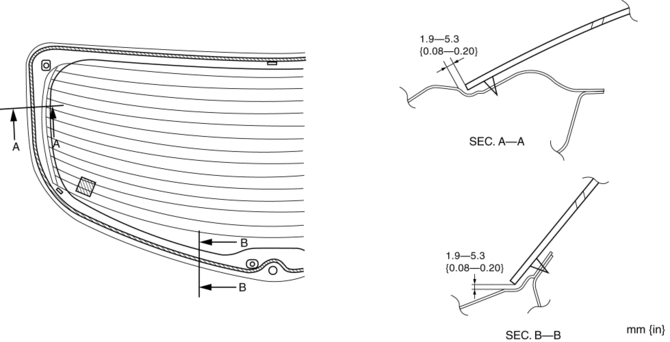
12. Verify that the gap at the upper and lower parts of the glass is within the specification shown in the figure, then press along the perimeter of the glass.
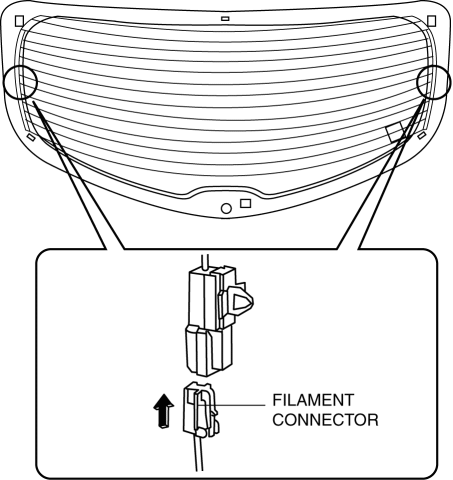
13. Connect the filament connector.
14. Install the following parts:
a. Rear wiper arm and blade.
b. Rear spoiler.
c. Liftgate lower trim.
d. Liftgate side trim.
e. High-mount brake light.
f. Liftgate upper trim.
15. Connect the negative battery cable..
16. Allow the sealant to harden completely. Sealant hardening time: 24 h
 Rear Power Window Regulator Removal/Installation
1. Fully lower the rear door glass.
2. Disconnect the negative battery cable..
3. Remove the rear door trim..
4. Remove the service hole cover.
5. Remove the rear door speaker..
6. Remov ...
 Rear Window Glass Removal
4SD
1. Disconnect the negative battery cable.
2. Remove the following parts:
a. Rear seat cushion.
b. Rear scuff plate.
c. Rear side seat back.
d. C–pillar trims.
e. Rear package trim.
...
Other materials:
Reporting Safety Defects
(U.S.A.)
If you believe that your vehicle has a defect which could cause a crash or
could cause
injury or death, you should immediately inform the National Highway Traffic
Safety
Administration (NHTSA) in addition to notifying Mazda Motor Corporation (Your
Mazda
Importer/Distributor).
If NHTSA re ...
Auxiliary Jack Inspection
1. Disconnect the negative battery cable..
2. Remove the following parts:
a. Upper panel.
b. Shift lever knob (MTX).
c. Selector lever knob (ATX).
d. Shift panel.
e. Side wall.
f. Console.
g. Auxiliary jack.
3. Connect a commercially-available nonresistant plug to the auxiliary jac ...
Down Switch Inspection [FS5 A EL]
1. Perform the following procedures.
a. Remove the battery cover..
b. Disconnect the negative battery cable.
c. Remove the console..
d. Disconnect the selector lever component connector.
2. Inspect the continuity between the selector lever component terminals C and
H.
If ...
