Mazda 3 Service Manual: Side Step Molding Removal
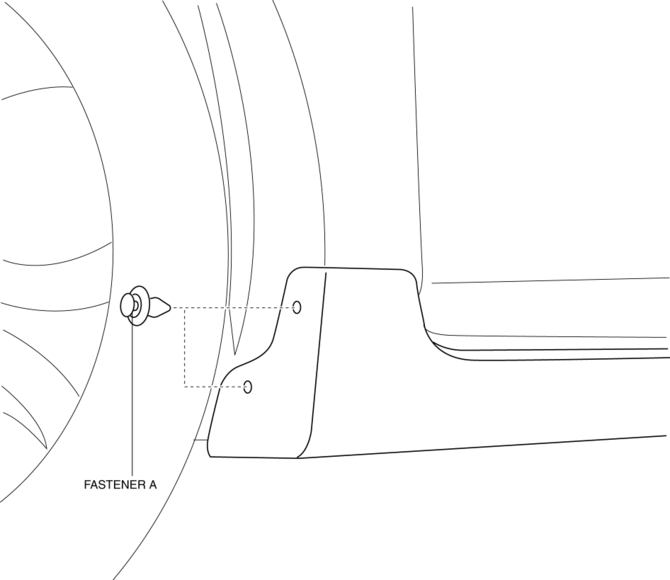
1. Remove the fasteners A.
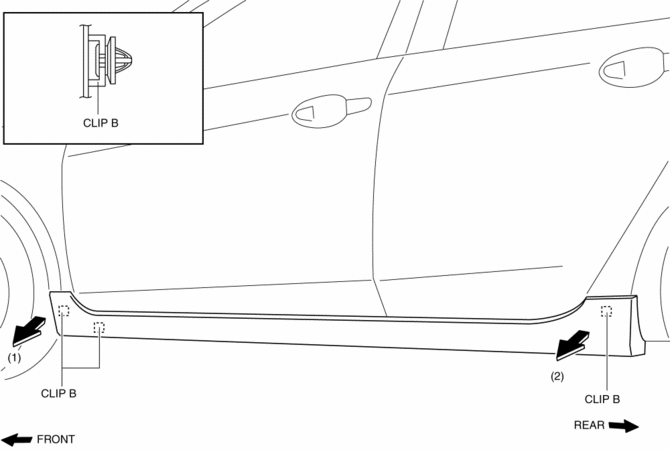
2. Using the removal tool, disengage clips B in the direction of the arrow (1), (2) shown in the figure.
NOTE:
-
Leave the disengaged clip B in place in consideration of the servicing.
3. Slide the side step molding in the direction of the arrow (3) shown in the figure and remove the side step molding from clips C and D.
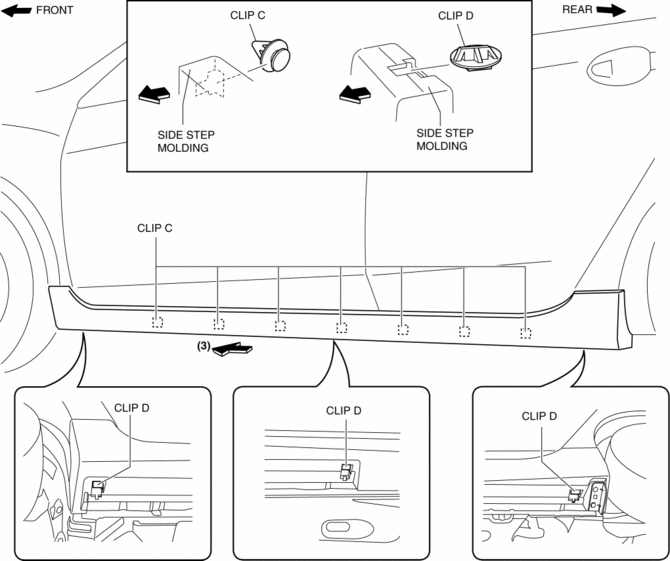
4. After removing the side step molding, remove clips C and D from the body using a fastener remover.
 Side Step Molding Installation
NOTE:
Double-sided adhesive tape has already been adhered to a new side step molding
for installation.
When a side step molding is to be reused, perform the following procedure:
1 ...
 Splash Shield Removal/Installation
Front Splash Shield
1. Remove the bolts and fastener then remove the front splash shield.
2. Install in the reverse order of removal.
Rear Splash Shield
1. Remove the fastener, screws and ca ...
Other materials:
Washer Motor Removal/Installation
4SD
1. Disconnect the negative battery cable..
2. Remove the front mudguard (RH)..
3. Remove in the order indicated in the table.
1
Windshield washer hose
2
Washer motor connector
3
Washer motor
...
Glass Panel Adjustment
1. Fully close the glass panel.
2. Measure the gap and height between the glass panel and body.
If not as specified, loosen the glass panel installation screws and reposition
the glass panel.
Clearance (4SD)
a: -2.4—0.2 mm {-0.09—0.01 in}
b: 0 mm {0 in}
...
Electric Variable Valve Timing Actuator Inspection [Skyactiv G 2.0]
WARNING:
A hot engine can cause severe burns. Turn off the engine and wait until it
is cool before servicing.
CAUTION:
Do not disassemble the electric variable valve timing actuator because it
is a precision unit.
1. Remove the battery cover..
2. Disconnect the ne ...
