Mazda 3 Service Manual: Vacuum Hose Removal/Installation [Mzr 2.0, Mzr 2.5]
1. Remove the battery and battery tray..
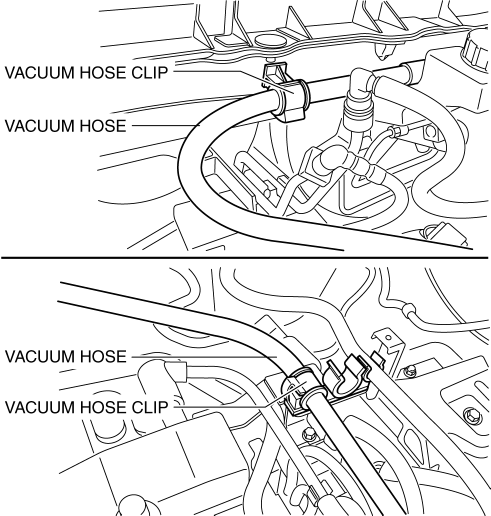
2. Remove the vacuum hose from the vacuum hose clip.
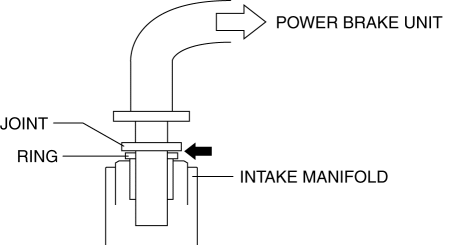
3. Insert a thin flathead screwdriver at the point indicated by the arrow in the figure, push the ring down and disconnect the vacuum hose from the intake manifold.
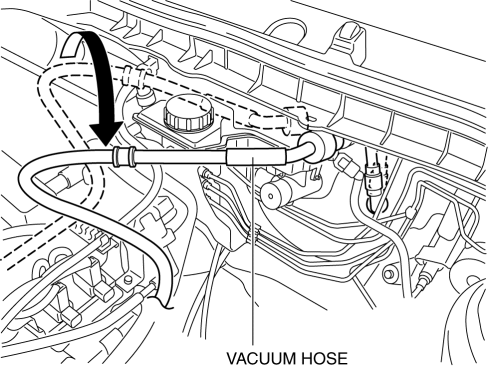
4. Move the vacuum hose as shown in the figure.
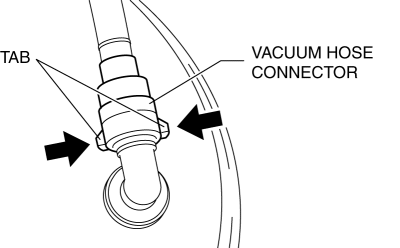
5. Disconnect the vacuum hose connector from the power brake unit while pressing the tabs of the vacuum hose connector.
6. Remove the vacuum hose.
7. Install in the reverse order of removal.
8. Insert the vacuum hose connector to the power brake unit.
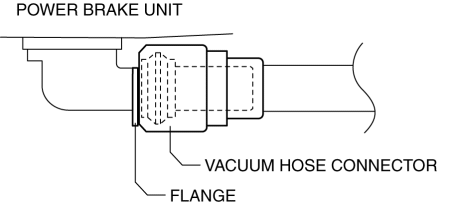
9. Verify that the vacuum hose is inserted so that the connector contacts the power brake unit flange.
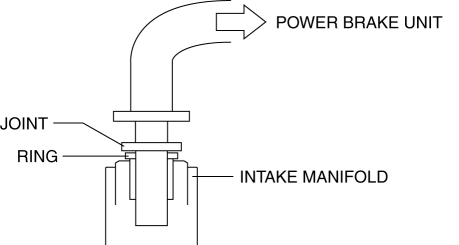
10. Verify that the vacuum hose is inserted so that the joint contacts the intake manifold ring.
 Power Brake Unit Removal/Installation [Mzr 2.3 Disi Turbo]
CAUTION:
Once the brake switch clearance has automatically been adjusted, it cannot
be adjusted again. Therefore, replace the switch with a new one when replacing
the power brake unit or ...
 Vacuum Hose Removal/Installation [Mzr 2.3 Disi Turbo]
1. Remove the charge air cooler cover..
2. Remove the charge air cooler..
3. Insert a thin flathead screwdriver at the point indicated by the arrow in
the figure, push the ring down and disconne ...
Other materials:
Restraints SST [Standard Deployment Control System]
49 H066 002
Deployment tool
49 D066 002
Adapter harness
49 L066 002
Adapter harness
49 B066 004
Adapter harness
49 N088 0A0
Fuel and Thermometer checker
...
Front Fog Light Bulb Removal/Installation
Except Mazdaspeed3
1. Disconnect the negative battery cable..
2. Slightly bend back the mudguard..
3. Disconnect the connector.
4. Rotate the front fog light bulb in the direction of the arrow shown in the
figure.
5. Remove the front fog light bulb.
CAUTION:
A haloge ...
C Pillar Trim Removal/Installation
4SD
1. Remove the following parts:
a. Rear seat cushion.
b. Rear scuff plate.
c. Tire house trim.
2. Partially peel back the seaming welt.
3. Pull the C-pillar trim in the direction of the arrow (1), (2) shown in the
figure, then detaching clip A and B.
4. Cut the lead wire connec ...
