Mazda 3 Owners Manual: Head Restraints
Your vehicle is equipped with head restraints on all outboard seats and the rear center seat * . The head restraints are intended to help protect you and the passengers from neck injury.
| WARNING Always drive with the head restraints installed when seats are being used and make sure they are properly adjusted: Driving with the head restraints adjusted too low or removed is dangerous. With no support behind your head, your neck could be seriously injured in a collision. |
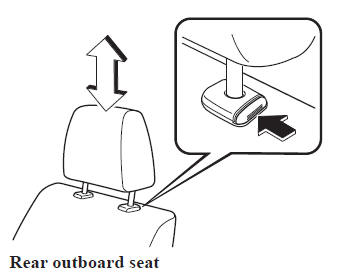
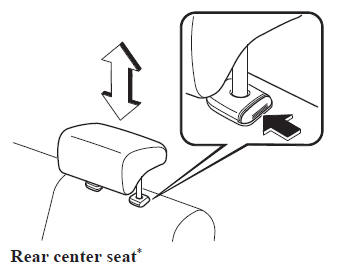
Height adjustment
To raise a head restraint, pull it up to the desired position.
To lower the head restraint, press the stopcatch release, then push the head restraint down.
Adjust the head restraint so that the center is even with the top of the passenger's ears.
Front outboard seat
*Some models.
Removal/Installation
To remove the head restraint, pull it up while pressing the stop-catch.
To install the head restraint, insert the legs into the holes while pressing the stopcatch.
| WARNING Always drive with the head restraints installed when seats are being used and make sure they are properly installed: Driving with the head restraints not installed is dangerous. With no support behind your head, your neck could be seriously injured in a collision. |
 Armrest
The rear armrest in the center of the rear
seatback can be used (no occupant in the
center seat) or placed upright.
WARNING
Never put your hands and fi ngers
around the moving part ...

Other materials:
Quarter Window Glass Removal
1. Remove the following parts:
a. Rear seat cushion.
b. Rear scuff plate.
c. Tire house trim.
d. Trunk side upper trim.
e. C-pillar trim.
2. Apply protective tape along the edge of the body and the quarter window glass.
NOTE:
For the areas of the sealant that are difficult ...
Dashboard Precautions
Prevent caustic solutions such as perfume
and cosmetic oils from contacting the
dashboard. They will damage and discolor
the dashboard. If these solutions get on the
dashboard, wipe them off immediately.
CAUTION
Do not use glazing agents.
Glazing agents contain ingredients
which ...
Advanced Keyless Entry
WARNING
Radio waves from the key may aff ect
medical devices such as pacemakers:
Before using the key near people who
use medical devices, ask the medical
device manufacturer or your physician
if radio waves from the key will aff ect
the device.
The advanced keyless ...
