
Mazda 3 Owners Manual: Battery Replacement
If the buttons on the transmitter are inoperable and the operation indicator light does not flash, the battery may be dead.
Replace with a new battery before the transmitter becomes unusable.
CAUTION
|
The following conditions indicate that the battery power is low:
- The KEY indicator light (green) flashes in the instrument cluster for about 30 seconds after the engine is turned off
- The system does not operate and the operation indicator light on the transmitter does not flash when the buttons are pressed.
- The system's operational range is
reduced.
Replacing the battery at an Authorized Mazda Dealer is recommended to prevent damage to the key. If replacing the battery by yourself, follow the instruction below.
Replacing the key battery
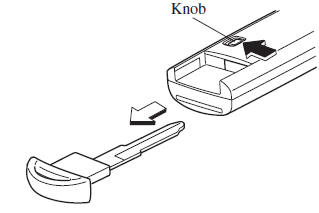
- Press the knob and pull out the auxiliary key.
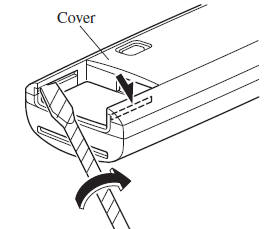
- Twist a tape-wrapped flathead screwdriver in the direction of the arrow and open the cover slightly.
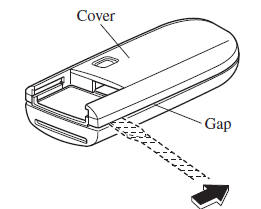
- Insert the tape-wrapped flathead screwdriver into the gap and slide it in the direction of the arrow.
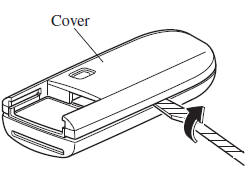
- Twist the flathead screwdriver in the direction of the arrow and remove the cover.
- Remove the battery cap, then remove the battery.
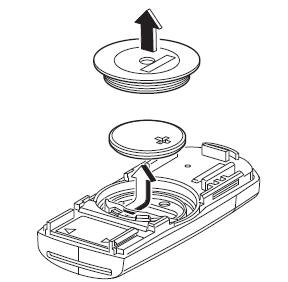
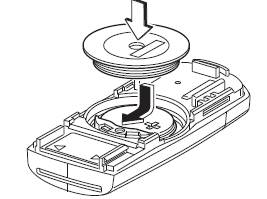
- Insert a new battery with the positive pole facing up, and then cover the battery with the battery cap.
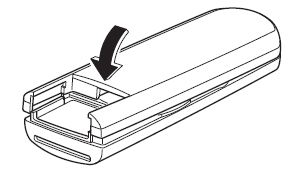
- Close the cover.
- Reinsert the auxiliary key.
CAUTION
|
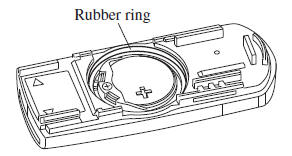
 Battery
WARNING
Wash hands after handling the battery and related accessories:
Battery posts, terminals and related accessories contain lead and lead
compounds,
chemicals known to the Stat ...
 Tires
Tires
For reasons of proper performance, safety,
and better fuel economy, always maintain
recommended tire inflation pressures and
stay within the recommended load limits
and weight distribution.
...
Other materials:
Suspension SST
49 T034 1A0
Coil spring compressor set
49 0180 510B
Preload measuring attachment
49 B034 001
Guide
49 B034 002
Guide
49 T028 3A0
Ball joint puller set
...
Seat Warmer
The front seats are electrically heated. The
ignition must be switched ON.
Press the seat warmer switch to illuminate
the indicator light while the ignition
is switched ON. The mode changes as
follows each time the seat warmer switch
is pressed.
WARNING
Be careful when using t ...
Air Bleeding
CAUTION:
If the strainer is removed, impurities may penetrate the power steering system
and damage it. To prevent this, always bleed air with the strainer installed.
Do not maintain the steering wheel fully turned for 5 s or more. The oil
temperature could rise and damage ...
