Mazda 3 Service Manual: Climate Control Unit Disassembly/Assembly [Manual Air Conditioner]
1. Disassemble in the order indicated in the figure.

|
1 |
Dial |
|
2 |
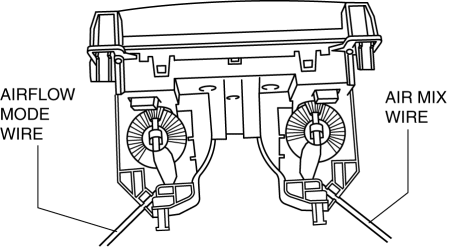
Airflow mode wire (See Wire Removal Note.) (See Wire Installation Note.) |
|
3 |
Air mix wire (See Wire Removal Note.) (See Wire Installation Note.) |
|
4 |
Bulb |
|
5 |
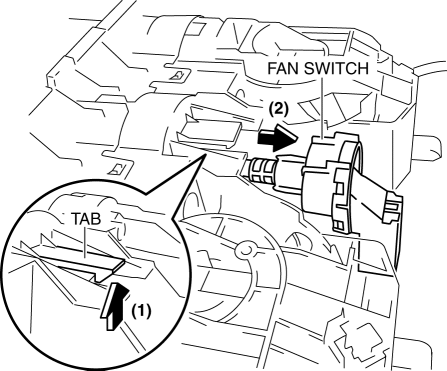
Fan switch (See Fan Switch Removal Note.) |
|
6 |
Climate control unit |
2. Assemble in the reverse order of disassembly.
Wire Removal Note
1. Remove in the order indicated in the figure.
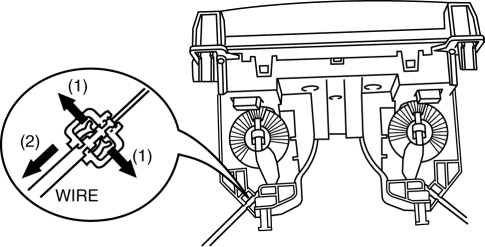
Wire Installation Note
1. Install as shown in the figure.
Fan Switch Removal Note
1. Pull up the tab (1) and remove the fan switch (2).
 Blower Motor Removal [Manual Air Conditioner]
NOTE:
The blower motor is located on the A/C unit as shown in the figure.
Perform the work from the front passenger side in the posture shown in the
figure.
1. Set ...
 Climate Control Unit Inspection [Full Auto Air Conditioner]
1. Remove the climate control unit with the connector connected..
2. Switch the ignition to ON.
3. Connect the negative (-) lead of the tester to body ground.
4. By inserting the positive (+) le ...
Other materials:
Discharge Headlight Service Warnings
Discharge Headlight Service Warnings
To prevent electrical shock when replacing the discharge headlight bulb,
always perform the servicing with dry hands and in an area where it does not
get wet.
Never probe the discharge headlight bulb connector directly with a finger
o ...
Replacing Exterior Light Bulbs
Headlights (With xenon fusion
headlights)
Low/High beam bulbs
You cannot replace the low/high beam
bulbs by yourself. The bulbs must be
replaced at an Authorized Mazda Dealer.
Headlights (With halogen headlights)
Low-beam bulbs
If you are changing the right bulb, start
the engine, turn ...
Cruise Control Switch Inspection [Mzr 2.0, Mzr 2.5]
1. Remove the battery cover..
2. Disconnect the negative battery cable and wait for 1 min or more..
3. Remove the driver–side air bag module..
4. Disconnect the clock spring connector (part wiring harness-side).
5. Measure the resistance between clock spring terminals K and M (part wiring ...
