Mazda 3 Service Manual: Headliner Removal/Installation
1. Shift to the D (ATX) or 4th gear (MTX) position. (4SD)
2. Disconnect the negative battery cable..
3. Remove the rain sensor cover. (Vehicles with auto light/wiper system).
4. Disconnect the rain sensor connector. (Vehicles with auto light/wiper system)
5. Partially peel back the seaming welts.
6. Remove the following parts:
a. Sunroof seaming welt (vehicles with sunroof)
b. A-pillar trim.
c. Front scuff plate.
d. Rear scuff plate.
e. B-pillar lower trim.
f. Upper anchor of the front seat belt.
g. B-pillar upper trim.
h. Rear seat cushion.
i. Tire house trim.
j. Trunk side upper trim (5HB).
k. C-pillar trim.
l. Map light.
m. Sunvisor.
n. Assist handle.
7. Disconnect the microphone connecter. (Vehicles with headliner installation type)
8. Disconnect the roof wiring harness connector and remove the roof wiring harness connector clip from the body.
9. Disconnect the rear washer hose. (5HB)
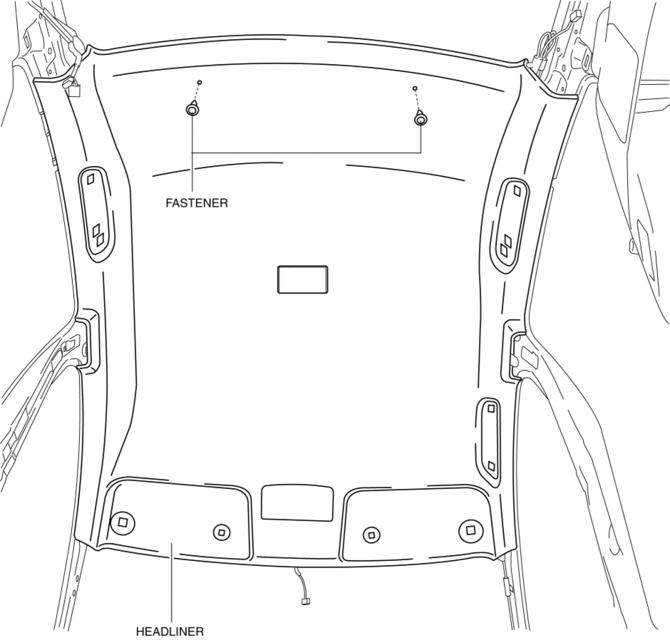
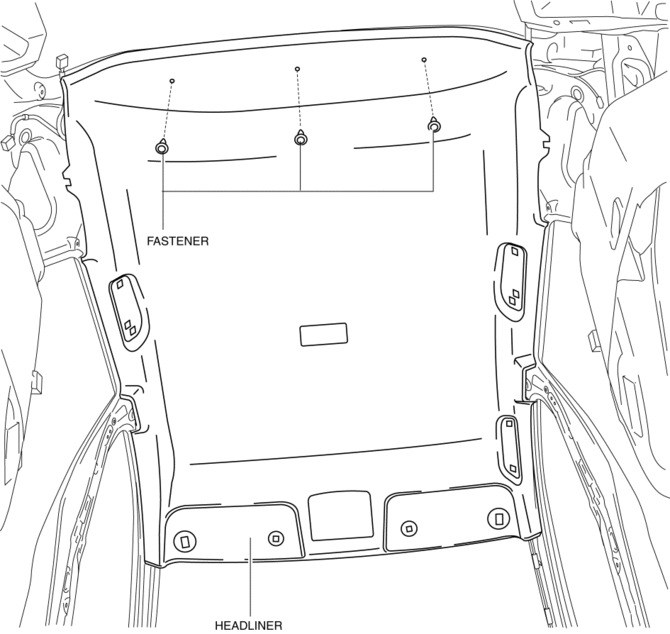
10. Remove the fasteners.
4SD

5HB

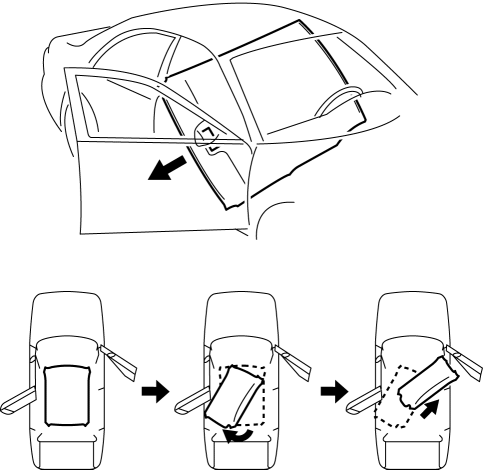
11. Take the headliner out from the opened front passenger-side door. (4SD)

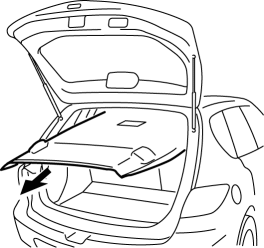
12. Take the headliner out from the opened liftgate. (5HB)

13. Install in the reverse order of removal.
 Sunroof Switch Removal/Installation
NOTE:
The sunroof switch is together with the front map light.
1. Disconnect the negative battery cable..
2. Remove the map light from the headliner..
3. Install in the reverse order ...
 Roof Molding Installation
1. Install the roof molding to the front T-stud.
2. Hook the roof molding to the clip and attach the roof molding while pressing
it in the direction of the arrow shown in the figure.
3. Inst ...
Other materials:
Trunk Side Trim Removal/Installation
4SD
Left-side
1. Remove the following parts:
a. Rear scuff plate.
b. Tire house trim.
c. Trunk mat.
d. Trunk board.
e. Trunk end trim.
f. Service hole cover
2. Remove the fasteners.
3. Install in the reverse order of removal.
Right-side
1. Remove the following parts:
a. Re ...
Oil Control Valve (OCV) Inspection [Mzr 2.0, Mzr 2.5]
Coil Resistance Inspection
1. Remove the battery cover..
2. Disconnect the negative battery cable..
3. Remove the plug hole plate..
4. Disconnect the OCV connector.
5. Measure the resistance between terminals A and B using an ohmmeter.
OCV coil resistance
6.9—7.9 ohms [20°C {6 ...
Antenna (4-Door)
AM/FM Radio Antenna
The AM/FM radio antenna receives both
AM and FM signals.
The antenna is embedded into the window
glass.
CAUTION
When washing the inside of the
window which has an antenna, use
a soft cloth dampened in lukewarm
water, gently wiping the antenna lines.
U ...
