Mazda 3 Service Manual: Keyless Antenna Removal/Installation
Interior, Front
1. Disconnect the negative battery cable..
2. Remove the following parts:
a. Upper panel.
b. Shift knob (MTX).
c. Selector lever knob (ATX).
d. Shift panel.
e. Side wall.
f. Center panel.
g. Audio unit.
h. Rear heat duct (1).
3. Disconnect the connector.
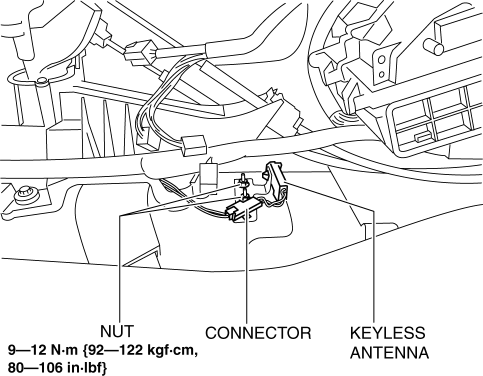
4. Remove the nuts.
5. Remove the keyless antenna.
6. Install in the reverse order of removal.
Interior, Rear
1. Disconnect the negative battery cable..
2. Remove the rear seat cushion..
3. Disconnect the connector.
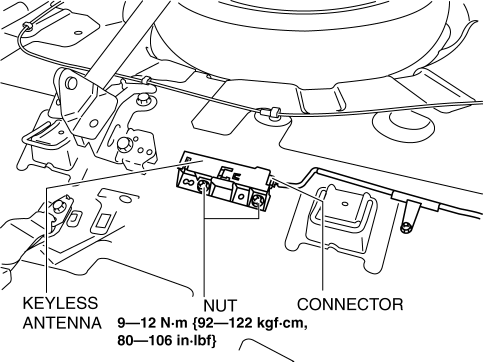
4. Remove the nuts.
5. Remove the keyless antenna.
6. Install in the reverse order of removal.
Exterior, Rear
1. Disconnect the negative battery cable..
2. Remove the rear combination light..
3. Remove the rear bumper..
4. Remove the nuts.
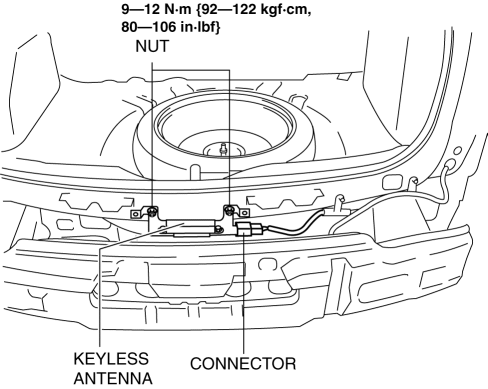
5. Disconnect the connector.
6. Remove the keyless antenna.
7. Install in the reverse order of removal.
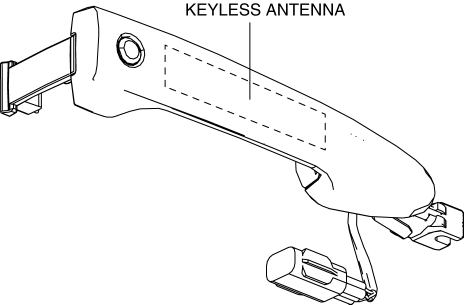
Exterior, LF/RF
NOTE:
-
The keyless antenna (vehicle exterior, LF/RF) is built into the front outer handle..
 Door Lock Switch Removal/Installation
1. Disconnect the negative battery cable..
2. Remove the inner garnish..
3. Remove the front door trim..
4. Remove the front inner handle..
5. Remove the screws, then remove the door lock swit ...
 Keyless Beeper Inspection
1. Disconnect the negative battery cable..
2. Remove the front mudguard..
3. Remove the keyless beeper..
4. When applying battery positive voltage to the keyless beeper, verify that
an electro ...
Other materials:
Operational Range
The system operates only when the driver
is in the vehicle or within operational
range while the key is being carried.
Starting the Engine
NOTE
Starting the engine may be possible
even if the key is outside of the vehicle
and extremely close to a door and
window, however, always start ...
Warranties for Your Mazda
New Vehicle Limited Warranty
Powertrain Limited Warranty
Safety Restraint System Limited Warranty
Anti-perforation Limited Warranty
Federal Emission Control Warranty/California Emission Control Warranty
Emission Defect Warranty
Emission Performance Warranty
Emission Control ...
Abbreviations
ABS
Antilock Brake System
ABDC
After Bottom Dead Center
ACC
Accessories
ALC
Auto Level Control
ALR
Automatic Locking Retractor
AT
Automa ...
