Mazda 3 Service Manual: Oil Cooler Removal/Installation [Fw6 A EL]
1. Remove the battery cover..
2. Disconnect the negative battery cable..
3. Remove the aerodynamic under cover NO.2..
4. Drain the ATF..
5. Drain the engine coolant..
6. Remove in the order indicated in the table.
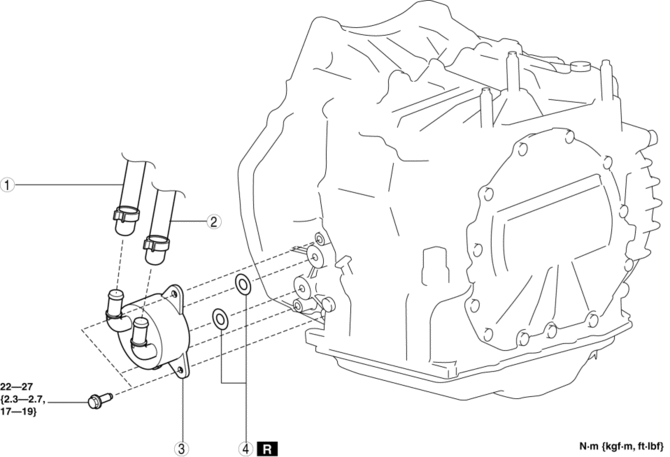
|
1 |
Water hose (connected to the water pipe) |
|
2 |
Water hose (connected to the outlet) |
|
3 |
Water-cooled oil cooler |
|
4 |
O-rings |
7. Install in the reverse order of removal.
8. Add the engine coolant..
9. Add the ATF..
10. Perform the “Mechanical System Test”..
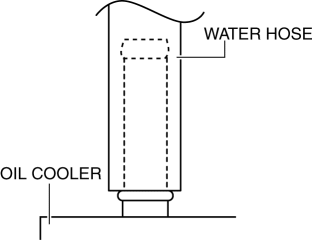
Water Hose Installation Note
1. Install the water hose to the oil cooler as shown in the figure with the hose clamp expanded.
NOTE:
-
A new water hose and hose clamp are attached.
2. Install the hose clamp to the position shown in the figure.
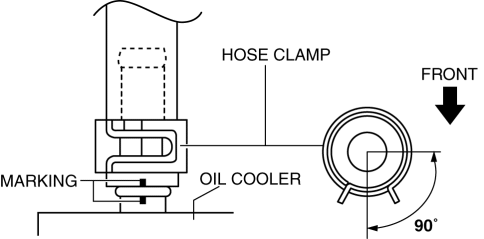
-
Verify that the installation angle of the hose clamp is within the range shown in the figure.
3. Verify that the hose clamp does not interfere with any other components.
 Oil Cooler Removal/Installation [FS5 A EL]
1. Remove the battery cover..
2. Disconnect the negative battery cable.
3. Remove the air cleaner component..
4. Remove the aerodynamic under cover NO.2..
5. Drain the ATF..
6. Drain the eng ...
 Oil Cooler Removal/Installation [Mzr 2.0, Mzr 2.5]
WARNING:
Hot engines and engine oil can cause severe burns. Turn off the engine and
wait until it and the engine oil have cooled.
A vehicle that is lifted but not securely supported ...
Other materials:
Brake Hose (Rear) Removal/Installation [Mzr 2.5, Mzr 2.3 Disi Turbo]
1. Remove in the order indicated in the table.
2. Install in the reverse order of removal.
3. Add brake fluid, bleed the brakes, and inspect for leakage after the installation
has been completed..
1
Brake pipe
(See Clip and Brake Pipe Installation Note.)
...
Vehicle Loading
WARNING
Do not tow a trailer with this vehicle:
Towing a trailer with this vehicle is dangerous because it has not been
designed to tow a
trailer and doing so will aff ect the drive system which could result in
vehicle damage.
This section will guide you in the proper l ...
Parking Brake Switch Inspection
1. Remove the upper panel..
2. Disconnect the parking brake switch connector.
3. Verify that the continuity is as indicated in the table.
If not as indicated in the table, replace the parking brake lever.
...
