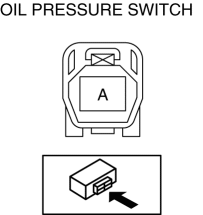
Mazda 3 Service Manual: Oil Pressure Switch Inspection
MZR 2.0, MZR 2.5, MZR 2.3 DISI Turbo
WARNING:
-
A hot engine can cause severe burns. Turn off the engine and wait until it is cool before removing the exhaust system.
1. Disconnect the negative battery cable..
2. Remove the aerodynamic under cover No.2..
3. Remove the oil pressure switch..
4. Apply air pressure of approx. 40 kPa {0.41 kgf/cm2, 5.8 psi} to the oil pressure switch as shown in the figure.

5. Measure continuity between oil pressure switch terminal A and the thread area.
-
If there is any malfunction, replace the oil pressure switch.
|
Measurement condition |
Continuity |
|
Air pressure applied |
No |
|
Air pressure not applied |
Yes |
SKYACTIV-G 2.0
WARNING:
-
A hot engine can cause severe burns. Turn off the engine and wait until it is cool before removing the exhaust system.
1. Disconnect the negative battery cable..
2. Remove the aerodynamic under cover No.2..
3. Remove the oil pressure switch..
4. Apply air pressure of approx. 120 kPa {1.22 kgf/cm2, 17.4 psi} to the oil pressure switch as shown in the figure.
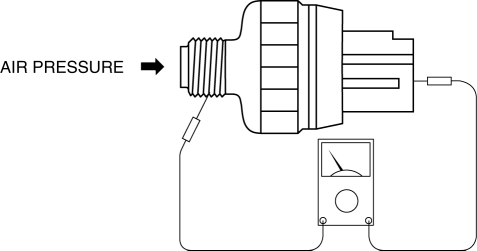
5. Measure continuity between oil pressure switch terminal A and the thread area.
-
If there is any malfunction, replace the oil pressure switch.
|
Measurement condition |
Continuity |
|
Air pressure applied |
No |
|
Air pressure not applied |
Yes |
 Transaxle Oil Replacement [G66 M R]
1. Park the vehicle on level ground.
2. Remove the aerodynamic under cover No.2..
3. Remove the drain plug and washer.
4. Drain the oil into a suitable container.
5. Install a new washer a ...
 Oil Pressure Switch Inspection [FS5 A EL]
CAUTION:
Water or foreign objects entering the connector can cause a poor connection
or corrosion. Be sure not to drop water or foreign objects on the connector
when disconnecting it.
...
Other materials:
Inside rear view mirror
In the Subaru Solterra, the inside rear view mirror is designed to
provide a clear and accurate view of the area behind the vehicle, allowing the driver
to maintain full awareness of surrounding traffic conditions.
Adjusting the height of rear view mirror
The position of the rear view mirror i ...
Seat Weight Sensor Calibration [Two Step Deployment Control System]
CAUTION:
If any of the following work is performed, perform the seat weight sensor
calibration using the M-MDS.
Replacement with a new seat weight sensor
Replacement with a new seat weight sensor control module
Replacement with new passenger-side seat pa ...
Clutch Pedal Inspection [C66 M R]
NOTE:
For the clutch pedal inspection, note the followings and measure each inspection
location.
Measure the center of the upper surface of the pedal pad for each inspection.
If the distance from the pedal pad to the floor covering is measured,
measure the shor ...
