Mazda 3 Service Manual: Rear Beltline Molding Removal/Installation
1. Fully open the rear door glass.
2. Remove the rear door trim..
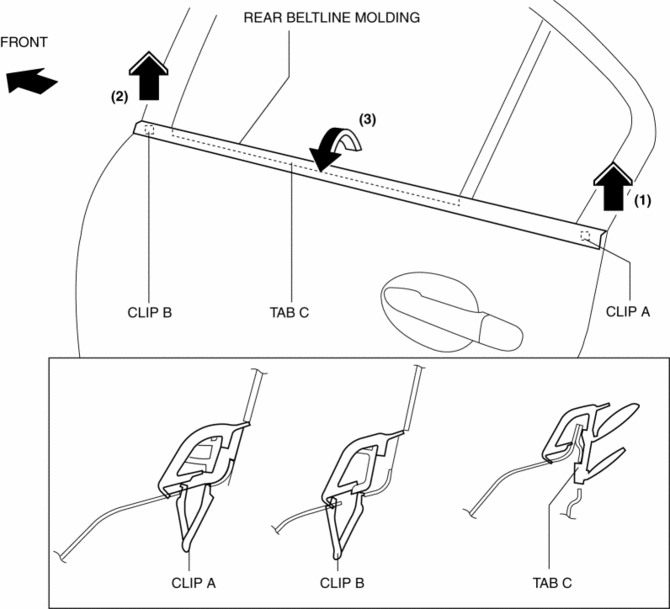
3. Remove clip A using a fastener remover and pull up the rear beltline molding in the direction of the arrow (1) shown in the figure.
4. Remove clip B using a fastener remover and pull up the rear beltline molding in the direction of the arrow (2) shown in the figure.
5. Rotate the rear beltline molding in the direction of the arrow (3) shown in the figure and remove it while detaching tabs C.
6. Install in the reverse order of removal.
 Front Mudguard Removal/Installation
1. Remove screw A, fasteners B, screws C, fasteners D, and E.
2. Remove the front mudguard in the direction of the arrow shown in the figure.
3. Install in the reverse order of removal. ...
 Rear Bumper Disassembly/Assembly
1. Remove the License plate lights..
2. Disassemble in the order indicated in the table.
1
Fastener A
2
Bracket
3
...
Other materials:
Drive Plate Removal/Installation [Fw6 A EL]
1. Remove the transaxle..
2. Remove in the order indicated in the table.
1
Drive plate installation bolts
(See Drive Plate Installation Bolts Removal Note.)
(See Drive Plate Installation Bolts Installation Note.)
2
Backing plate
...
Drive Belt Auto Tensioner Inspection [Mzr 2.0, Mzr 2.5]
MZR 2.0
1. Remove the generator drive belt with the A/C drive belt still installed and
set it out of the way..
2. Verify that the drive belt auto tensioner moves smoothly in the operational
direction.
If it does not move smoothly, replace the drive belt auto tensioner..
3. T ...
Basic Operation Method
TOUCH & TAP
Touch or tap on the item indicated on the screen.
The operation is launched and the next item is displayed.
SLIDE
Touch the setting item displaying a slider bar.
Touch the slider with your finger and move to the desired level.
SWIPE
Touch the screen with ...
