Mazda 3 Service Manual: Joint Shaft Assembly [Mzr 2.3 Disi Turbo]
1. Assemble in the order indicated in the table.
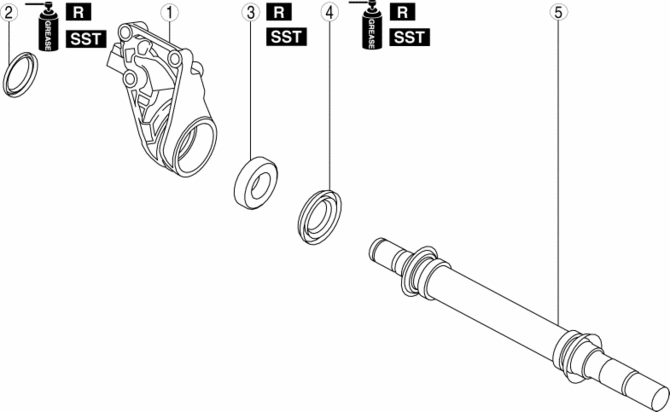
|
1 |
Bracket |
|
2 |
Dust seal (RH) . |
|
3 |
Bearing . |
|
4 |
Dust seal (LH) . |
|
5 |
Joint shaft . |
Dust Seal (RH) Assembly Note
1. Apply grease to a new dust seal lip.
2. Install the dust seal (RH) using the SST
.
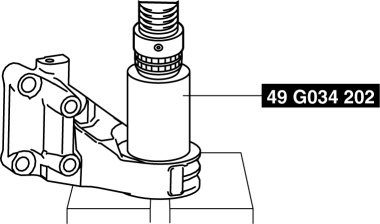
Bearing Assembly Note
1. Install a new bearing using the SSTs
.
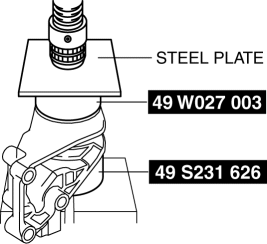
Dust Seal (LH) Assembly Note
1. Apply grease to a new dust seal lip.
2. Install a new dust seal (LH) using the steel plate and the SSTs
.
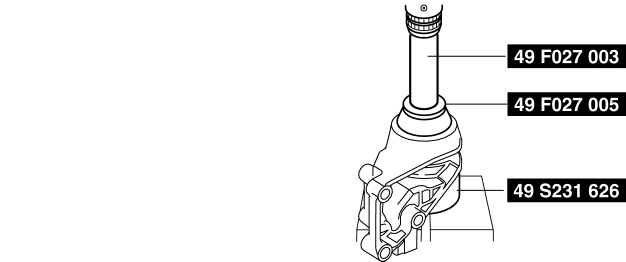
Joint Shaft Assembly Note
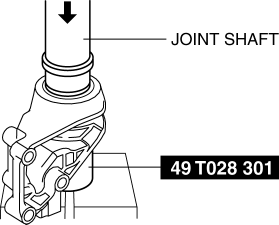
1. Press fit the joint shaft using the SST
and a press.
 Joint Shaft Assembly [Mzr 2.0, Mzr 2.5 (MTX)]
1. Assemble in the order indicated in the table.
1
Bracket
2
Dust seal (RH)
.
3
Bearing
.
4 ...
 Joint Shaft Assembly [Skyactiv G 2.0]
1. Assemble in the order indicated in the table.
1
Dust cover
.
2
Bearing
.
3
Snap ring
4
...
Other materials:
Oil Pressure Inspection [Mzr 2.0, Mzr 2.5]
WARNING:
Hot engines and engine oil can cause severe burns. Turn off the engine and
wait until it and the engine oil have cooled.
A vehicle that is lifted but not securely supported on safety stands is dangerous.
It can slip or fall, causing death or serious injury. Never work ...
Types of cameras and sensors used for the Advanced Park
The Subaru Solterra Advanced Park system relies on a network of high-precision
cameras and sensors designed to detect surrounding vehicles and environmental features,
helping the driver accurately identify suitable parking spaces and improve overall
parking efficiency.
Front camera
Sid ...
Fuel Injector Removal/Installation [Mzr 2.0, Mzr 2.5]
WARNING:
Fuel is very flammable liquid. If fuel spills or leaks from the pressurized
fuel system, it will cause serious injury or death and facility breakage. Fuel
can also irritate skin and eyes. To prevent this, always complete the “Fuel
Line Safety Procedure”, while referring ...
