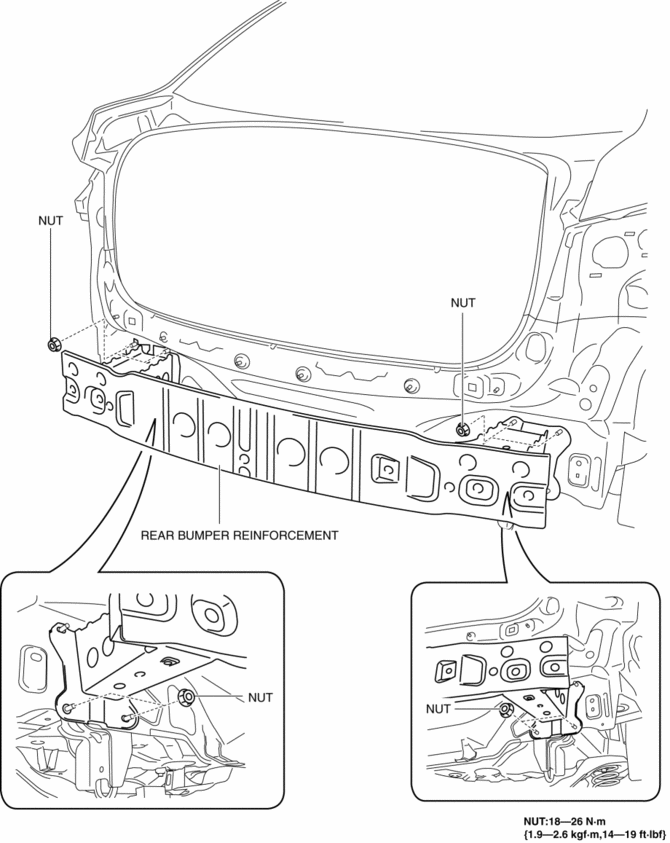
Mazda 3 Service Manual: Rear Bumper Reinforcement Removal/Installation
1. Disconnect the negative battery cable..
2. Remove the rear combination light..
3. Remove the rear bumper..
4. Remove the nuts and remove the rear bumper reinforcement.

5. Install in the reverse order of removal.
 Rear Bumper Disassembly/Assembly
1. Remove the License plate lights..
2. Disassemble in the order indicated in the table.
1
Fastener A
2
Bracket
3
...
 Rear Bumper Removal/Installation
4SD
1. Disconnect the negative battery cable..
2. Remove the rear combination light..
3. Remove the fastener A and screw B.
4. Remove the rear splash shield..
5. Remove the screws C.
...
Other materials:
Oil Seal (Differential) Replacement [A26 M R]
1. On level ground, jack up the vehicle and support it evenly on safety stands.
2. Drain the oil from the transaxle..
3. Remove the front tires..
4. Remove the splash shield..
5. Remove the aerodynamic under cover No.2..
6. Separate the drive shaft and joint shaft from the transaxle..
7 ...
Quick Release Connector Removal/Installation [Mzr 2.0, Mzr 2.5]
WARNING:
Fuel is very flammable liquid. If fuel spills or leaks from the pressurized
fuel system, it will cause serious injury or death and facility breakage. Fuel
can also irritate skin and eyes. To prevent this, always complete the “Fuel
Line Safety Procedure”, while referring to ...
Evaporator Temperature Sensor Inspection [Manual Air Conditioner]
NOTE:
Inspect the evaporator temperature sensor when it is installed to the A/C
unit.
1. Set the fan speed MAX HI.
2. Set the temperature control at MAX COLD.
3. Set the RECIRCULATE mode.
4. Turn the A/C switch off.
5. Close all doors and windows.
6. Wait for 5 min.
7. D ...
