Mazda 3 Service Manual: Shroud Panel Removal/Installation
CAUTION:
-
Because the shroud panel is installed to the bumper reinforcement, support the shroud panel using a jack before removing the bumper reinforcement so as not to apply excessive force to the shroud panel.
-
Since the servicing is performed with the hood open, secure the hood using a piece of wood to prevent it from falling.
1. Disconnect the negative battery cable..
2. Remove the following parts:
a. Front bumper.
b. Front combination lights.
c. Seal plate.
d. Front bumper reinforcement.
3. Disconnect the hood latch cable..
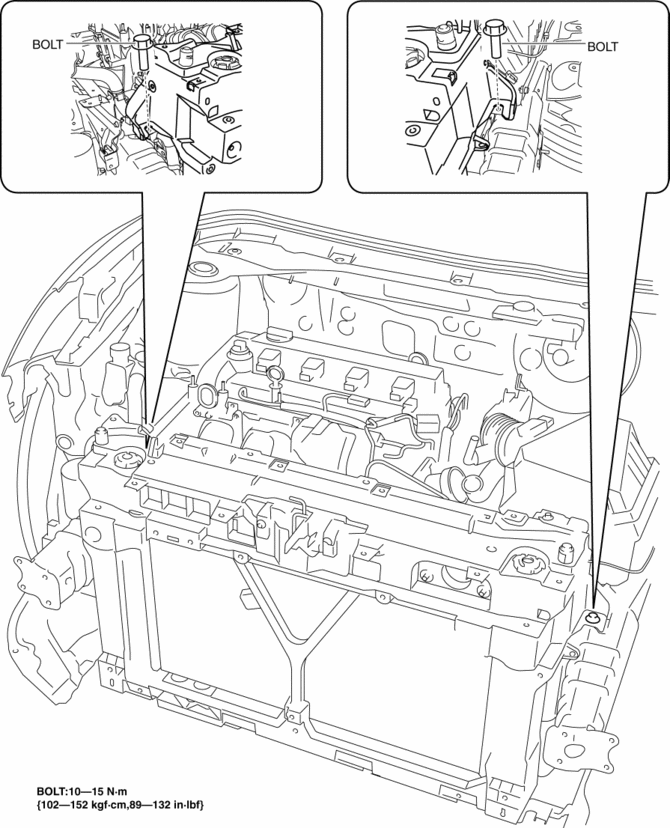
4. Remove the bolts.
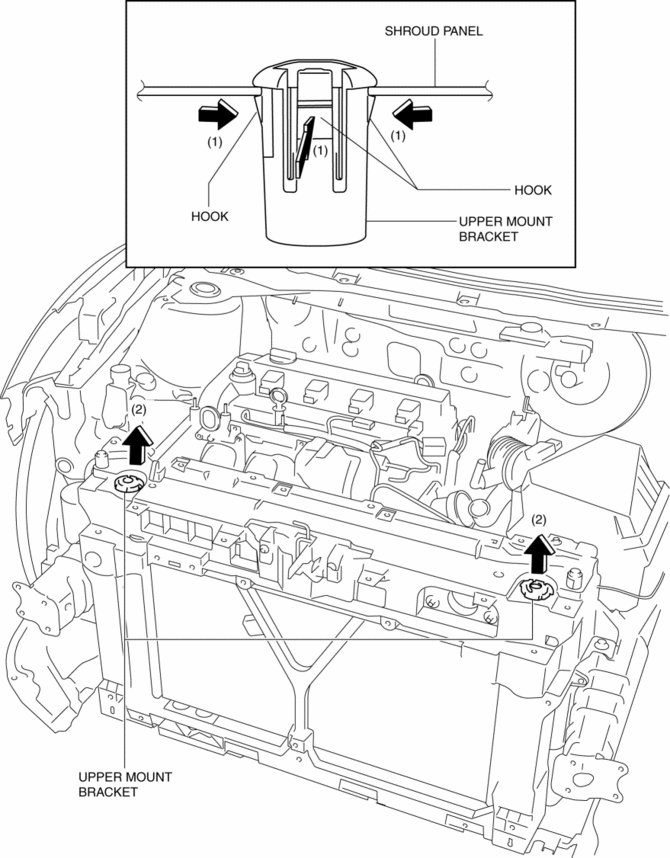
5. Push the hooks in the direction of arrow (1), and remove the upper mount bracket in the direction of the arrow (2).
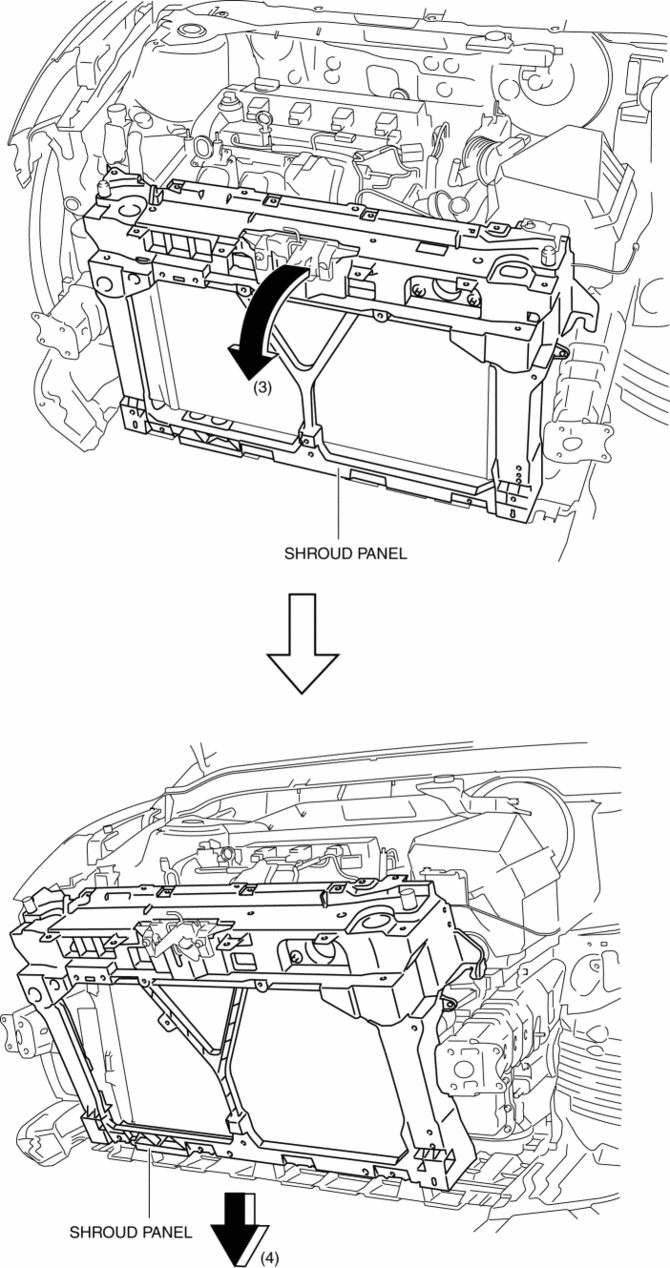
6. Pull the shroud panel in the direction of arrow (3) in the figure, and remove it in the direction of arrow (4).
CAUTION:
-
Support the lower surface of the radiator with a floor jack to prevent the radiator from falling off after the shroud panel is removed.
7. Install in the reverse order of removal.
 Radiator Removal/Installation [Mzr 2.0, Mzr 2.5]
WARNING:
Never remove the cooling system cap or loosen the radiator drain plug while
the engine is running, or when the engine and radiator are hot. Scalding engine
coolant and steam may ...
 Water Pump Removal/Installation [Mzr 2.0, Mzr 2.5]
WARNING:
Never remove the cooling system cap or loosen the radiator drain plug while
the engine is running, or when the engine and radiator are hot. Scalding engine
coolant and steam may ...
Other materials:
Brake Fluid Level Sensor Inspection
1. Disconnect the brake fluid level sensor connector from the master cylinder.
2. Inspect for continuity according to fluid level between the brake fluid level
sensor terminals.
If not as indicated in the table, replace the reserve tank.
...
ABS HU/CM Removal/Installation
WARNING:
If the ABS HU/CM configuration is not completed, it could result in an unexpected
accident due to the ABS being inoperative. If the ABS HU/CM or ABS CM is replaced,
always use the automatic configuration function so that the ABS operation conditions
are correct.
CAUTI ...
Clock Switch Inspection
NOTE:
Clock switch built with the hazard warning switch.
1. Disconnect the negative battery cable..
2. Remove the clock switch..
3. Verify resistance between the clock switch terminals.
If the resistance is not as specified, replace the clock switch.
Between t ...
