Mazda 3 Service Manual: Trunk Lid Opener Cable Removal/Installation
1. Disconnect the negative battery cable..
2. Remove the following parts:
a. Front seat (LH)(See FRONT SEAT REMOVAL/INSTALLATION.)
b. Front scuff plate (LH).
c. Rear scuff plate.
d. B-pillar lower trim.
e. Rear seat cushion.
f. Rear seat back.
g. Tire house trim (LH).
h. Trunk end trim.
i. Trunk side trim (LH).
j. Trunk lid opener lever.
3. Remove the blots and nut.
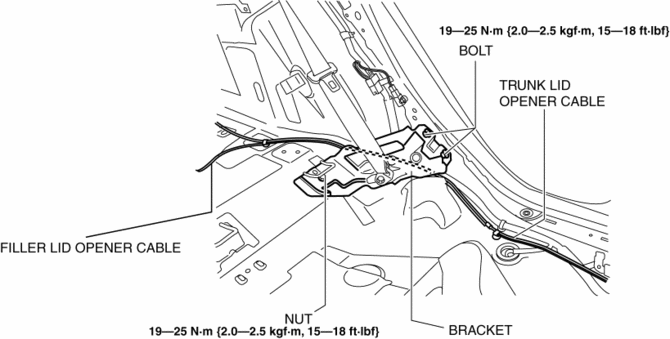
4. Remove the bracket.
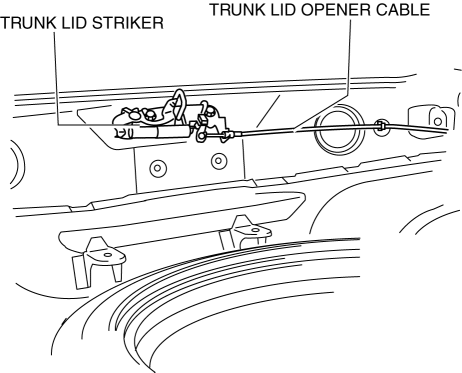
5. Disconnect the trunk lid striker from the trunk lid opener cable.
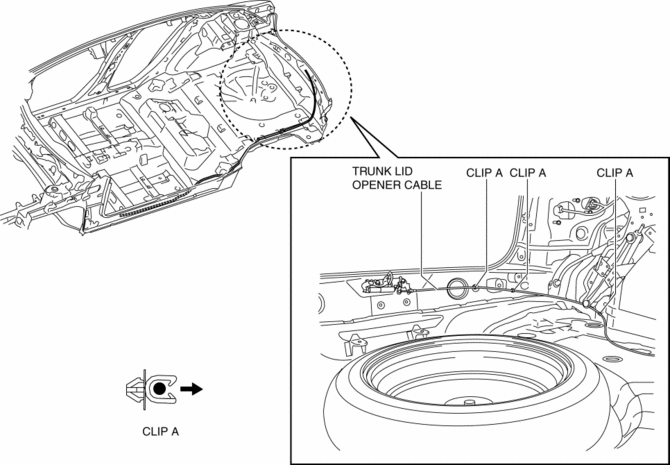
6. Remove the trunk lid opener cable from clips A.
7. Remove the trunk lid opener cable from clips B and C.

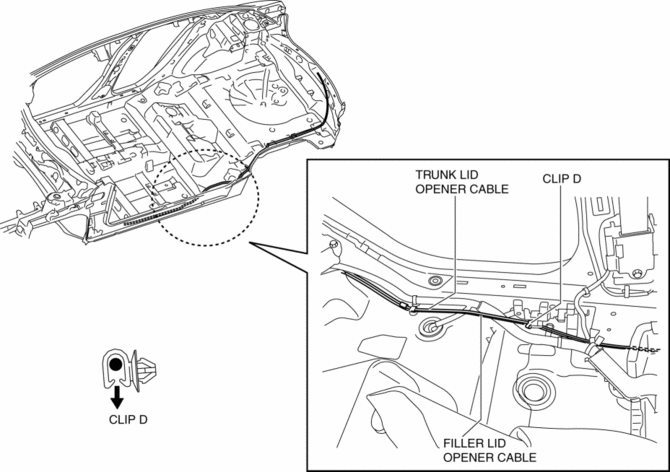
8. Remove the trunk lid opener cable from clips D.
9. Install in the reverse order of removal.
 Trunk Lid Lock Striker Removal/Installation
1. Remove the trunk end trim..
2. Disconnect the trunk lid lock striker from the trunk lid opener cable.
3. Remove the bolts, then remove the trunk lid lock striker.
4. Install in the revers ...
 Trunk Lid Opener Lever Removal/Installation
1. Remove the front scuff plate (LH)..
2. Remove the front side trim (LH)..
3. Remove the fuel-filler lid opener bezel..
4. Partially peel back the floor covering.
5. Remove the bolts.
...
Other materials:
Antenna Feeder No.5 Removal/Installation
1. Disconnect the negative battery cable..
2. Remove the following parts:
a. Front scuff plate (RH).
b. Front side trim (RH).
c. Rear scuff plate (RH).
d. B-pillar lower trim (RH).
e. Rear seat cushion.
f. Tire house trim (RH).
3. Partially peel back the floor covering.
4. Disconne ...
Electrical System
Electrical Parts
Battery cable
Before disconnecting connectors or removing electrical parts, disconnect
the negative battery cable.
Wiring Harness
To remove the wiring harness from the clip in the engine room, pry up the
hook of the clip using a flathead screwdriver. ...
Oil Cooler Removal/Installation [Fw6 A EL]
1. Remove the battery cover..
2. Disconnect the negative battery cable..
3. Remove the aerodynamic under cover NO.2..
4. Drain the ATF..
5. Drain the engine coolant..
6. Remove in the order indicated in the table.
1
Water hose (connected to the water pipe)
...
