Subaru Solterra 2023-2026 Owner's Manual: Charging equipment
Charging equipment and names
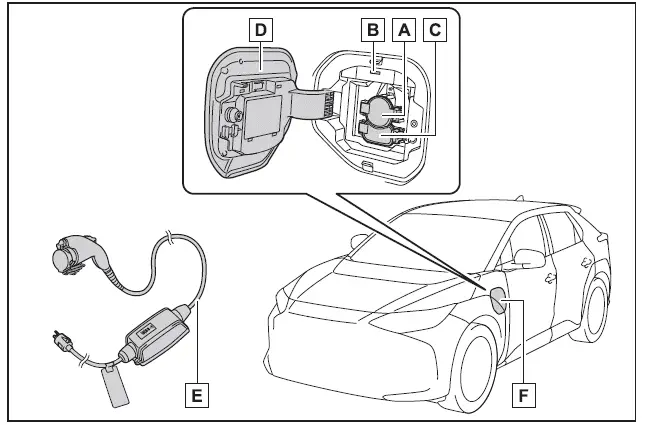
- AC charging inlet
- Charging indicator and charging inlet light
- DC charging inlet
- Charging port lid
- AC charging cable (if equipped)*
- Charging port
*: For safe handling procedures and precautions related to the AC charging cable, always refer to the dedicated manual provided with the Subaru Solterra.
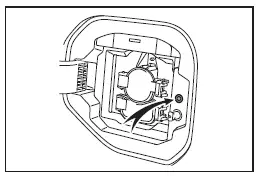
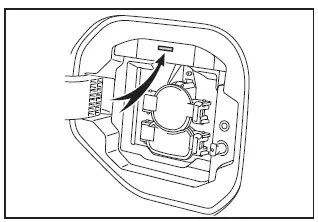
Opening/closing the charging port lid
■ Open
To access the charging port on the Subaru Solterra, gently press the rear edge of the charging port lid as indicated in the illustration. Once released, manually open the lid fully.
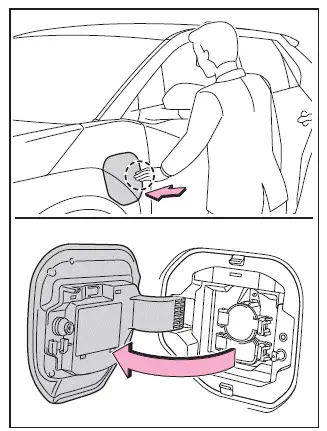
■ Close
To close the charging port lid, first position it slightly open, then press the rear edge firmly until it securely locks into place.
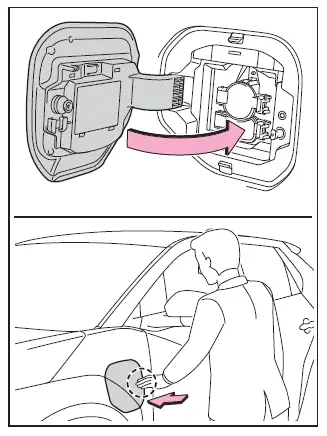
■ About lid lifter
- If the lid lifter is pressed inward before closing the charging port lid, the lid may not close properly. In this case, ensure the vehicle is unlocked, press the lid again to release the lifter mechanism, and then close the charging port lid securely.
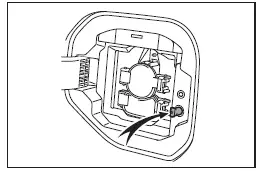
■ About the charging port lid open/close detection switch
When the charging port lid of the Subaru Solterra is open, avoid touching the detection switch located near the lid mechanism.
Accidental contact with this switch may cause the system to incorrectly detect the lid status, potentially resulting in inaccurate system notifications.
Charging indicator
The Subaru Solterra charging indicator uses different illumination and flashing patterns to inform the driver about the current charging status.
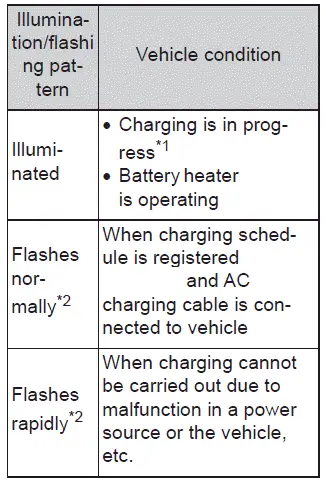
*1: The indicator light becomes dim once charging is fully completed
*2: The indicator flashes for a certain period and then turns off automatically.
Understanding these indicators helps Subaru Solterra drivers better monitor charging progress and ensure the vehicle is ready for efficient and reliable operation.
 Driving range
The driving range displayed on the multi-information display of the
Subaru Solterra represents an estimated reference distance based on current conditions.
The actual distance that can be traveled ...
 AC charging cable
This section explains the functionality, proper handling procedures,
and safety considerations for the AC charging cable used with the Subaru Solterra,
ensuring efficient and secure charging in ev ...
Other materials:
Rear ABS Wheel Speed Sensor Removal/Installation
1. Remove the under cover..
2. Remove in the order indicated in the table.
3. Install in the reverse order of removal.
1
Connector
2
Bolt
3
Rear ABS wheel-speed sensor
4
ABS hole cov ...
Coupler Component Removal/Installation [Fw6 A EL]
WARNING:
A hot transaxle and ATF can cause severe burns. Turn off the engine and wait
until they are cool.
Always wear protective eye wear when using the air compressor. If the air
compressor is used, any particles of dirt or soiling could spatter and get into
the eyes.
...
Outer Mirror Garnish Removal/Installation
1. Disconnect the negative battery cable..
2. Remove the outer mirror glass from the outer mirror..
3. Pinch the end of the tab which is visible, and release the tab by pressing
it toward the vehicle front (3 locations).
4. Grasp the upper side of the outer mirror garnish and remove it b ...
