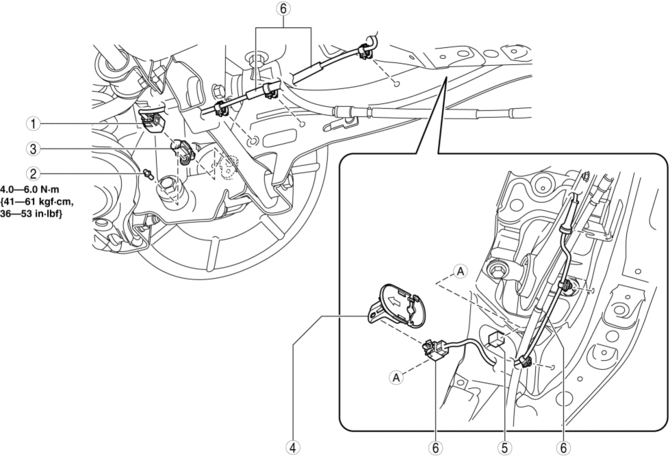
Mazda 3 Service Manual: Rear ABS Wheel Speed Sensor Removal/Installation
1. Remove the under cover..
2. Remove in the order indicated in the table.
3. Install in the reverse order of removal.
|
1 |
Connector |
|
2 |
Bolt |
|
3 |
Rear ABS wheel-speed sensor |
|
4 |
ABS hole cover . |
|
5 |
Connector |
|
6 |
Rear ABS wheel-speed sensor wiring harness (See Rear ABS Wheel-speed Sensor Wiring Harness Installation Note.) |
ABS Hole Cover Removal Note
1. Press the tab of the ABS hole cover to separate the ABS hole cover from the body.
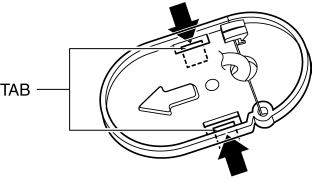
2. Remove the ABS hole cover from the body.
Rear ABS Wheel-speed Sensor Wiring Harness Installation Note
1. Pass the rear ABS wheel-speed sensor wiring harness outside the rear parking brake cable as shown in the figure.
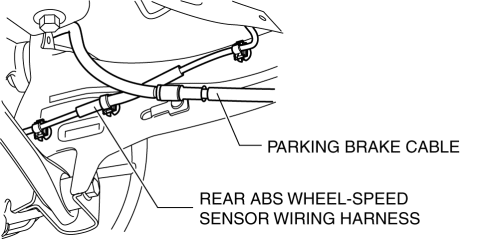
2. Install the rear ABS wheel-speed sensor wiring harness.
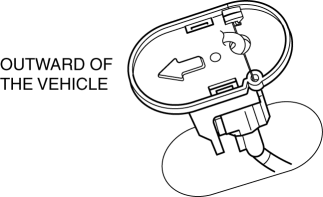
ABS Hole Cover Installation Note
1. Install the ABS hole cover into the body so that the arrow on it is facing toward the outer side of the vehicle.
 Rear ABS Wheel Speed Sensor Inspection
Installation Visual Inspection
1. Inspect for the following:
If there is any malfunction, replace the part.
a. Excessive looseness or play of the rear ABS wheel-speed sensor
b. Deform ...

Other materials:
DSC HU/CM Inspection
1. Disconnect the DSC HU/CM connector..
2. Connect the negative battery cable..
3. Attach the tester lead to the DSC HU/CM wiring harness-side connector and
inspect voltage, continuity, or resistance according to the standard (reference)
on the table.
Standard (Reference)
...
Forced Ignition On [With Advanced Keyless Entry And Push Button Start System]
NOTE:
In order to perform a forced ignition ON, the M-MDS (IDS) is necessary. If
the servicing is being done outside of an Authorized Mazda dealership, contact
an Authorized Mazda dealership for instructions.
The forced ignition ON procedure forces a power supply to each part w ...
Available Language (Type A)
The available languages are English,
Spanish, and Canadian French. If the
language setting is changed, all of the
voice guidance and voice input commands
are done in the selected language.
NOTE
If the language setting is changed,
device registration is maintained.
Phonebook records are ...
