Mazda 3 Owners Manual: Overhead Lights
With Map Lights
Front

Rear
Without Map Lights
NOTE (With map lights) The rear overhead light also turn on and off when the front overhead light switch is operated.
Map Lights *
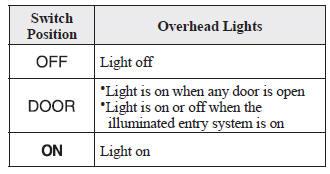
When the overhead light switch is in the door or off position, press the lens to illuminate the map lights, and then press the lens again to turn them off.
NOTE The map lights will not turn off even if the lens is pressed in the following cases:
- The overhead light switch is in the ON position.
- The overhead light switch is in the door position with the door open.
- The illuminated entry system is on.
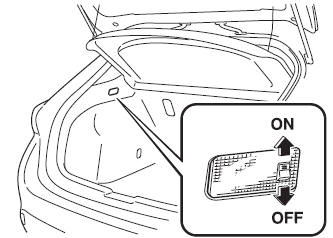
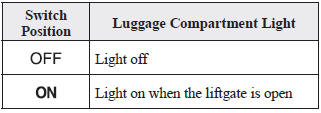
Luggage Compartment Lights (5–door)
Trunk Light (4–door)
The trunk light is on when the lid is open and off when it's closed.
NOTE To prevent the battery from being discharged, do not leave the trunk open for a long period when the engine is not running.
 Interior Lights
...
 Illuminated Entry System
When the illuminated entry system
operates, the overhead light (switch is in
the DOOR position) turn on for:
About 30 seconds after the driver's door
is unlocked and the ignition is switched
...
Other materials:
Operational Range
WARNING
Always take all children and pets with
you or leave a responsible person with
them:
Leaving a child or a pet unattended in
a parked vehicle is dangerous. In hot
weather, temperatures inside a vehicle
can become high enough to cause
brain damage or even death.
...
Front Beltline Molding Removal/Installation
1. Fully open the front door glass.
2. Disconnect the negative battery cable..
3. Remove the inner garnish..
4. Remove the front door trim..
5. Remove the power outer mirror..
6. Remove clip A using a fastener remover and pull the front beltline molding
in the direction of the arrow (1) ...
Auto Dimming Mirror Removal
1. Disconnect the negative battery cable.
2. Remove the screw.
3. Disconnect the auto-dimming mirror connector.
4. Pull out the rearview mirror toward the vehicle rear.
CAUTION:
When removing the rearview mirror, it may hit the headliner and cause damage.
Hold the ...
