Mazda 3 Owners Manual: Storage Compartments
| WARNING
Keep storage boxes closed when
driving:
Driving with the storage boxes open is
dangerous. To reduce the possibility of
injury in an accident or a sudden stop,
keep the storage boxes closed when
driving.
Do not put articles in storage spaces with no lid: Putting articles in storage spaces with no lid is dangerous as they could be thrown around the cabin if the vehicle is suddenly accelerated and cause injury depending on how the article is stored. |
| CAUTION Do not leave lighters or eyeglasses in the storage boxes while parked under the sun. A lighter could explode or the plastic material in eyeglasses could deform and crack from high temperature. |
Overhead Console *
This console box is designed to store eyeglasses or other accessories.
Push and release to open.
Glove Compartment
To open the glove compartment, pull the latch toward you.
To close the glove compartment, firmly press in the center of the glove compartment lid.
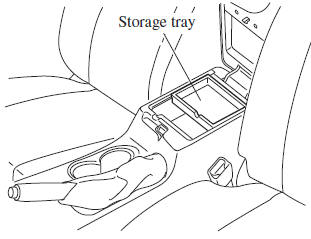
Center Console
To open, pull the release latch
Storage tray
The storage tray can be removed.
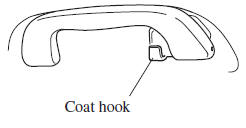
Rear Coat Hooks
| WARNING Never hang heavy or sharp objects on the assist grips and coat hooks: Hanging heavy or sharp-ended objects such as a coat hanger from the assist grips or coat hooks is dangerous as they can fl y off and hit an occupant in the cabin if a curtain air bag was to deploy, which could result in serious injury or death |
Always hang clothes on the coat hooks and the assist grips without hangers.
 Bottle Holder
Bottle holders are on the inside of the
doors.
CAUTION
Do not use the bottle holders for
containers without caps. The contents
may spill when the door is opened or
closed.
...
 Maintenance and Care
How to keep your Mazda in top condition. ...
Other materials:
Rear Washer Nozzle Removal/Installation
1. Disconnect the negative battery cable..
2. Remove the following parts:
a. Liftgate upper trim.
b. Rear spoiler.
c. High-mount brake light.
3. Disconnect the rear washer hose.
4. Press the tabs and remove the rear washer nozzle.
5. Install in the reverse order of removal.
6. Ad ...
Ignition Coil/Ion Sensor Removal/Installation [Skyactiv G 2.0]
1. Remove the battery cover..
2. Disconnect the negative battery cable..
3. Remove the plug hole plate..
4. Remove the plug hole plate bracket..
5. Remove in the order indicated in the table.
6. Install in the reverse order of removal.
1
Connector
...
Rear Lower Arm Removal/Installation
1. Disconnect the auto leveling sensor link lower side. (Vehicles with AFS).
2. Remove in the order indicated in the table.
3. Install in the reverse order of removal.
4. Inspect the wheel alignment and adjust it if necessary..
1
Rear coil spring component
.
...
