Mazda 3 Service Manual: Antenna Amplifier Inspection
1. Disconnect the negative battery cable..
2. Remove the rain sensor cover. (Vehicles with auto light/wiper system).
3. Disconnect the rain sensor connector. (Vehicles with auto light/wiper system)
4. Partially peel back the seaming welts.
5. Remove the following parts:
a. Sunroof seaming welt (vehicles with sunroof)
b. A-pillar trim.
c. Front scuff plate.
d. Rear scuff plate.
e. B-pillar lower trim.
f. Upper anchor of the front seat belt.
g. B-pillar upper trim.
h. Rear seat cushion.
i. Tire house trim.
j. C-pillar trim.
k. Map light.
l. Sunvisor.
m. Assist handle.
n. Headliner.
6. Connect the negative battery cable..
7. Switch the ignition to ON.
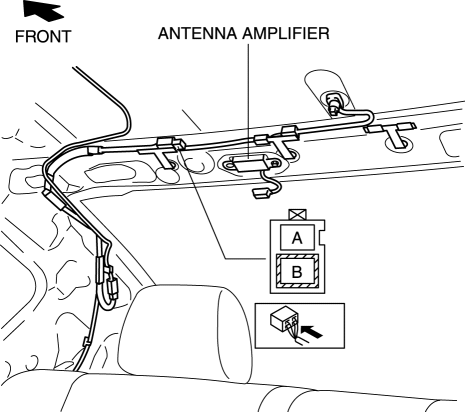
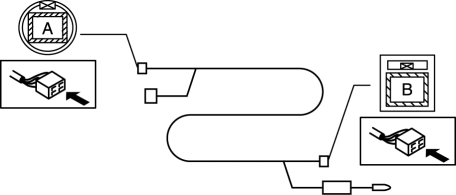
8. Verify that voltage is B+ at the antenna amplifier terminal A.
With audio unit (without display)
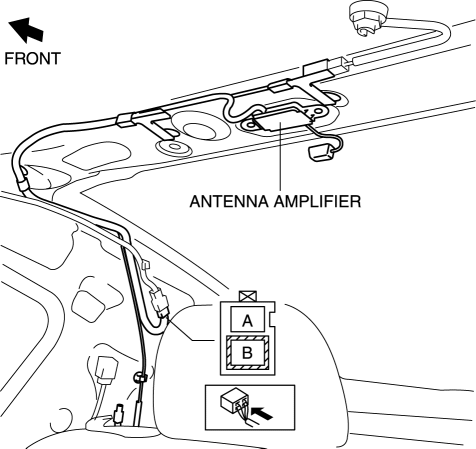
With audio unit (with display)
-
If the battery voltage can be verified, replace the antenna amplifier.
9. Verify that the continuity between antenna amplifier terminals is as indicated in the table. (with SIRIUS satellite radio system)
-
If not as indicated in the table, replace antenna amplifier.

 Entertainment
...
 Antenna Amplifier Removal/Installation
With Audio Unit (Without Display)
1. Disconnect the negative battery cable..
2. Remove the rain sensor cover. (Vehicles with auto light/wiper system).
3. Disconnect the rain sensor connector. (Ve ...
Other materials:
Front ABS Wheel Speed Sensor Inspection
Sensor Output Value Inspection
CAUTION:
Resistance inspection using other testers may cause damage to the ABS wheel-speed
sensor internal circuit. Be sure to use the M-MDS to inspect the ABS wheel-speed
sensor.
1. Switch the ignition to off.
2. Connect the M-MDS to the DLC-2. ...
Operation of Automatic Air
Conditioning
Press the AUTO switch. Selection
of the airflow mode, air intake
selector and amount of airflow will be
automatically controlled.
Use the temperature control dial to
select a desired temperature.
Press the DUAL switch or turn the
front passenger temperature control
dial to control ...
Restraints SST [Two Step Deployment Control System]
49 H066 002
Deployment tool
49 D066 002
Adapter harness
49 L066 002
Adapter harness
49 G066 003
Adapter harness
49 N088 0A0
Fuel and Thermometer checker
...
