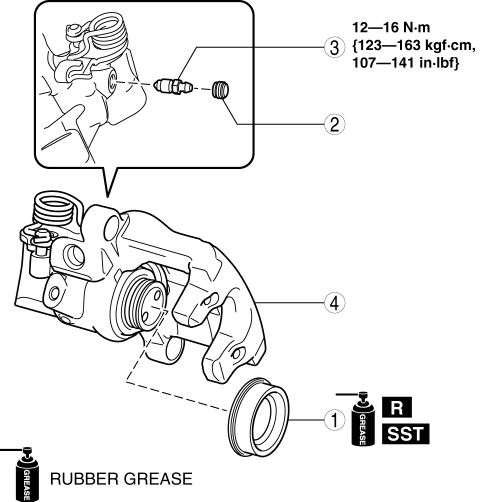
Mazda 3 Service Manual: Caliper (Rear) Disassembly/Assembly
1. Disassemble in the order indicated in the table.
|
1 |
Dust seal (See Dust Seal Assembly Note.) |
|
2 |
Bleeder cap |
|
3 |
Bleeder screw |
|
4 |
Caliper body |
2. Assemble in the reverse order of disassembly.
Dust Seal Assembly Note
1. While rotating the piston counterclockwise using the SST
, pull it out to the position shown in the figure.
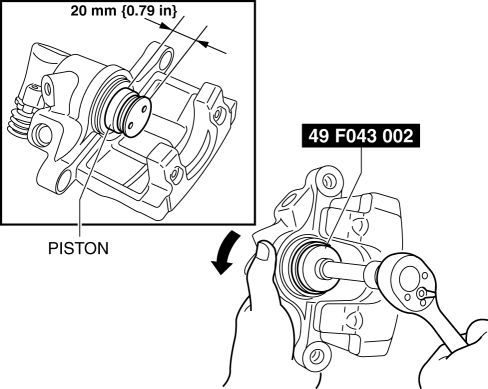
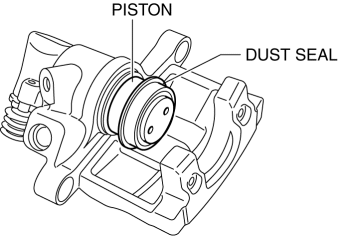
2. As shown in the figure, assemble a new dust seal to the piston.
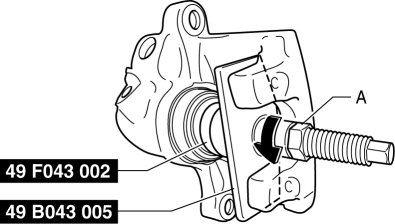
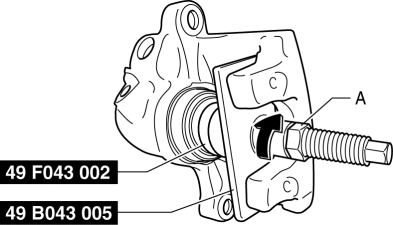
3. Install the SST
(49 F043 002) to the SST
(49 B043 005).
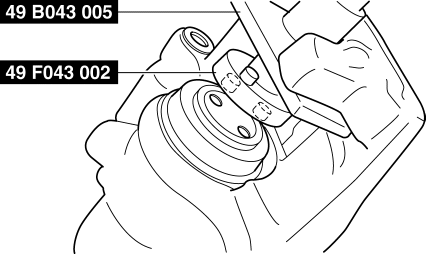
4. Align the SST
projection to the piston groove.
5. Rotate part A on the SST
in the direction of the arrow and secure the SST
to the caliper.
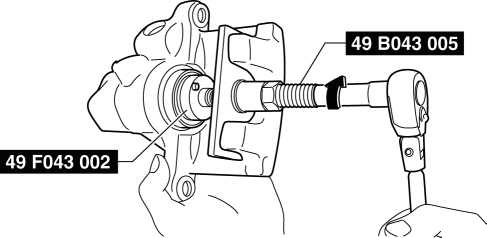
6. Rotate the SST
(49 B043 005) in the direction of the arrow and push the piston completely into the caliper.
NOTE:
-
Even with the piston completely pushed in, the top of the piston projects from the dust seal by approximately 2 mm
{0.09 in}
.
7. Rotate part A on the SST
(49 B043 005) in the direction of the arrow using the tool and remove the SST
from the caliper.
8. Assemble the dust seal to the caliper body using the SSTs
and a press with a press-in force of 834 N {85 kgf, 187 lbf}
.
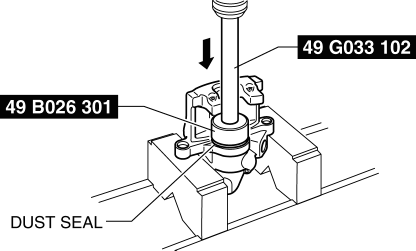
9. Verify that there is no gap between the dust seal and caliper body.
 Caliper (Front) Disassembly/Assembly [Mzr 2.3 Disi Turbo]
1. Disassemble in the order indicated in the table.
1
Bleeder cap
2
Bleeder screw
3
Piston
(See Piston Disassem ...
 Front Brake (Disc) Inspection
Brake Judder Repair Hints
Description
1. Brake judder concern has the following 3 characteristics:
Steering wheel vibration
1. The steering wheel vibrates in the rotation direction. This characte ...
Other materials:
Drive mode select switch
The drive modes of the Subaru Solterra can be adjusted to match different
driving conditions, ensuring optimal performance, efficiency, and comfort.
Selecting a drive mode
By pressing the drive mode select switch, the Subaru Solterra cycles through
three distinct driving modes: Power mode, Nor ...
Glass Antenna Inspection
4SD
1. Disconnect the negative battery cable..
2. Disconnect the antenna amplifier connector B..
3. Disconnect the antenna feeder No.3 connector C. (with audio unit (with display)).
4. Inspect the glass antenna for damage visually.
5. Inspect for continuity between the glass antenna termin ...
On Board Diagnostic System Simulation Inspection [FS5 A EL]
1. Connect the M-MDS(IDS) to the DLC-2.
2. After the vehicle is identified, select the following items from the initialization
screen of the IDS.
a. Select "DataLogger".
b. Select "Modules".
c. Select "TCM".
3. Select the simulation items from the PID ta ...
