Mazda 3 Service Manual: Center Roof Antenna Removal/Installation
4SD
1. Disconnect the negative battery cable..
2. Remove the rain sensor cover. (Vehicles with auto light/wiper system).
3. Disconnect the rain sensor connector. (Vehicles with auto light/wiper system)
4. Partially peel back the seaming welts.
5. Remove the following parts:
a. Sunroof seaming welt (vehicles with sunroof)
b. A-pillar trim.
c. Front scuff plate.
d. Rear scuff plate.
e. B-pillar lower trim.
f. Upper anchor of the front seat belt.
g. B-pillar upper trim.
h. Rear seat cushion.
i. Tire house trim.
j. C-pillar trim.
k. Map light.
l. Sunvisor.
m. Assist handle.
n. Headliner.
6. Disconnect the connector.
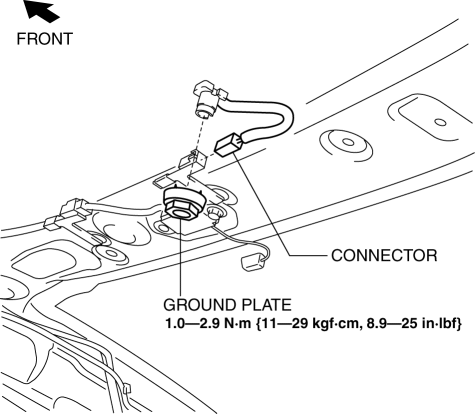
7. Remove the ground plate.
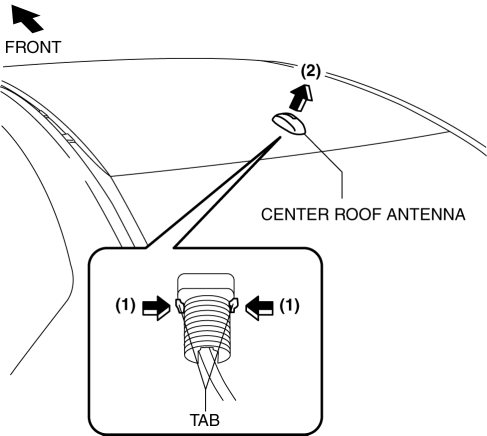
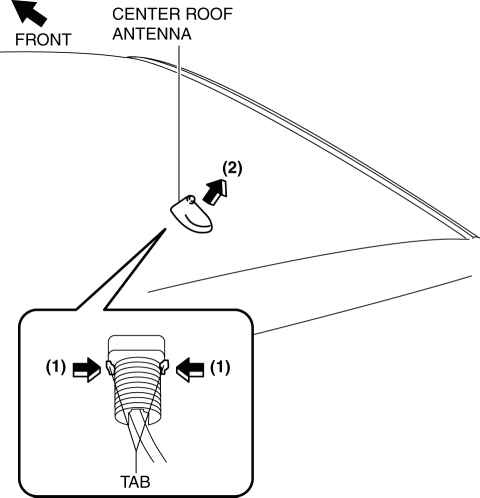
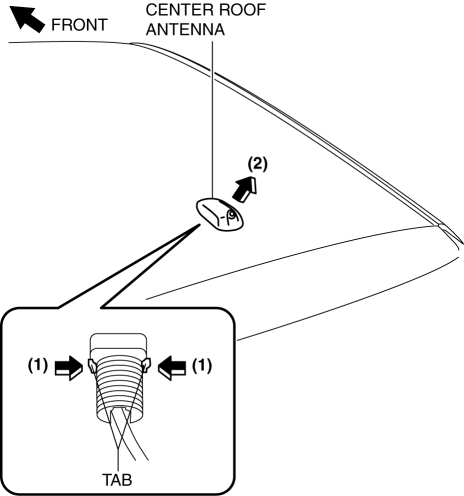
8. Remove the center roof antenna in the direction of the arrow (2) shown in the figure while pressing the center roof antenna tabs in the direction of the arrow (1).
9. Install in the reverse order of removal.
10. After installation, verify that the rubber of the center roof antenna is installed to the roof panel with no space between them.
5HB
1. Disconnect the negative battery cable..
2. Remove the rain sensor cover. (Vehicles with auto light/wiper system).
3. Disconnect the rain sensor connector. (Vehicles with auto light/wiper system)
4. Partially peel back the seaming welts.
5. Remove the following parts:
a. Sunroof seaming welt (vehicles with sunroof)
b. A-pillar trim.
c. Front scuff plate.
d. Rear scuff plate.
e. B-pillar lower trim.
f. Upper anchor of the front seat belt.
g. B-pillar upper trim.
h. Rear seat cushion.
i. Tire house trim.
j. Trunk side upper trim.
k. C-pillar trim.
l. Map light.
m. Sunvisor.
n. Assist handle.
o. Headliner.
6. Disconnect the connector.
AM/FM type
AM/FM/SIRIUS type
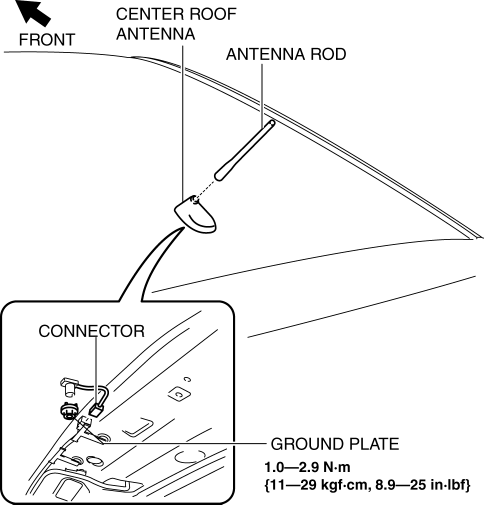
7. Remove the ground plate.
8. Remove the antenna rod.
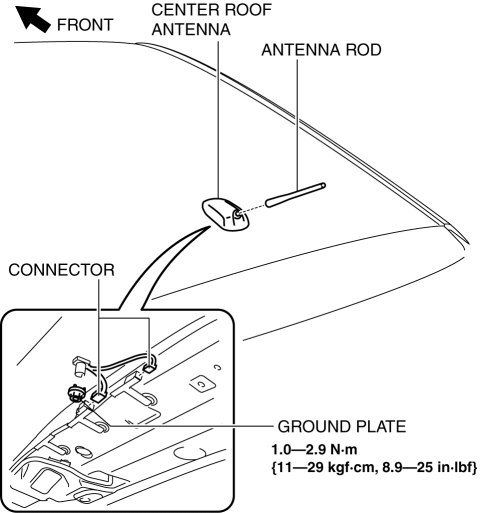
9. Remove the center roof antenna in the direction of the arrow (2) shown in the figure while pressing the center roof antenna tabs in the direction of the arrow (1).
AM/FM type
AM/FM/SIRIUS type
10. Install in the reverse order of removal.
11. After installation, verify that the rubber of the center roof antenna is installed to the roof panel with no space between them.
 Center Roof Antenna Inspection
4SD
1. Disconnect the negative battery cable..
2. Remove the rain sensor cover. (Vehicles with auto light/wiper system).
3. Disconnect the rain sensor connector. (Vehicles with auto light/wiper s ...
 Coil Antenna Removal/Installation
1. Disconnect the negative battery cable..
2. Remove the column cover..
3. Remove the key cylinder..
4. Disconnect the coil antenna connector.
5. Remove the screw.
6. Detach the coil ante ...
Other materials:
Audio Amplifier Removal/Installation
1. Slide the passenger seat rearward.
2. Remove the cover.
3. Remove the bolt.
4. Detach the clips and set the vehicle wiring harness aside.
5. Slide the passenger seat forward.
6. Disconnect the negative battery cable..
7. Remove the caps.
8. Remove the nuts.
9. Disconnect t ...
Headlight Aiming
CAUTION:
If the headlight aiming is adjusted with cargo in the vehicle, it may not
adjust correctly. Adjust the headlight aiming with the vehicle under the following
conditions:
No occupants inside vehicle
Cargo other than spare tire, jack, and tools not loaded
...
Bluetooth® Audio (Type A)
Applicable Bluetooth ® specification
(Recommended)
Ver. 2.0
Response profile
A2DP (Advanced Audio Distribution
Profile) Ver. 1.0/1.2
AVRCP (Audio/Video Remote Control
Profile) Ver. 1.0/1.3
A2DP is a profile which transmits only
audio to the Bluetooth ® unit. If your
Bluetooth ® ...
