Mazda 3 Service Manual: Console Removal/Installation
1. Disconnect the negative battery cable..
2. Remove the following parts:
a. Upper panel.
b. Shift knob (MTX).
c. Selector lever knob (ATX).
d. Shift panel.
e. Side wall.
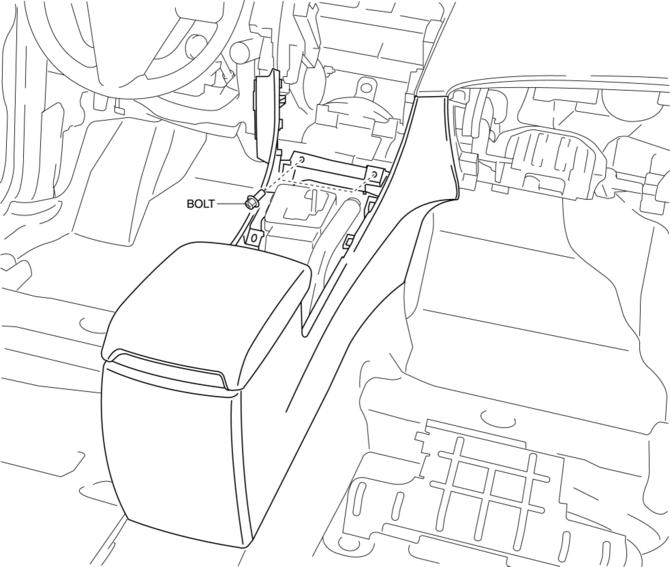
3. Remove the bolts.
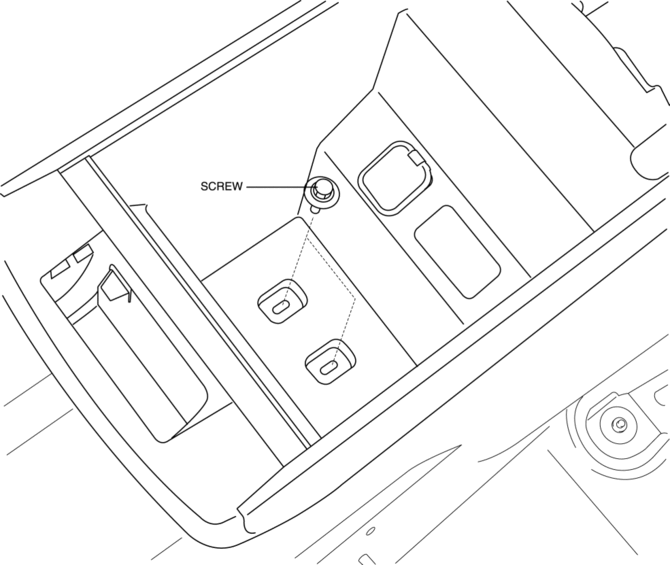
4. Remove the screws.
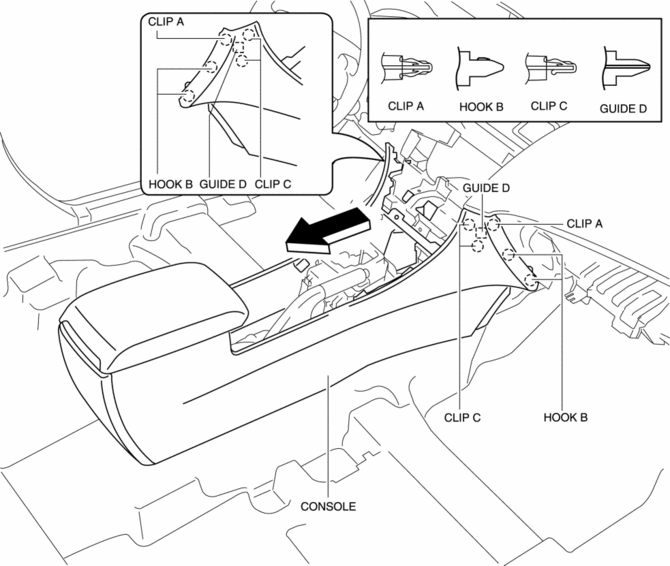
5. Pull the console in the direction of the arrow shown in the figure, then detaching clips A, C hooks B and guides D.
6. Disconnect the following connectors:
a. Rear accessory socket
b. Auxiliary jack (vehicles without USB port)
c. Auxiliary jack/USB port (vehicles with USB port)
d. Car-navigation unit (vehicles with audio unit)
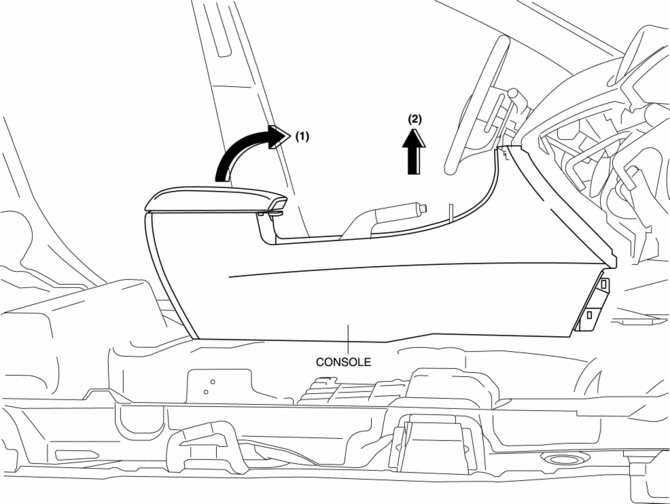
7. Pull up the console in the direction of the arrow (1) shown in the figure, move the rear console in the direction of the arrow (2), and remove it avoiding the parking brake lever.
8. Remove the following parts:
a. Rear accessory socket.
b. Auxiliary jack (vehicles without USB port).
c. Auxiliary jack/USB port (vehicles with USB port).
d. Car-navigation unit (vehicles with audio unit).
9. Install in the reverse order of removal.
 Assist Handle Removal/Installation
Assist Handle Removal
1. Insert a flathead screwdriver into the service hole and remove the assist
handle covers.
2. Remove the assist handle in the direction of the arrow (1) and (2), while ...
 Glove Compartment Light Bulb Removal/Installation
1. Disconnect the negative battery cable..
2. Remove the following parts:
a. Passenger-side front scuff plate.
b. Passenger-side front side trim.
c. Dashboard under cover.
d. Glove compartme ...
Other materials:
Electric Variable Valve Timing Actuator, Hydraulic Variable Valve Timing Actuator
Removal/Installation [Skyactiv G 2.0]
WARNING:
A hot engine can cause severe burns. Turn off the engine and wait until it
is cool before servicing.
CAUTION:
Do not disassemble the electric variable valve timing actuator and hydraulic
variable valve timing actuator because they are precision units.
If ...
Selecting wheel set
The Subaru Solterra is equipped with an advanced tire pressure warning system
that supports registration of two separate wheel sets. This feature allows you to
conveniently switch between different configurations, such as summer and winter
tires, without reprogramming the system each time.
Th ...
Clutch Pedal Position Switch Removal/Installation [C66 M R]
1. Remove the battery cover..
2. Disconnect the negative battery cable..
3. Disconnect the clutch pedal position switch connector.
4. Remove the clutch pedal position switch from the pedal bracket.
5. Insert a new clutch pedal position switch into the pedal bracket hole until
the switc ...
