Mazda 3 Service Manual: Front Beltline Molding Removal/Installation
1. Fully open the front door glass.
2. Disconnect the negative battery cable..
3. Remove the inner garnish..
4. Remove the front door trim..
5. Remove the power outer mirror..
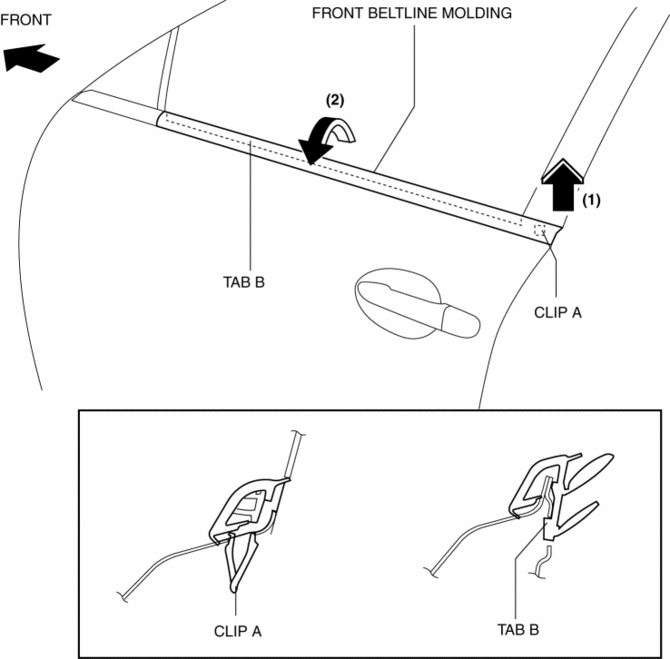
6. Remove clip A using a fastener remover and pull the front beltline molding in the direction of the arrow (1) shown in the figure.
7. Rotate the front beltline molding in the direction of the arrow (2) shown in the figure and remove it while detaching tab B.
8. Install in the reverse order of removal.
 Floor Under Cover Removal/Installation
1. Lift up the vehicle.
2. Remove the cap nuts.
3. Remove the nus.
4. Pull the floor under covers in the direction of arrow (1), (2), (3) shown
in the figure, and then remove it.
5. ...
 Front Bumper Disassembly/Assembly
Standard Type
Except SKYACTIV-G 2.0
1. Disassemble in the order indicated in the table.
1
Screw A
2
Guard cover
3
...
Other materials:
Joint Shaft Assembly [Mzr 2.3 Disi Turbo]
1. Assemble in the order indicated in the table.
1
Bracket
2
Dust seal (RH)
.
3
Bearing
.
4
Dust seal (LH)
.
5
Joint shaft
.
Dust Seal ...
Quarter Window Glass Removal
1. Remove the following parts:
a. Rear seat cushion.
b. Rear scuff plate.
c. Tire house trim.
d. Trunk side upper trim.
e. C-pillar trim.
2. Apply protective tape along the edge of the body and the quarter window glass.
NOTE:
For the areas of the sealant that are difficult ...
No.28 Fuel Filling Shut Off Concerns [Mzr 2.0, Mzr 2.5]
28
FUEL FILLING SHUT OFF CONCERNS
DESCRIPTION
Fuel does not shut off properly.
POSSIBLE CAUSE
PCM DTC is stored
Nonreturn valve malfunction
Fuel nozzle ...
