Mazda 3 Service Manual: Headliner Removal/Installation
1. Shift to the D (ATX) or 4th gear (MTX) position. (4SD)
2. Disconnect the negative battery cable..
3. Remove the rain sensor cover. (Vehicles with auto light/wiper system).
4. Disconnect the rain sensor connector. (Vehicles with auto light/wiper system)
5. Partially peel back the seaming welts.
6. Remove the following parts:
a. Sunroof seaming welt (vehicles with sunroof)
b. A-pillar trim.
c. Front scuff plate.
d. Rear scuff plate.
e. B-pillar lower trim.
f. Upper anchor of the front seat belt.
g. B-pillar upper trim.
h. Rear seat cushion.
i. Tire house trim.
j. Trunk side upper trim (5HB).
k. C-pillar trim.
l. Map light.
m. Sunvisor.
n. Assist handle.
7. Disconnect the microphone connecter. (Vehicles with headliner installation type)
8. Disconnect the roof wiring harness connector and remove the roof wiring harness connector clip from the body.
9. Disconnect the rear washer hose. (5HB)
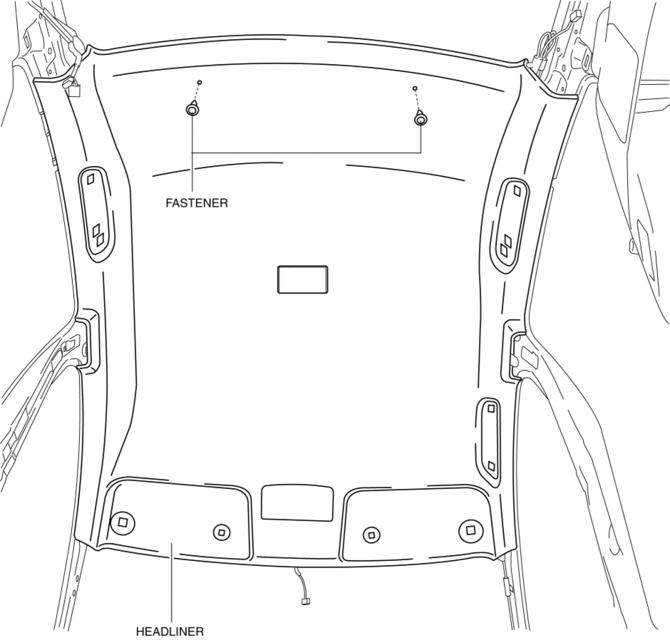
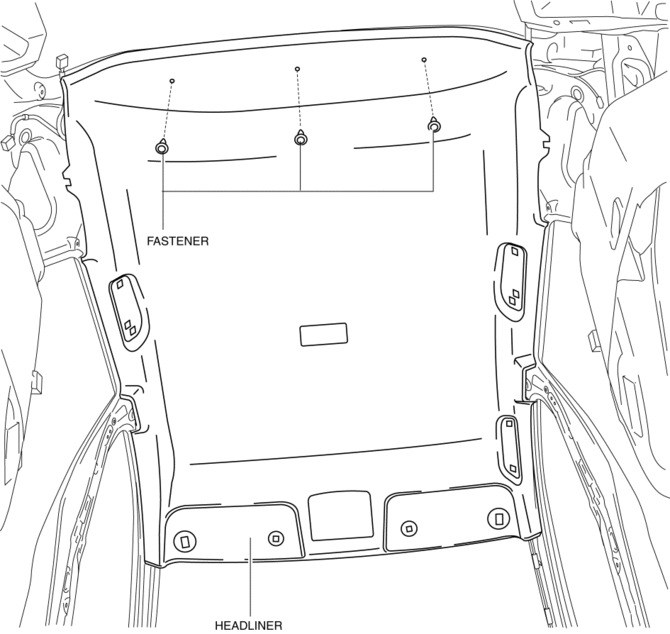
10. Remove the fasteners.
4SD

5HB

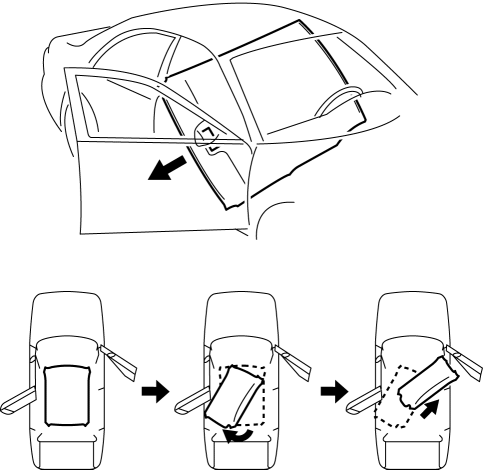
11. Take the headliner out from the opened front passenger-side door. (4SD)

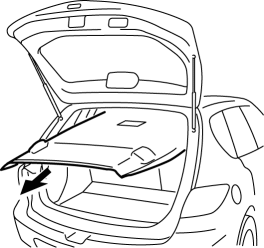
12. Take the headliner out from the opened liftgate. (5HB)

13. Install in the reverse order of removal.
 Front Side Trim Removal/Installation
1. Remove the front scuff plate..
2. Partially peel back the seaming welt.
3. Remove the fastener.
4. Pull the front side trim in the direction of the arrow and detach the clip.
5. Instal ...
 Hole Cover Removal/Installation
With Car-navigation system
1. Disconnect the negative battery cable..
2. Remove the following parts:
a. Upper column cover.
b. Instrument cluster.
c. Center panel.
d. Center cover.
e. Das ...
Other materials:
Abbreviations
ABS
Antilock Brake System
ABDC
After Bottom Dead Center
ACC
Accessories
ALC
Auto Level Control
ALR
Automatic Locking Retractor
AT
Automa ...
Split/One-piece Folding the
Seatback
By lowering the rear seatback(s) the
luggage compartment space can be
expanded.
WARNING
Do not drive the vehicle with occupants
on folded down seatback(s) or in the
luggage compartment.
Putting occupants in the luggage
compartment is dangerous because
seat belts cannot be ...
Fuse Panel Description
Fuse block (Engine compartment)
*1 With xenon fusion headlights
*2 With halogen headlights
Fuse block (Left side)
...
