
Mazda 3 Owners Manual: Jack
To remove the jack
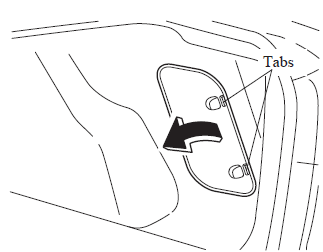
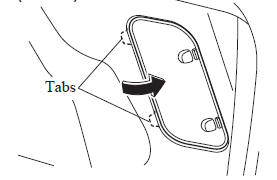
- (4–Door)
Push the tabs and remove the cover.
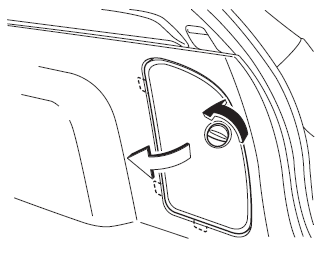
(5–Door)
Turn the knob and remove the cover.
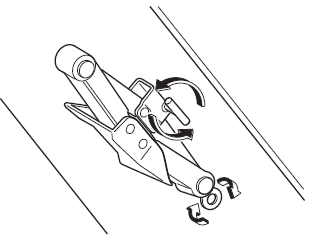
- Turn the wing bolt and jack screw counterclockwise.
To secure the jack
- Insert the wing bolt into the jack with the jack screw pointing to the down and turn the wing bolt clockwise to temporarily tighten it.
- Turn the jack screw in the direction shown in the figure.
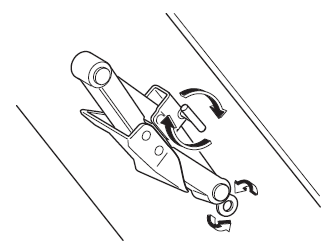
- Turn the wing bolt completely to secure the jack.
NOTE If the jack is not completely secured, it could rattle while driving. Make sure the jack screw is sufficiently tightened.
- Insert the cover tabs and install the cover.
(4-Door)
(5-Door)
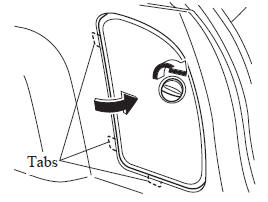
NOTE Verify that the cover is securely installed.
Maintenance
- Always keep the jack clean.
- Make sure the moving parts are kept free from dirt or rust.
- Make sure the screw thread is adequately lubricated.
 Spare Tire and Tool Storage
Spare tire and tools are stored in the locations illustrated in the diagram.
4-Door
5-Door
...
 Spare Tire
Your Mazda has a temporary spare tire.
The temporary spare tire is lighter and
smaller than a conventional tire, and is
designed only for emergency use and
should be used only for VERY short
pe ...
Other materials:
Applicable Bluetooth ® specification
(Recommended)
Ver. 1.1/1.2/2.0 EDR/2.1 EDR/3.0
(conformity)
Response profile
A2DP (Advanced Audio Distribution
Profile) Ver. 1.0/1.2
AVRCP (Audio/Video Remote Control
Profile) Ver. 1.0/1.3/1.4
A2DP is a profile which transmits only
audio to the Bluetooth ® unit. If your
Bluetooth ® audio device ...
If you think something is wrong
If you observe any unusual behavior while operating your Subaru Solterra,
it may indicate that the vehicle requires inspection, adjustment, or repair. Promptly
contacting an authorized SUBARU dealer is strongly recommended to ensure continued
safety and reliability.
Visible symptoms
Fluid ...
Locking and unlocking AC charging connector
When the AC charging connector is properly inserted into the charging
inlet of the Subaru Solterra, it is automatically secured in place to prevent accidental
disconnection during the charging process. This locking mechanism ensures a stable
and safe connection while charging is in progress.
...
