Mazda 3 Owners Manual: Spare Tire
Your Mazda has a temporary spare tire.
The temporary spare tire is lighter and smaller than a conventional tire, and is designed only for emergency use and should be used only for VERY short periods. Temporary spare tires should NEVER be used for long drives or extended periods.
| WARNING
Do not install the temporary spare tire
on the front wheels (driving wheels):
Driving with the temporary spare tire
on one of the front driving wheels is
dangerous. Handling will be aff ected. You could lose control of the vehicle, especially on ice or snow bound roads, and have an accident. Move a regular tire to the front wheel and install the temporary spare tire to the rear. |
CAUTION
|
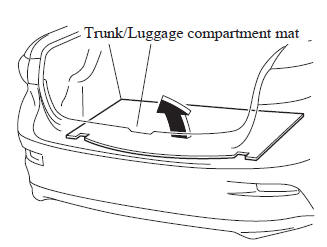
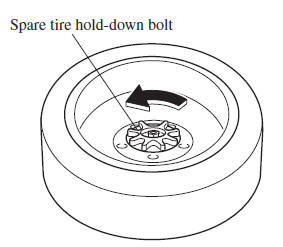
To remove the spare tire
- Lift the trunk/luggage compartment mat.
- Turn the spare tire hold-down bolt counterclockwise.
To secure the spare tire
Store the spare tire in the reverse order of removal. After storing, verify that the spare tire is stored securely
 Jack
Jack
To remove the jack
(4–Door)
Push the tabs and remove the cover.
(5–Door)
Turn the knob and remove the cover.
Turn the wing bolt and jack screw
counterclockwise.
To s ...
 Changing a Flat Tire
NOTE
If the following occurs while driving, it
could indicate a flat tire.
Steering becomes difficult.
The vehicle begins to vibrate
excessively.
The vehicle pulls in one direction.
If ...
Other materials:
Magnetic Clutch Disassembly/Assembly [Manual Air Conditioner]
1. Disassemble in the order indicated in the table.
SKYACTIV-G 2.0
1
Bolt
(See Bolt Removal/Installation Note.)
2
Pressure plate
3
Shim
(See Shim Installation Note.)
4
Snap ring
...
Front Center Speaker Inspection
1. Disconnect the negative battery cable..
2. Remove the following parts:
a. Upper column cover.
b. Instrument cluster.
c. Center panel.
d. Center cover.
e. Dashboard upper panel.
f. Front center speaker.
3. Verify the resistance between the front center speaker terminals.
...
Seat Belt Precautions
Seat belts help to decrease the possibility of severe injury during accidents
and sudden
stops. Mazda recommends that the driver and all passengers always wear seat
belts.
(U.S.A. and Canada)
All of the seat belt retractors are designed to keep the lap/shoulder belts
out of the way when
no ...
