Mazda 3 Owners Manual: Changing a Flat Tire
NOTE If the following occurs while driving, it could indicate a flat tire.
- Steering becomes difficult.
- The vehicle begins to vibrate excessively.
- The vehicle pulls in one direction.
If you have a flat tire, drive slowly to a level spot that is well off the road and out of the way of traffic to change the tire.
Stopping in traffic or on the shoulder of a busy road is dangerous.
| WARNING
Be sure to follow the directions for
changing a tire:
Changing a tire is dangerous if not
done properly. The vehicle can slip off
the jack and seriously injure someone. No person should place any portion of their body under a vehicle that is supported by a jack. Never allow anyone inside a vehicle supported by a jack: Allowing someone to remain in a vehicle supported by a jack is dangerous. The occupant could cause the vehicle to fall resulting in serious injury. |
NOTE Make sure the jack is well lubricated before using it.
- Park on a level surface off the right-ofway and firmly set the parking brake.
- Put a vehicle with an automatic transaxle in Park (P), a manual transaxle in Reverse (R) or 1, and turn off the engine.
- Turn on the hazard warning flasher.
- Have everyone get out of the vehicle and away from the vehicle and traffic.
- Remove the jack, tool, and spare tire .
- Block the wheel diagonally opposite the flat tire. When blocking a wheel, place a tire block both in front and behind the tire.
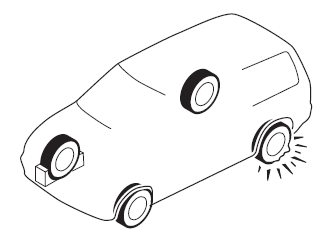
NOTE When blocking a tire, use rocks or wood blocks of sufficient size if possible to hold the tire in place.
 Spare Tire
Your Mazda has a temporary spare tire.
The temporary spare tire is lighter and
smaller than a conventional tire, and is
designed only for emergency use and
should be used only for VERY short
pe ...
 Removing a Flat Tire
If your vehicle is equipped with a
wheel cover, pry off the wheel cover
with the beveled end of the jack lever.
NOTE
Force the end of the jack lever firmly
between wheel and cover, or ...
Other materials:
Back door
In the Subaru Solterra, the back door can be conveniently locked,
unlocked, opened, and closed using several intuitive methods, ensuring both ease
of use and a high level of safety during everyday operation.
WARNING
Carefully follow all safety precautions when operating the Subaru Solterra
b ...
Neutral Switch Removal/Installation [C66 M R]
1. Remove the battery cover..
2. Disconnect the negative battery cable..
3. Remove the aerodynamic under cover No.2..
4. Install in the reverse order of removal.
5. Remove in the order indicated in the table.
6. Install in the reverse order of removal.
1
Neutr ...
Manual Shift Mode
The manual shift mode gives you the feel
of driving a manual transaxle vehicle by
allowing you to operate the selector lever
manually. This allows you to control
engine rpm and torque to the drive wheels
much like a manual transaxle when more
control is desired.
To change to manual shift mo ...
