
Mazda 3 Owners Manual: Laser Sensor (Front)
The Smart City Brake Support (SCBS) laser sensor is installed at the top of the windshield near the rearview mirror.
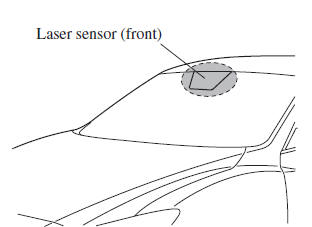
Always keep the surface of the windshield around the laser sensor clean to assure proper operation of the Smart City Brake Support (SCBS) system.
WARNING
As there is the possibility of eye damage occurring from the laser,
always heed the
following precautions:
|
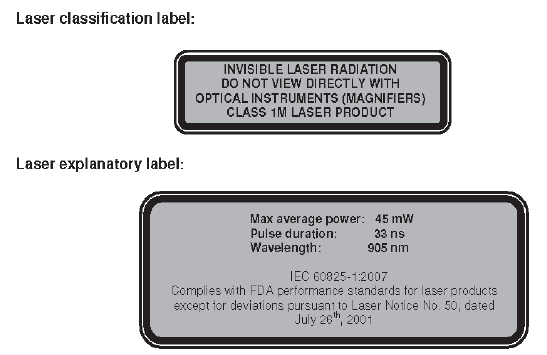
Laser sensor radiation data
Maximum average power: 45 mW
Pulse duration: 33 ns
Wavelength: 905 nm
Divergence angle (horizontal×vertical): 28 degrees×12 degrees
 Radar Sensor (Front)
Your vehicle is equipped with a radar sensor (front).
The following systems also use the radar sensor (front).
Mazda Radar Cruise Control (MRCC)
Forward Obstruction Warning (FOW)
The radar ...
 Radar Sensors (Rear)
The radar sensors (rear) for the rear vehicle monitoring system are equipped
inside the rear
bumper, one each on the left and right sides.
Sedan
Hatchback
The surface area of the rear bu ...
Other materials:
ABS HU/CM Inspection
1. Disconnect the ABS HU/CM connector..
2. Connect the negative battery cable..
3. Attach the tester lead to the ABS HU/CM wiring harness-side connector and
inspect the voltage, continuity, or resistance according to the standard (reference
value) in the table below.
Standard (reference)
...
Oil Seal (Differential) Replacement [Fw6 A EL]
1. Remove the aerodynamic under cover No.2 and the splash shield as a single
unit..
2. Remove the oil seal.
a. Drain the ATF..
b. Disconnect the drive shaft (LH) from the transaxle..
c. Disconnect the drive shaft (RH) from the joint shaft..
d. Remove the joint shaft..
CAUTION:
...
Rear Stabilizer Control Link Inspection
1. Remove the rear stabilizer control link from the vehicle..
2. Inspect for bending or damage. If there is any malfunction, replace the rear
stabilizer control link.
3. Rotate the ball joint stud 10 times and shake it side to side 10
times.
4. Measure the ball joint rotational torque usin ...
