Mazda 3 Owners Manual: Radar Sensors (Rear)
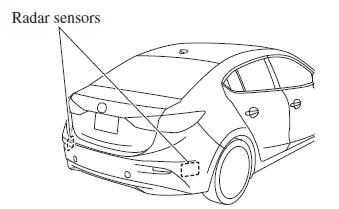
The radar sensors (rear) for the rear vehicle monitoring system are equipped inside the rear bumper, one each on the left and right sides.
Sedan
Hatchback
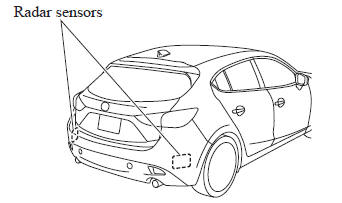
The surface area of the rear bumper near the radar sensors (rear) should always be clean so that the rear vehicle monitoring system operates correctly. Do not apply stickers or similar objects to the rear bumper.
Refer to Exterior Care on .
NOTE Consult an Authorized Mazda Dealer for radar sensors (rear) repairs and replacement, or repair, replacement or painting of the rear bumper near a radar sensors (rear).
 Laser Sensor (Front)
The Smart City Brake Support (SCBS) laser sensor is installed at the top of
the windshield
near the rearview mirror.
Always keep the surface of the windshield around the laser sensor clean to ...
 Cruise Control
With cruise control, you can set and automatically maintain any speed of more
than about
25 km/h (16 mph).
WARNING
Do not use the cruise control under the following conditions:
Using ...
Other materials:
Headliner Removal/Installation
1. Shift to the D (ATX) or 4th gear (MTX) position. (4SD)
2. Disconnect the negative battery cable..
3. Remove the rain sensor cover. (Vehicles with auto light/wiper system).
4. Disconnect the rain sensor connector. (Vehicles with auto light/wiper system)
5. Partially peel back the seaming ...
Entertainment System
Outline
Auxiliary jack/USB port has been adopted.
USB adapter has been adopted.
An audio unit which supports USB devices such as USB memory or iPods has
been adopted.
911 assist function has been added to the Bluetooth unit.
RDS-TMC (Radio Data System-Traffi ...
Compression Inspection [Mzr 2.0, Mzr 2.5]
WARNING:
Hot engines and oil can cause severe burns. Be careful not to burn yourself
during removal/installation of each component.
Fuel vapor is hazardous. It can very easily ignite, causing serious injury
and damage. Always keep sparks and flames away from fuel.
Fuel ...
