Mazda 3 Service Manual: Rear Door Trim Removal/Installation
1. Disconnect the negative battery cable..
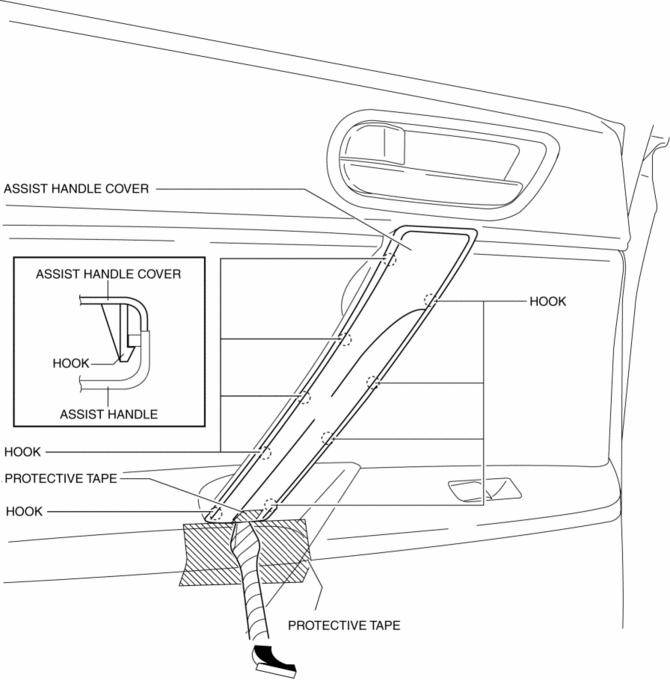
2. Move the hook in the direction of arrow shown in the figure using a tape-lapped flathead screwdriver and detach it from the rear door trim.
CAUTION:
-
Affix protective tape to the rear door trim and assist handle cover to prevent damage.
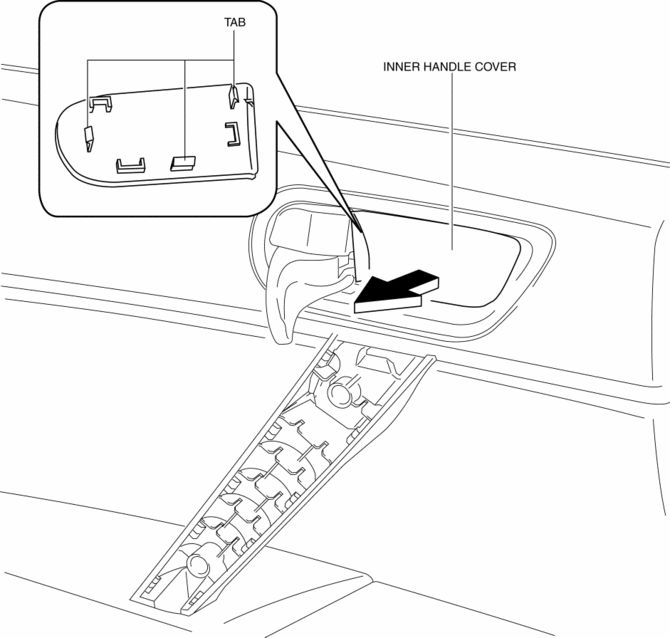
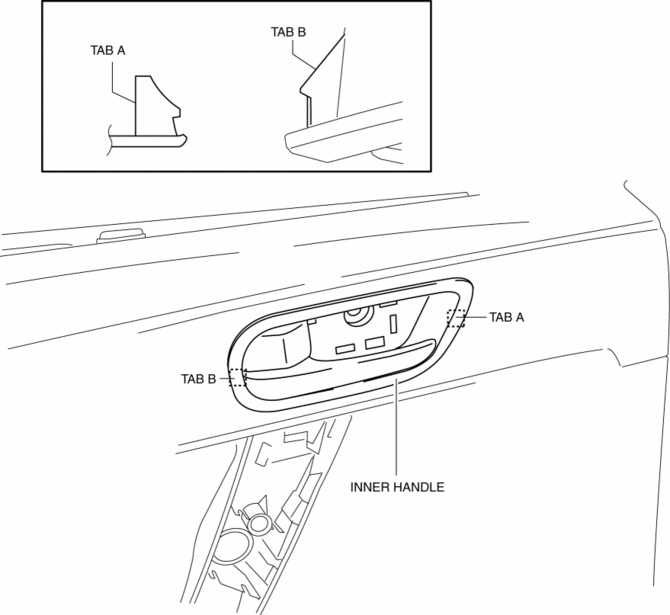
3. Pull the cover of inner handle and remove it while detaching tabs.
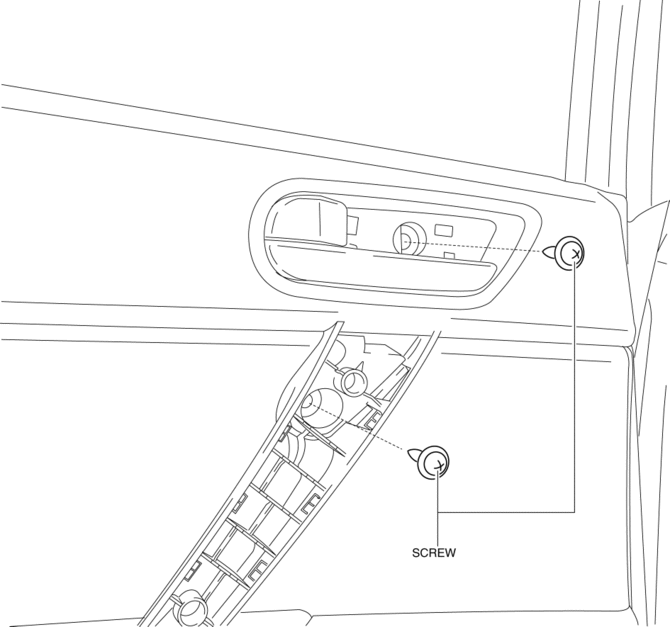
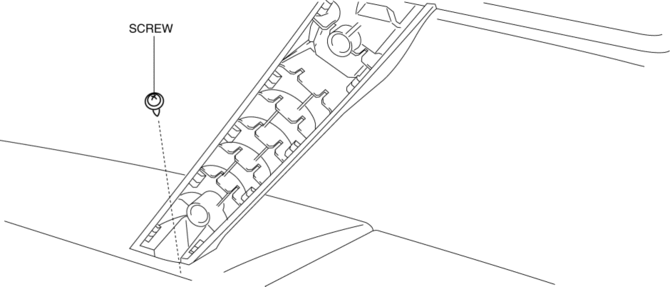
4. Remove the screws.
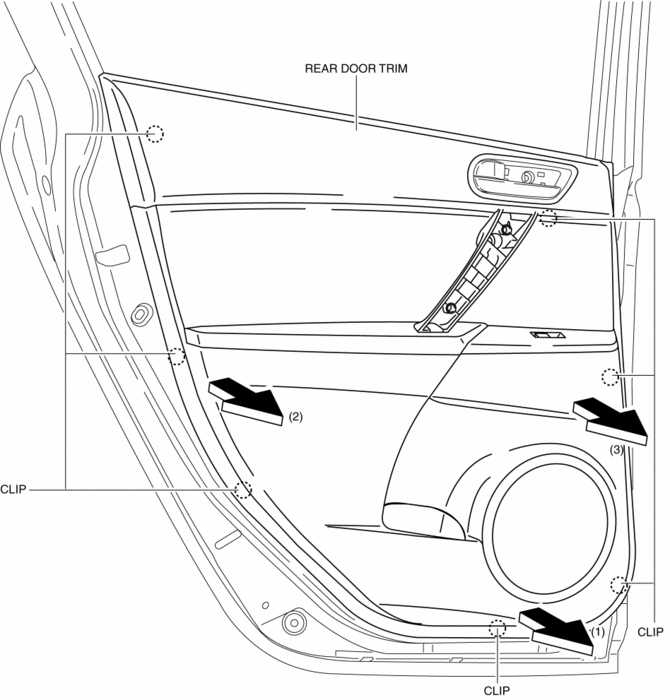
5. Pull in the direction of the arrow (1), (2), (3) shown in the figure and remove clips from the door inner panel using a fastener remover.
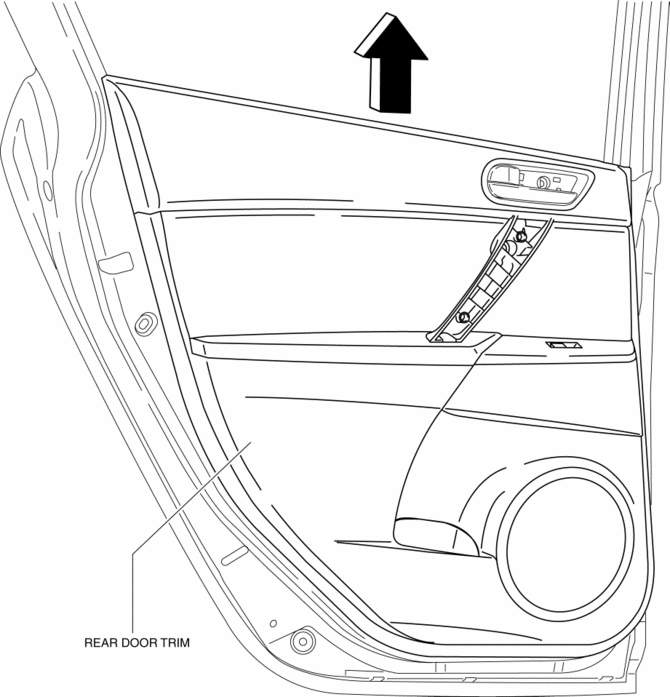
6. Remove the rear door trim in the direction of the arrow shown in the figure.
7. Remove the inner handle and move the rear door trim in the direction of the arrow shown in the figure.
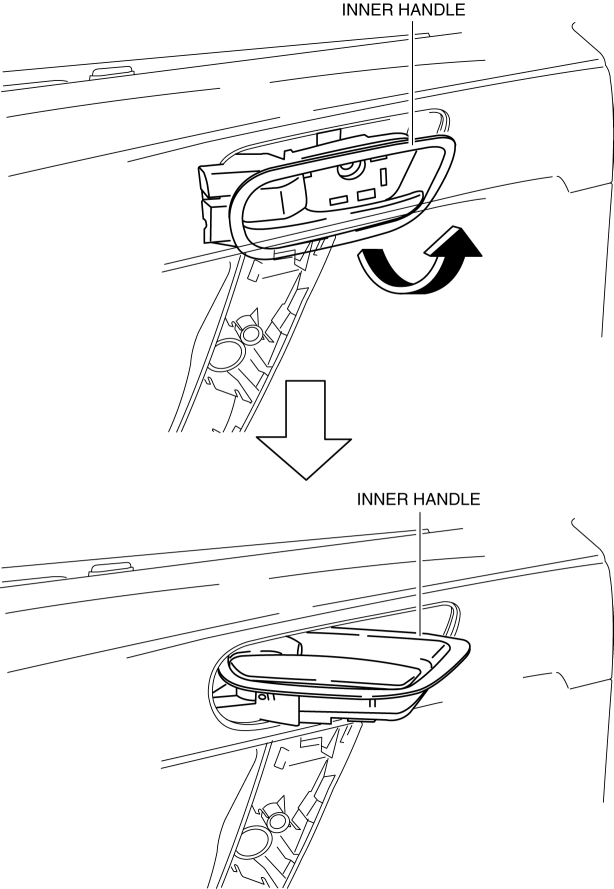
8. Turn the inner handle 90° in the direction of the arrow and remove it from the rear door trim.
9. Disconnect the power window subswitch connector.
10. Install in the reverse order of removal.
 Rear Door Trim Disassembly/Assembly
1. Disassemble in the order shown in the figure.
1
Screw
2
Assist handle
3
Switch panel cover
4
...
 Trunk Lid Trim Removal/Installation
1. Remove the fasteners, then remove the trunk lid trim.
2. Install in the reverse order of removal. ...
Other materials:
Daytime Running Lights
Some countries require moving vehicles
to have their lights on (daytime running
lights) during the daytime.
Daytime running lights turn on
automatically when the ignition is
switched ON.
They turn off when the parking brake is
operated or the shift lever is shifted to the
P position (aut ...
TCM Inspection [FS5 A EL]
NOTE:
The TCM terminal voltage can vary with conditions when measuring and changes
due to age deterioration on the vehicle, causing false diagnosis. Therefore
a comprehensive inspection of the input and output systems, and the TCM is necessary
to determine where the malfunction occu ...
Antenna Feeder No.2 Removal/Installation
1. Disconnect the negative battery cable..
2. Remove the rain sensor cover. (Vehicles with auto light/wiper system).
3. Disconnect the rain sensor connector. (Vehicles with auto light/wiper system)
4. Partially peel back the seaming welts.
5. Remove the following parts:
a. Sunroof seaming ...
