Mazda 3 Service Manual: Rear Outer Handle Removal/Installation
1. Fully close the rear door glass.
2. Disconnect the negative battery cable..
3. Remove the rear door trim..
4. Remove the service hole cover.
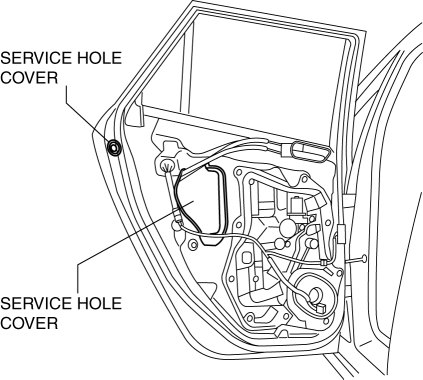
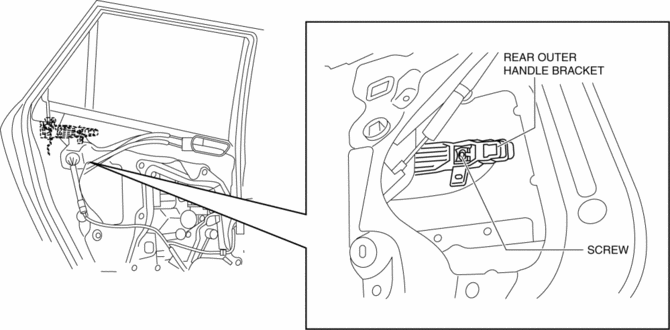
5. Remove the screw from the service hole.
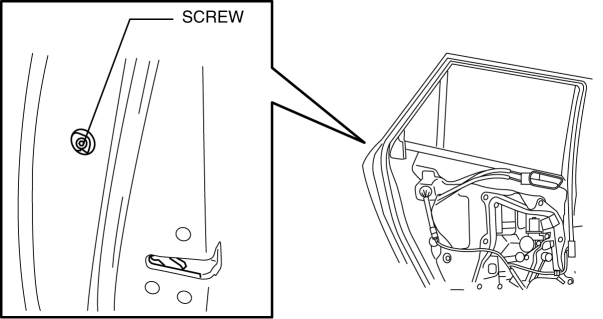
NOTE:
-
The screw cannot be removed because of the stopper.
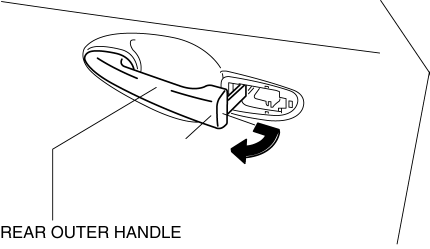
6. Press the tab on the rear outer handle bracket in the direction of the arrow.
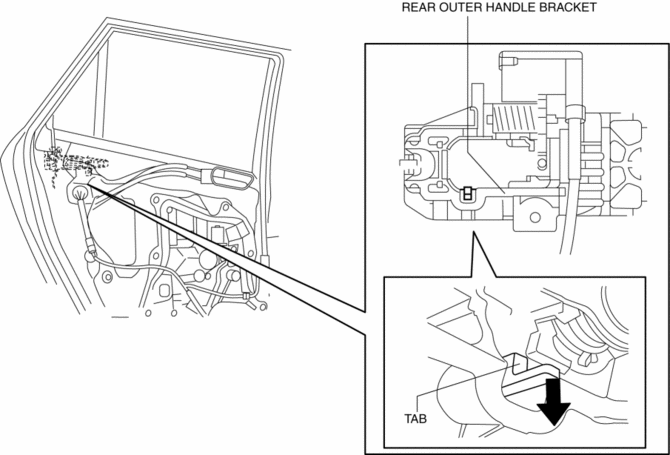
7. Maintaining the condition in procedure 6, remove the outer handle garnish.
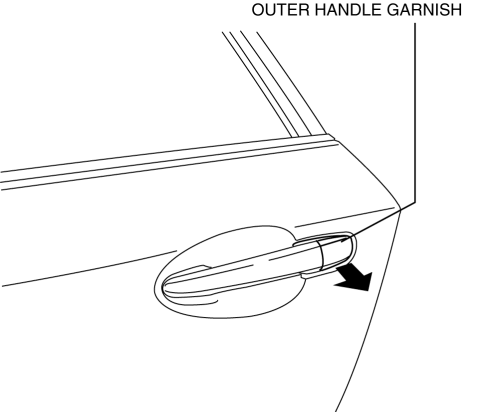
8. Remove the rear outer handle.
9. Loosen the screw.
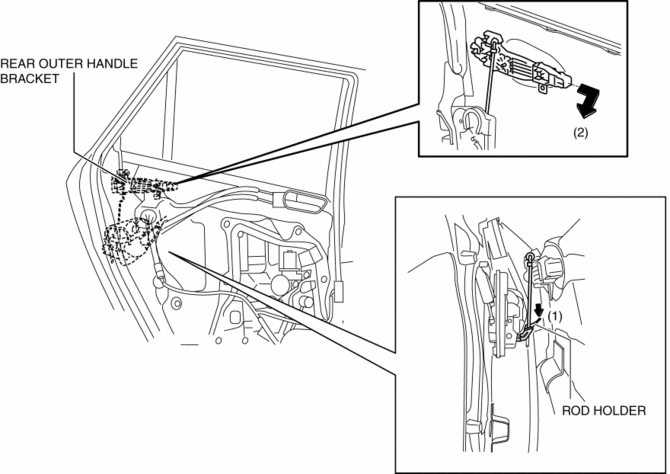
10. Press down the rod holder in the direction of arrow (1) and remove the rear outer handle bracket in the direction of arrow (2).
11. Install in the reverse order of removal.
 Rear Door Removal/Installation
WARNING:
Removing the rear door without supporting it could cause the rear door to
fall and cause serious injury. Always perform the procedure with at least another
person to prevent the ...
 Stay Damper Disposal
NOTE:
The stay damper contains colorless, odorless, nontoxic gas.
1. Wear protective eye wear.
2. Position the stay damper horizontally.
3. Drain gas and oil by cutting the posit ...
Other materials:
Rear Center Speaker Inspection
1. Disconnect the negative battery cable..
2. Remove the following parts:
a. Rear seat cushion.
b. Rear scuff plate.
c. Tire house trim.
d. C-pillar trim.
e. Rear package trim.
f. Rear center speaker.
3. Verify the resistance between the rear center speaker terminals.
If ...
Lighting Control
Headlights
Turn the headlight switch to turn the headlights, other exterior lights and
dashboard
illumination on or off.
When the lights are turned on, the lights-on indicator light in the instrument
cluster turns on.
NOTE
If the light switch is left on, the lights will automatical ...
Applicable Bluetooth ® specification
(Recommended)
Ver. 1.1/1.2/2.0 EDR/2.1 EDR/3.0
(conformity)
Response profile
A2DP (Advanced Audio Distribution
Profile) Ver. 1.0/1.2
AVRCP (Audio/Video Remote Control
Profile) Ver. 1.0/1.3/1.4
A2DP is a profile which transmits only
audio to the Bluetooth ® unit. If your
Bluetooth ® audio device c ...
