
Mazda 3 Service Manual: Stay Damper Disposal
NOTE:
-
The stay damper contains colorless, odorless, nontoxic gas.
1. Wear protective eye wear.
2. Position the stay damper horizontally.
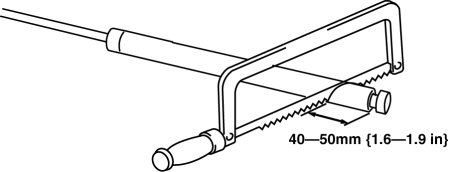
3. Drain gas and oil by cutting the position indicated in the figure to a 2—3 mm {0.08—0.11 in}
depth using a metal saw.
CAUTION:
-
When cutting the stay damper, wear protective eye wear to prevent the gas or oil from getting into your eyes. Otherwise, the force of the gas and oil spraying out could lead to injury.
4. Verify that the gas and oil is drained completely by pulling and pushing the piston rod several times with the cut position facing downward.
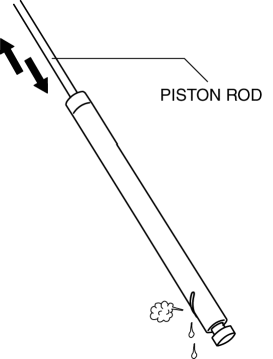
5. Cut off the bottom of the stay damper.
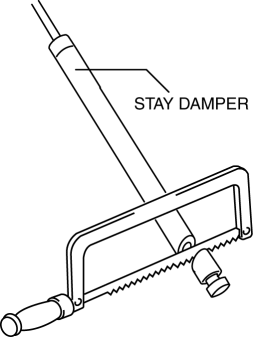
6. Dispose of the stay damper.
 Rear Outer Handle Removal/Installation
1. Fully close the rear door glass.
2. Disconnect the negative battery cable..
3. Remove the rear door trim..
4. Remove the service hole cover.
5. Remove the screw from the service hole.
...
 Trunk Board Removal/Installation
1. Remove the trunk mat in the direction of arrow shown in the figure.
2. Remove the trunk board in the direction of arrow shown in the figure.
3. Install in the reverse order of removal. ...
Other materials:
Transmitter
NOTE
(With theft-deterrent system)
The hazard warning lights flash when
the theft-deterrent system is armed or
turned off.
Refer to Theft-Deterrent System on .
(With the advanced keyless function)
A beep sound can be heard for
confirmation when the doors and the
l ...
Rear Heat Duct Removal/Installation
1. Disconnect the negative battery cable..
2. Remove the following parts:
a. Upper panel.
b. Shift lever knob (MTX).
c. Selector lever knob (ATX).
d. Shift panel.
e. Side wall.
f. Console.
g. Front scuff plate.
h. Front side trim.
i. Fuel-filler lid opener lever cover.
3. Turn ...
Windshield wipers and washer
The Subaru Solterra windshield wiper system offers both automatic
rain-sensing operation and manual control, allowing precise adjustment for various
weather conditions. The washer system can also be activated for effective cleaning
of the windshield.
NOTICE
■ When the windshield is dry
Do ...
