Mazda 3 Owners Manual: Rearview Mirror
| WARNING Do not stack cargo or objects higher than the seatbacks: Cargo stacked higher than the seatbacks is dangerous. It can block your view in the rearview mirror, which might cause you to hit another car when changing lanes. |
Rearview mirror adjustment
Before driving, adjust the rearview mirror to center on the scene through the rear window.
NOTE For the manual day/night mirror, perform the adjustment with the day/night lever in the day position.
Reducing glare from headlights
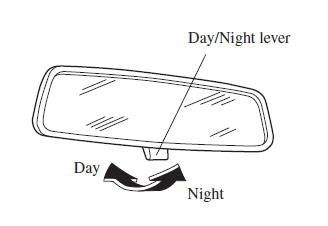
Manual day/night mirror
Push the day/night lever forward for day driving. Pull it back to reduce glare of headlights from vehicles at the rear.
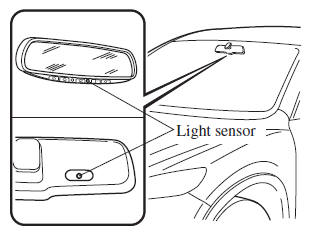
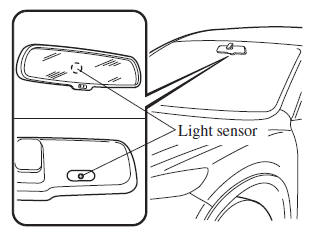
Auto-dimming mirror
The auto-dimming mirror automatically reduces glare of headlights from vehicles at the rear when the ignition is switched ON.
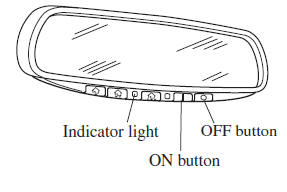
(With Homelink wireless control system)
Press the OFF button to cancel the automatic dimming function. The indicator light will turn off.
To reactivate the automatic dimming function, press the ON button . The indicator light will illuminate.
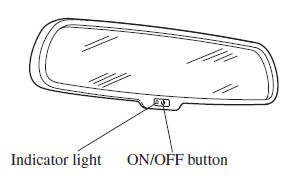
(Without Homelink wireless control system)
Press the ON/OFF button to cancel the automatic dimming function. The indicator light will turn off.
To reactivate the automatic dimming function, press the ON/OFF button . The indicator light will illuminate.
NOTE
- Do not use glass cleaner or suspend
objects on or around the light sensor.
Otherwise, light sensor sensitivity will be affected and may not operate normally.
(With Homelink wireless control system)
(Without Homelink wireless control system)
- (With Homelink wireless control
system)
For information regarding the 3 buttons
(
 ,
,
 ,
,
 ) on the auto-dimming
mirror.Refer to HomeLink Wireless Control System on .
- The auto-dimmer function is canceled when the ignition is switched ON and the shift lever is in reverse (R).
 Outside Mirrors
WARNING
Be sure to look over your shoulder
before changing lanes:
Changing lanes without taking
into account the actual distance of
the vehicle in the convex mirror is
dangero ...
 Windows
...
Other materials:
Receiving an Incoming Call
When an incoming call is received, the incoming call notification screen is
displayed. The
“Incoming Call Notifications” setting must be on.
Refer to Communication Settings on .
To accept the call, press the pick-up button on the audio control switch or
select on
the screen.
To r ...
Fuel Tank Inspection [Mzr 2.0, Mzr 2.5]
WARNING:
Fuel is very flammable liquid. If fuel spills or leaks from the pressurized
fuel system, it will cause serious injury or death and facility breakage. Fuel
can also irritate skin and eyes. To prevent this, always complete the “Fuel
Line Safety Procedure”, while referring ...
Steering Wheel And Column Removal/Installation [Without Advanced Keyless Entry
And Push Button Start System]
WARNING:
Handling the air bag module improperly can accidentally operate (deploy)
the air bag module, which may seriously injure you. Read the service warnings
before handling the air bag module..
1. Remove the driver-side front scuff plate..
2. Remove the driver-side front sid ...
