Mazda 3 Owners Manual: Engine Coolant
Inspecting Coolant Level
| WARNING
Do not use a match or live fl ame in the
engine compartment. DO NOT ADD
COOLANT WHEN THE ENGINE IS HOT:
A hot engine is dangerous. If the
engine has been running, parts of the
engine compartment can become very
hot. You could be burned. Carefully
inspect the engine coolant in the
coolant reservoir, but do not open it.
|
 Switch the ignition to
 Do not remove either
NOTE Changing the coolant should be done by an Authorized Mazda Dealer.
Inspect the antifreeze protection and coolant level in the coolant reservoir at least once a year—at the beginning of the winter season—and before traveling where temperatures may drop below freezing.
Inspect the condition and connections of all cooling system and heater hoses.
Replace any that are swollen or deteriorated.
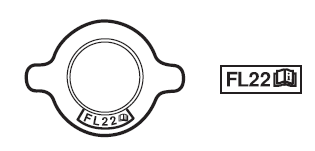
The coolant should be at full in the radiator and between the F and L marks on the coolant reservoir when the engine is cool.
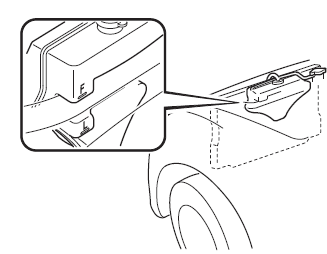
If it is at or near L, add enough coolant to the coolant reservoir to provide freezing and corrosion protection and to bring the level to F.
Securely tighten the coolant reservoir tank cap after adding coolant.
CAUTION
|
If the coolant reservoir is empty or new coolant is required frequently, consult an Authorized Mazda Dealer.
 Inspecting Engine Oil Level
Be sure the vehicle is on a level
surface.
Warm up the engine to normal
operating temperature.
Turn it off and wait at least 5 minutes
for the oil to return to the oil pan.
Pull out the ...
 Brake/Clutch Fluid
Inspecting Brake/Clutch Fluid Level
WARNING
If the brake/clutch fl uid level is low, have
the brakes inspected:
A low brake/clutch fl uid level is
dangerous.
A low level could i ...
Other materials:
DRL (Daytime Running Light) Bulb Removal/Installation
MZR 2.0, MZR 2.5, MZR 2.3 DISI Turbo
1. Disconnect the negative battery cable..
2. Disconnect the connector.
3. Rotate the DRL bulb in the direction of the arrow shown in the figure to remove
it.
4. Remove the DRL bulb.
5. Install in the reverse order of removal.
SKYACTIV-G 2.0
...
Rear Window Glass Installation
WARNING:
Using a utility knife with bare hands can cause injury. Always wear gloves
when using a utility knife.
CAUTION:
Proper installation of the glass may be difficult if sealant is cracked or
the glass is pushed out by air pressure when a door is opened/closed with al ...
Precaution
Intermittent Concern Troubleshooting
Vibration method
If malfunction occurs or becomes worse while driving on a rough road or when
the engine is vibrating, perform the steps below.
NOTE:
There are several reasons why vehicle or engine vibration could cause an
electrical m ...
