Mazda 3 Service Manual: Side Panel Removal/Installation
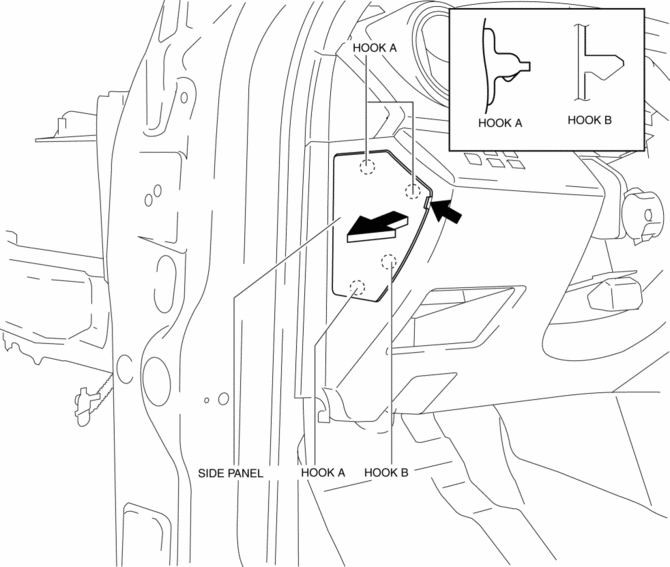
1. Insert a tape-wrapped fastener remover into the position indicated by the arrow in the figure.
2. Pull the side panel in the direction of the arrow shown in the figure, then remove the clips and hook.

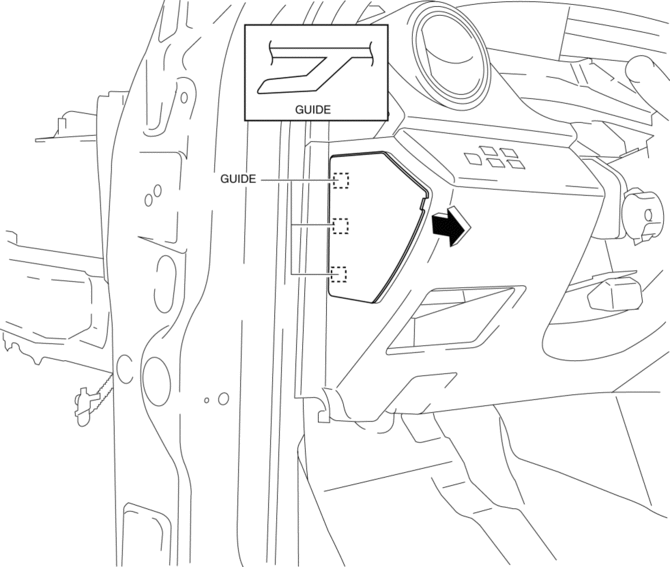
3. Pull the side panel in the direction of the arrow shown in the figure, while detaching the guides.

CAUTION:
-
When pulling out the side panel, be careful not to damage the guide.
4. Install in the reverse order of removal.
 Seal Plate Removal/Installation
1. Disconnect the negative battery cable..
2. Remove the front bumper..
3. Remove the bolt.
4. Pull the seal plate in the direction of arrow shown in the figure, then remove
the hook.
...
 Side Step Molding Installation
NOTE:
Double-sided adhesive tape has already been adhered to a new side step molding
for installation.
When a side step molding is to be reused, perform the following procedure:
1 ...
Other materials:
Operating Tips for CD Player
Condensation phenomenon
Immediately after turning on the heater
when the vehicle is cold, the CD or
optical components (prism and lens) in
the CD player may become clouded with
condensation. At this time, the CD will
eject immediately when placed in the unit.
A clouded CD can be corrected s ...
Antilock Brake System (ABS)
The ABS control unit continuously
monitors the speed of each wheel. If
one wheel is about to lock up, the ABS
responds by automatically releasing and
reapplying that wheel's brake.
The driver will feel a slight vibration in
the brake pedal and may hear a chattering
noise from the brake syst ...
Rear Washer Hose Removal/Installation
1. Disconnect the negative battery cable..
2. Remove the front mudguard (RH)..
3. Disconnect rear washer hose A from the washer motor.
4. Remove the rear washer hose A from clip A, B, C, D, E, F, G.
5. Disconnect joint pipes and remove rear washer hose A.
6. Partially peel back the sea ...
