Mazda 3 Service Manual: Side Step Molding Installation
NOTE:
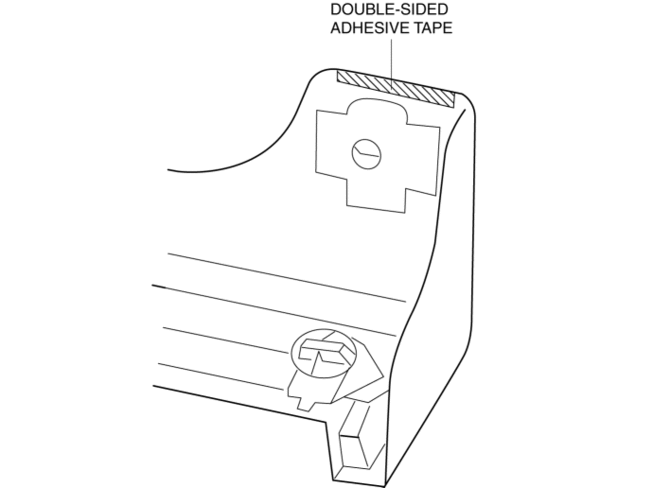
-
Double-sided adhesive tape has already been adhered to a new side step molding for installation.
-
When a side step molding is to be reused, perform the following procedure:
1. Remove any grease or dirt from the affixing surface of the side step molding.
2. Affix double-sided adhesive tape to the position shown in the figure.
1. Install the clips B, C and D to the side step molding.
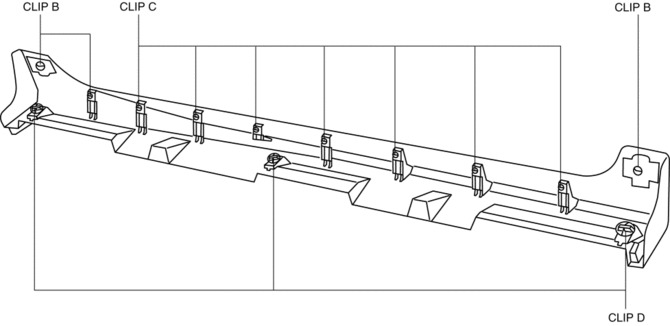
2. Install the side step molding while pushing the clips B, C, and D installation area shown in the figure.
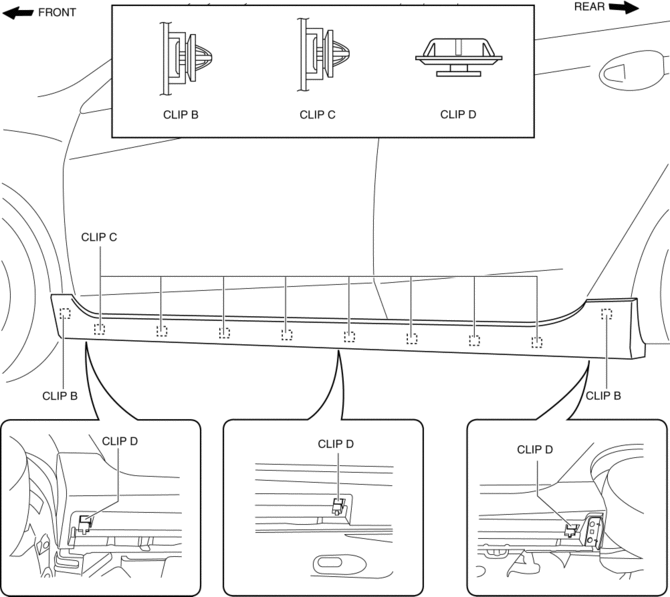
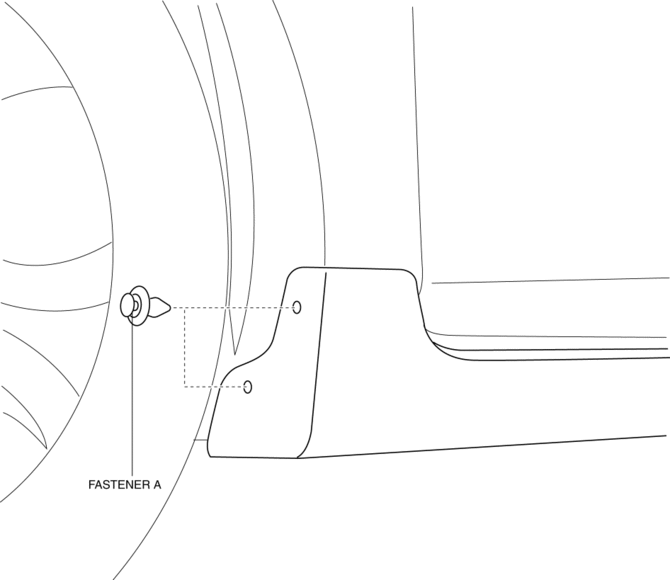
3. Install the fasteners A.
 Side Panel Removal/Installation
1. Insert a tape-wrapped fastener remover into the position indicated by the
arrow in the figure.
2. Pull the side panel in the direction of the arrow shown in the figure, then
remove the clips ...
 Side Step Molding Removal
1. Remove the fasteners A.
2. Using the removal tool, disengage clips B in the direction of the arrow (1),
(2) shown in the figure.
NOTE:
Leave the disengaged clip B in place in ...
Other materials:
Radar Sensors (Rear)
The radar sensors (rear) for the rear vehicle monitoring system are equipped
inside the rear
bumper, one each on the left and right sides.
Sedan
Hatchback
The surface area of the rear bumper near the radar sensors (rear) should
always be clean so
that the rear vehicle monitoring sys ...
No.6 Bsm Indicator Light Flashes While Not Under Bsm Indicator Light Flashing
Conditions (No Combination Switch Operation (Turn Signal Switch)) [Blind Spot Monitoring
(Bsm)]
6
BSM indicator light flashes while not under BSM indicator light-flashing
conditions (no combination switch operation (turn signal switch)
Description
The BSM indicator light flashes despite not satisfying the BSM indicator
l ...
Sirius Satellite Radio Antenna Feeder Removal/Installation
SIRIUS Satellite Radio Antenna Feeder No.1
NOTE:
SIRIUS satellite radio antenna feeder No.1 is integrated with the dashboard
wiring harness.
1. Refer to DASHBOARD DISASSEMBLY/ASSEMBLY.
SIRIUS Satellite Radio Antenna Feeder No.2
NOTE:
SIRIUS satellite radio antenna feeder ...
